WMS APP operation guide
1.Inbound
1.1 Receive
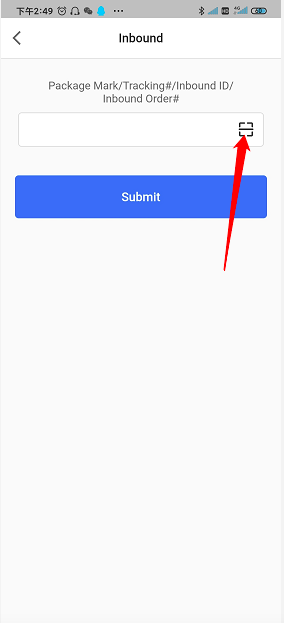
You can receive inbound orders on ShipOut mobile APP by scanning the package mark, tracking#, inbound order ID and order#. Both barcodes and QR codes are available for scanning. You can choose to receive either this package alone or the entire order depending on your needs.
Steps: Log in to Shipout App> Inbound> Scan relevant barcodes> Receive Scanned Package Only/ Receive Entire Inbound order> Completed> If necessary, you can edit the number of boxes, the number of defective products/standard products, the rent-free period and other information> Completed> Edit pallets Quantity> Confirm
Tap the scan icon to enter the scan code interface, scan the relevant bar code information
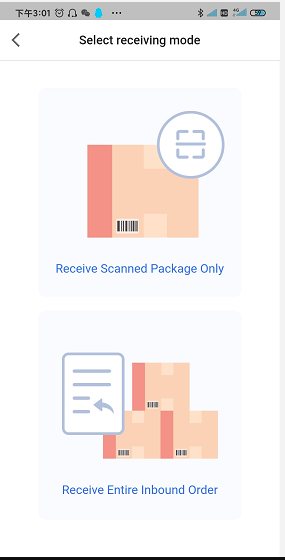
Choose to receive scanned package only or the entire order.
After scanning, it will direct you to the order interface, tap ‘Completed’ to enter the next step.
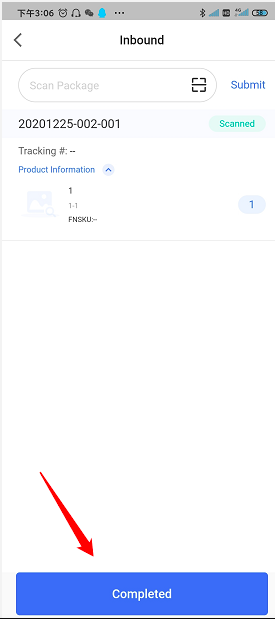
Once it directs you to the order editing page, you can modify the number of packages, defective products, the rent-free period, and the dimension&weight of the package. Tap ‘Completed’ after confirming all the information.
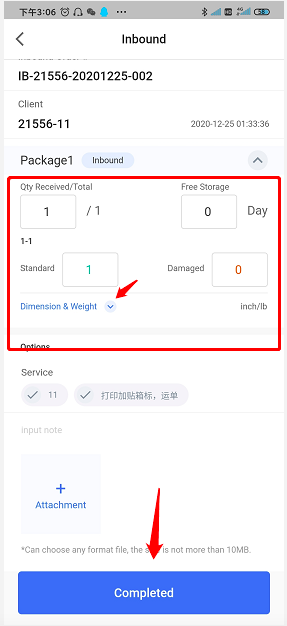
Edit the pallet quantity if needed. Note that there are two pallet types which are inbound pallet and cross dock pallet.
Inbound pallet: the number of regular inbound pallets which means the products go to warehouse regular storage. Inbound storage is basically for the drop-shipping business, which needs to be stored in the warehouse for a long time and shipped by SKU.
Transfer pallets: the number of pallets for cross-dock products. Cross-dock products only stay in the warehouse for a short amount of time, it’s usually shipped shortly after arriving in the warehouse. The cross-dock inventory will be indicated by cartons in inventory.
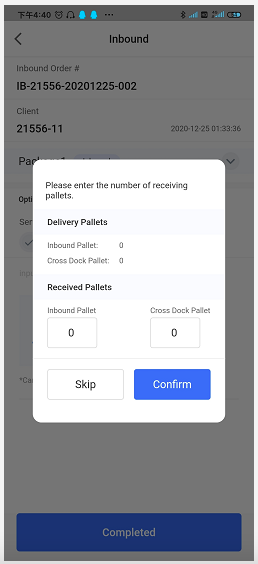
The package is received after you confirm pallet information.
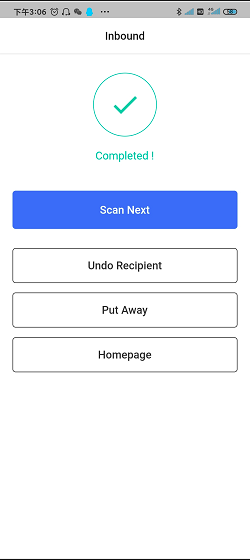
- ‘Scan next’ to continue scanning other packages
- ‘Undo recipient’ to cancel the reception
- ‘Put away’ to add location information for the received package.
- ‘Homepage’ to return the homepage
1.2 Put away
You can ‘Put away’ packages in the following two ways:
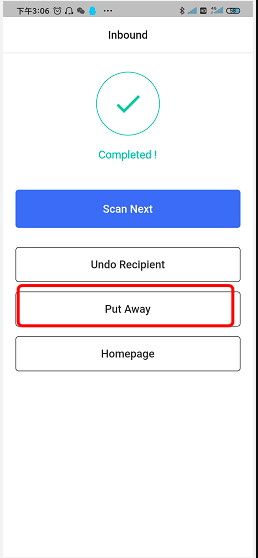
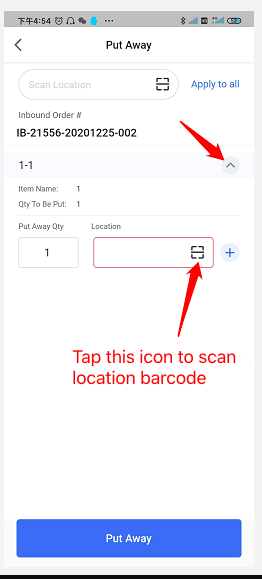
1.2.1 Put away right after you complete receiving package. As shown in the picture below, you can directly tap ‘Put away’ here.
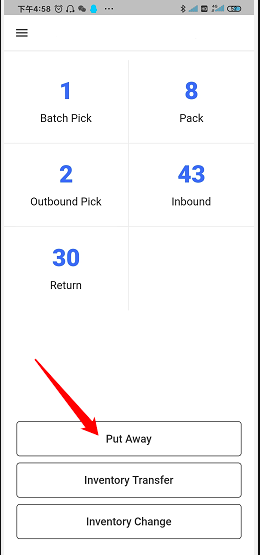
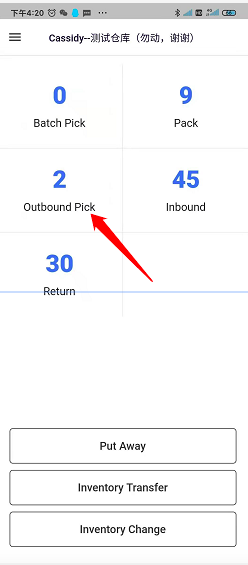
1.2.2 You can also tap ‘Put away’ on the Homepage. There are 3 ways to put away which are by package, by inbound order and by item SKU.
Steps: Home page > Put away > By package/By SKU/By Inbound ID > scan location barcode > Put Away.
2. Inventory
2.1 Inventory Transfer
Inventory transfer is to move the inventory of a certain SKU from one location to another. It does not change the total inventory of the product but only the storage location.
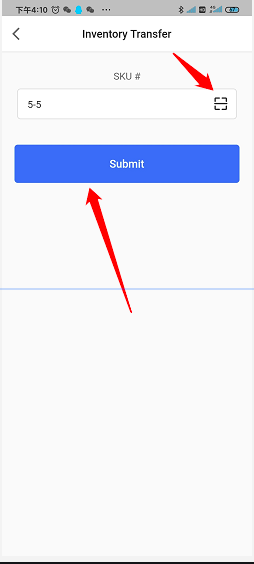
Steps:Homepage > Inventory Transfer >Scan the SKU > Submit > Scan the both locations > Input the quantity > Submit
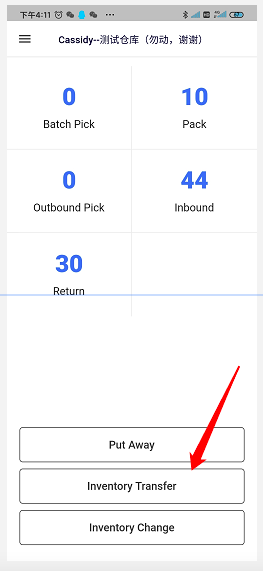
Tap ‘Inventory Transfer ‘ on home page
Scan the SKU barcode and submit
Scan the both locations that you want to transfer from and to, input the quantity

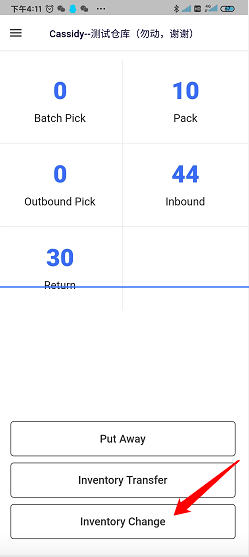
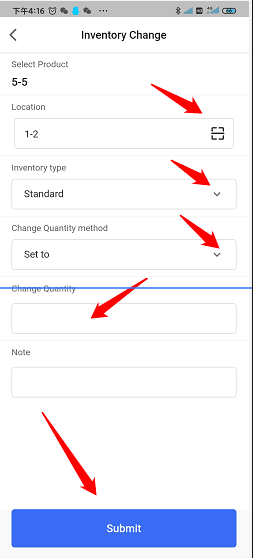
2.2 Inventory Change
Inventory change refers to the adjustment of the inventory quantity of a certain SKU, which has an impact on the total inventory of the product in the warehouse.
We support inventory changes for standard products and defective products. You can do the changes by adding or reducing inventory quantities on the basis of the original inventory, or directly set the inventory to a specific value.
Steps: Homepage > Inventory Change > Scan SKU > Scan location > Choose the inventory type ,change quantity method and quantity > Submit
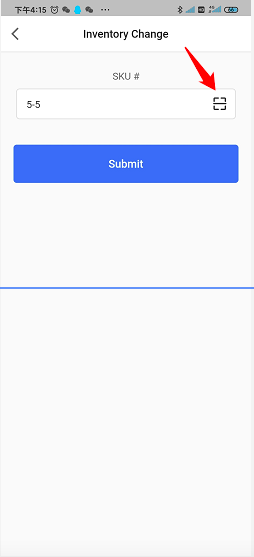
2.2.1 Inventory type: the type of inventory you want to change ,standard or damaged inventory
2.2.2 Change quantity method
- Set to: Set the inventory to a specific value
- Add: To add the quantity based on the original inventory of the current location
- Remove: To reduce the quantity based on the original inventory of the current location
3. Outbound
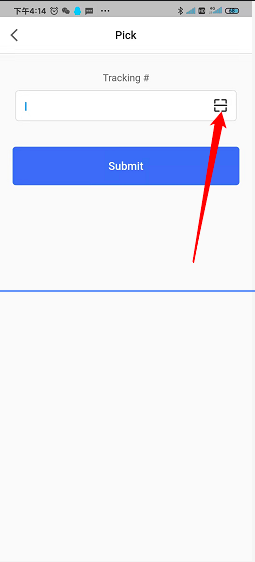
3.1 Picking
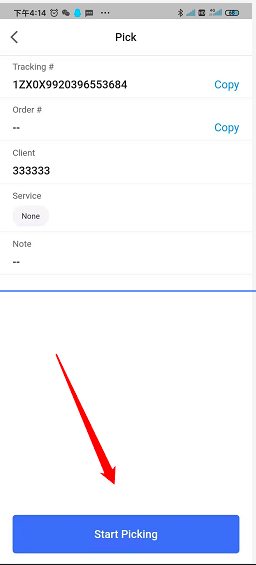
Steps:Home page > Outbound Pick > Scan tracking# > Starting picking > Scan SKU barcode > Completed.
Scan tracking and submit to move to the next step.
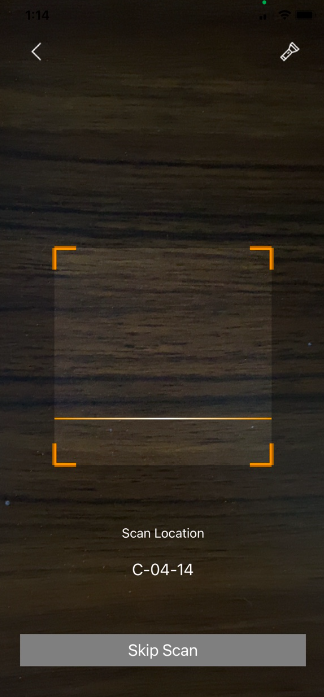
Scan location barcode(you can skip this step too)
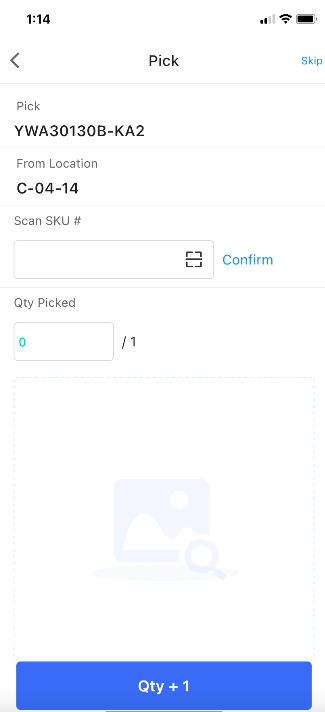
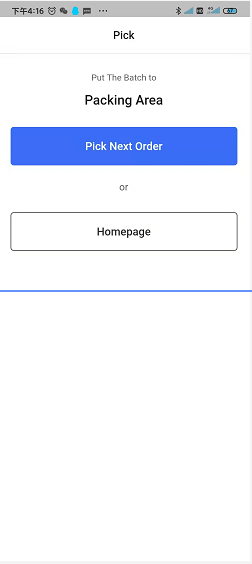
SKU picture will appear here if you upload the image while creating the product information. Scan SKU# and input quantity .The corresponding number of scanned SKU will be transferred to the picking buffer area. You can also tap ‘Pick Next Order’ to continue picking other orders.
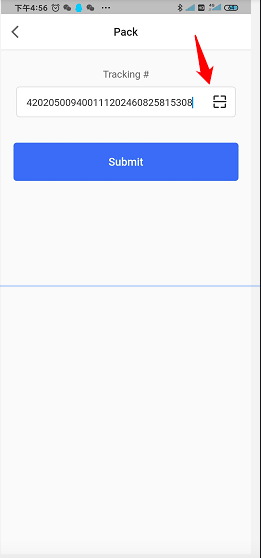
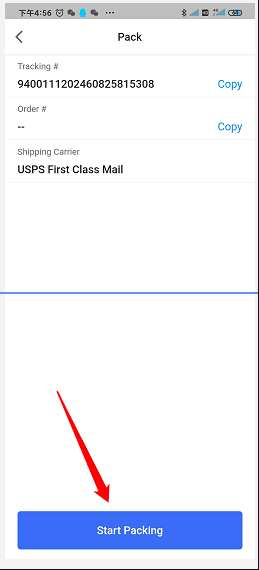
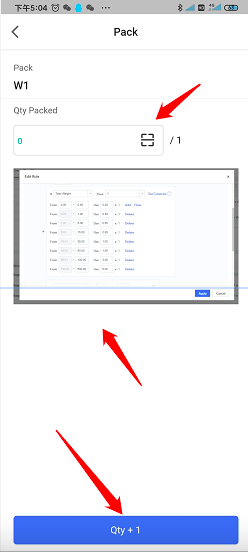
3.2 Packing
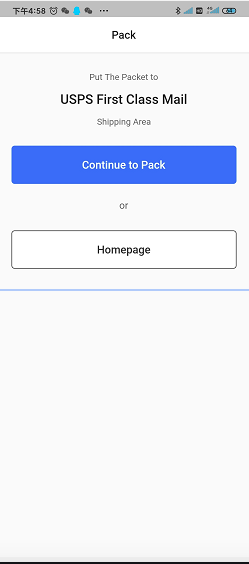
Steps:Homepage > Pack > Scan tracking# > Start picking > Scan product label and input quantity > Choose packing material > Finished
Scan tracking#
Tap ‘Start picking’ to continue
Scan the product label or directly click QTY+1 to enter the next step, if there is product picture information, it can also be displayed.
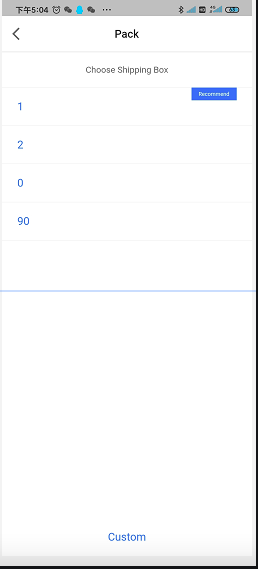
You can choose from existing package or customize a new one
Tap ‘continue to pack’ to do the packing for the next order.
3.3 Batch picking
You can do picking for parcel batch orders on app too.
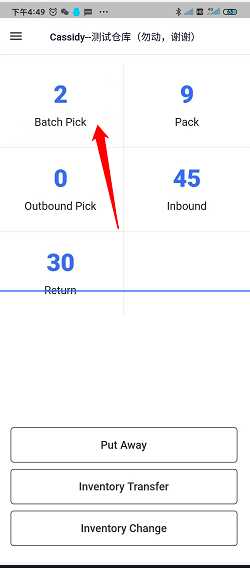
Tap ‘Batch pick’ on homepage.
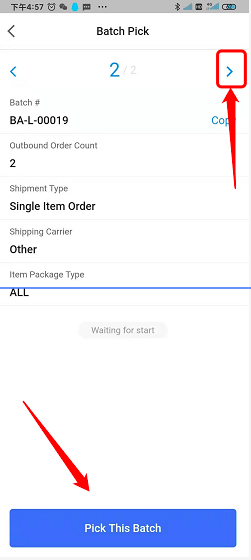
Choose the batch order you’d like to pick by tapping ‘>’, then tap ‘Pick this batch’
Scan location barcode
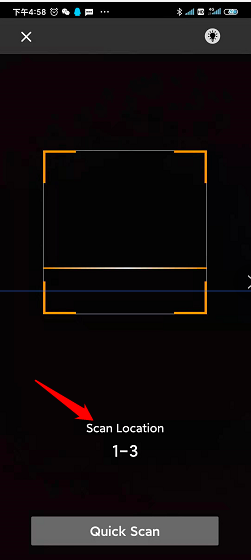
Scan SKU barcode, after scanning the current SKU, you will automatically direct to the page scanning the next location. This process will stop until the whole order has been finished.

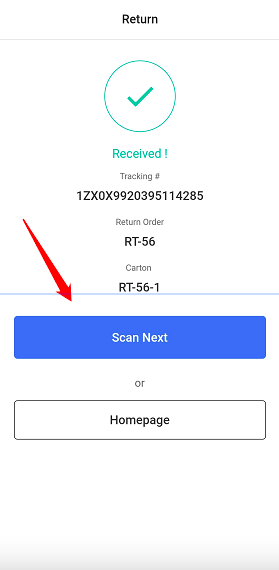
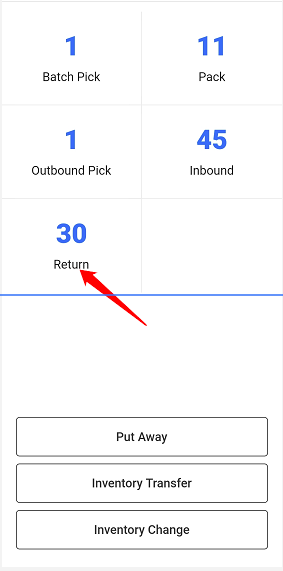
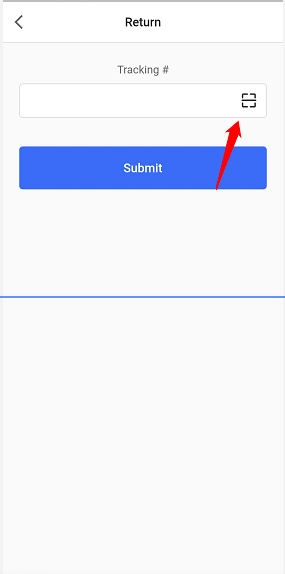
4. Return
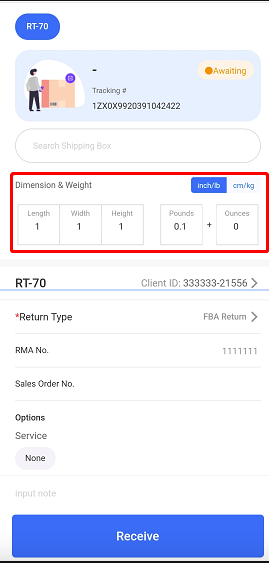
You can also receive return orders on ShipOut App. You can edit the package size and weight when receiving.
Tap ‘Return’ on homepage then scan tracking #
After scanning the order number, you will enter the order details page. You can edit the current package size and weight here. At the same time, you can also take pictures of the currently received package.
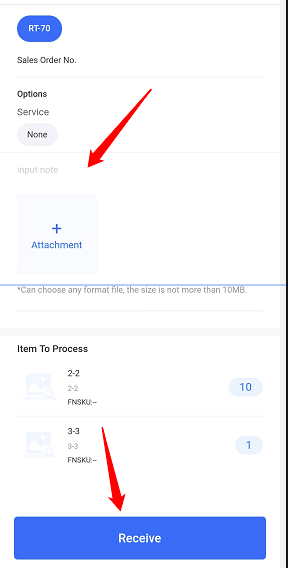
Tap ‘Receive’ to complete the reception. You can tap ‘Scan Next’ to receive the next package.