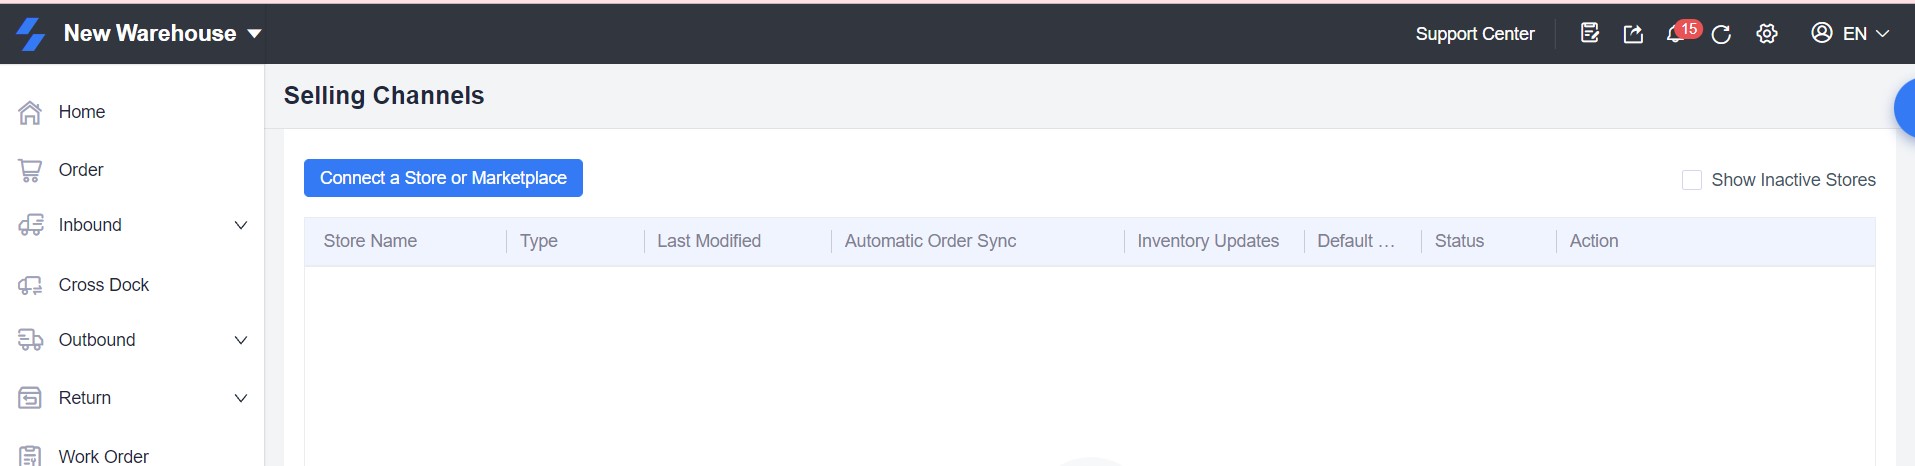
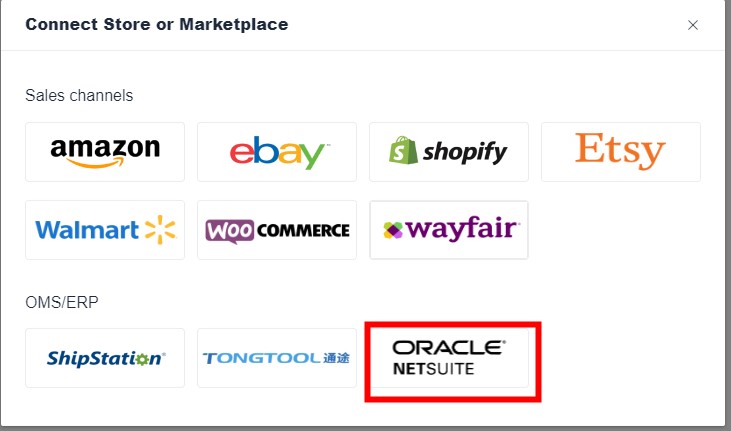
How do you connect your Netsuite account to ShipOut?
Operation steps: Log in to your ShipOut account > Go to the Settings button in the upper right corner > Selling Channels >Connect a Store or Marketplace > Click the Net suite icon > Fill in the form> Click Connect
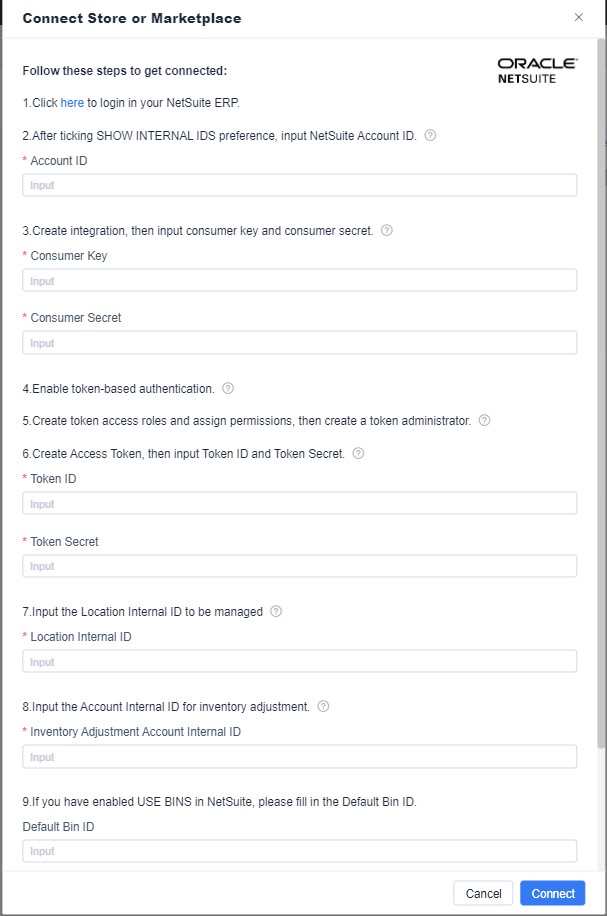
Step 1: To access your NetSuite ERP system, click the [Login] link Step 2: After checking Enable Internal ID, enter NetSuite Account ID
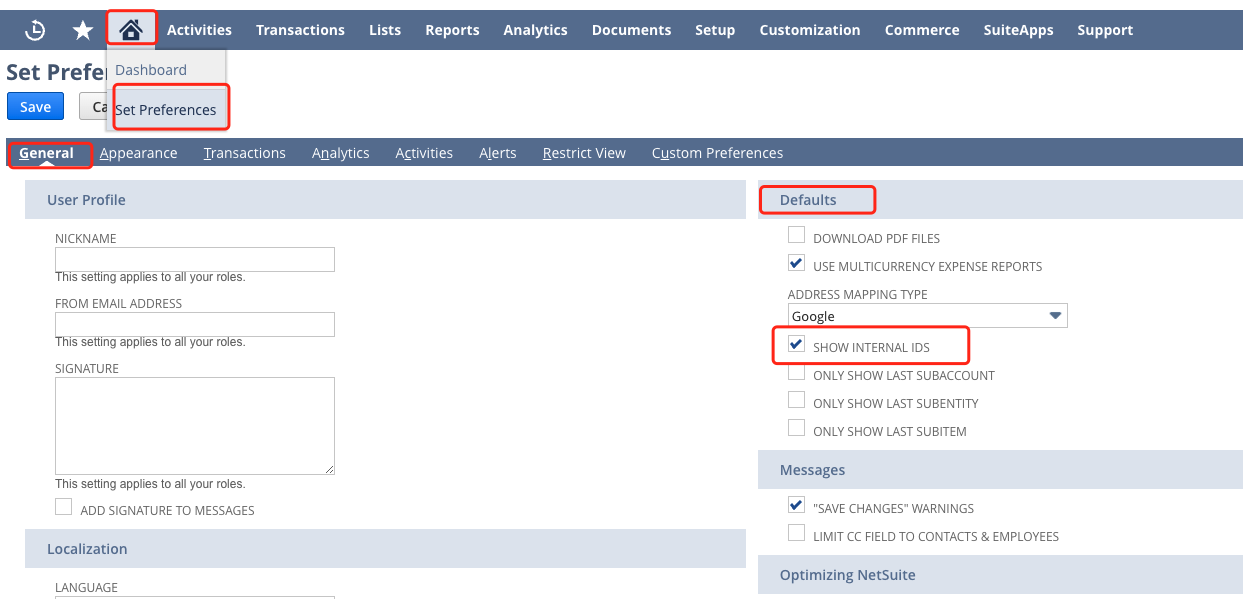
From Home – Set Preferences – General – Defaults section Enable Show Internal IDs preference
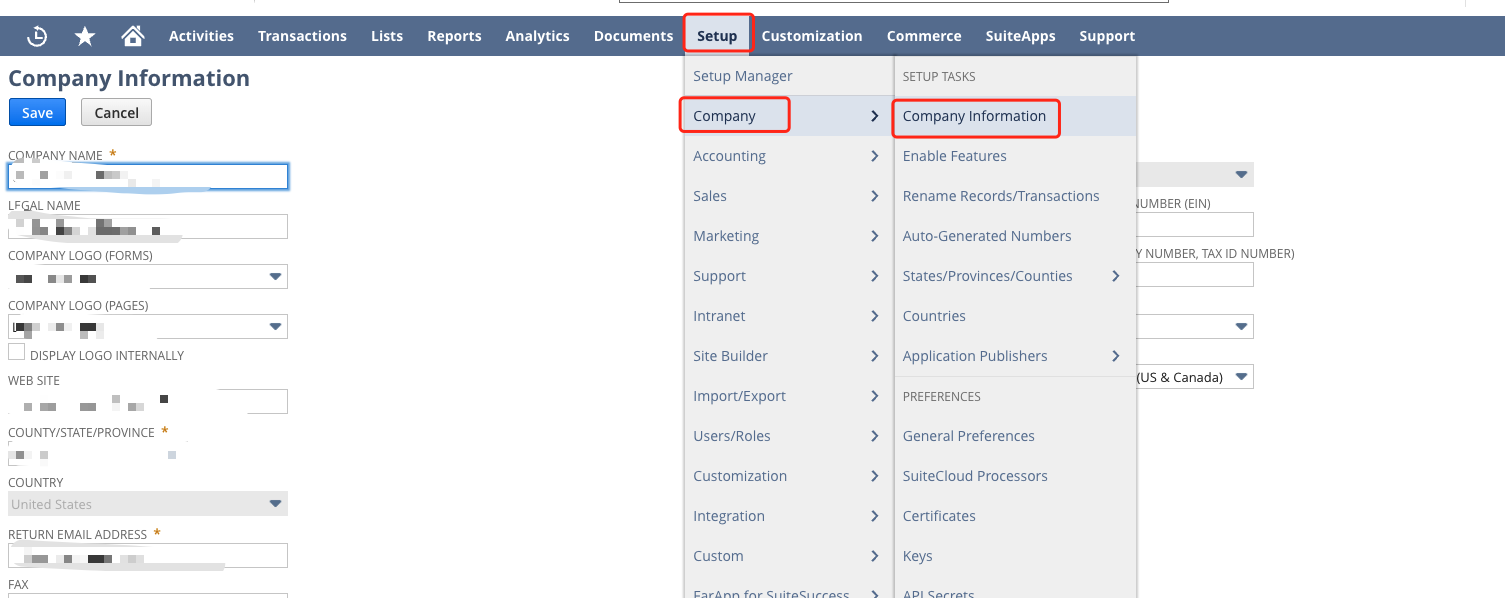
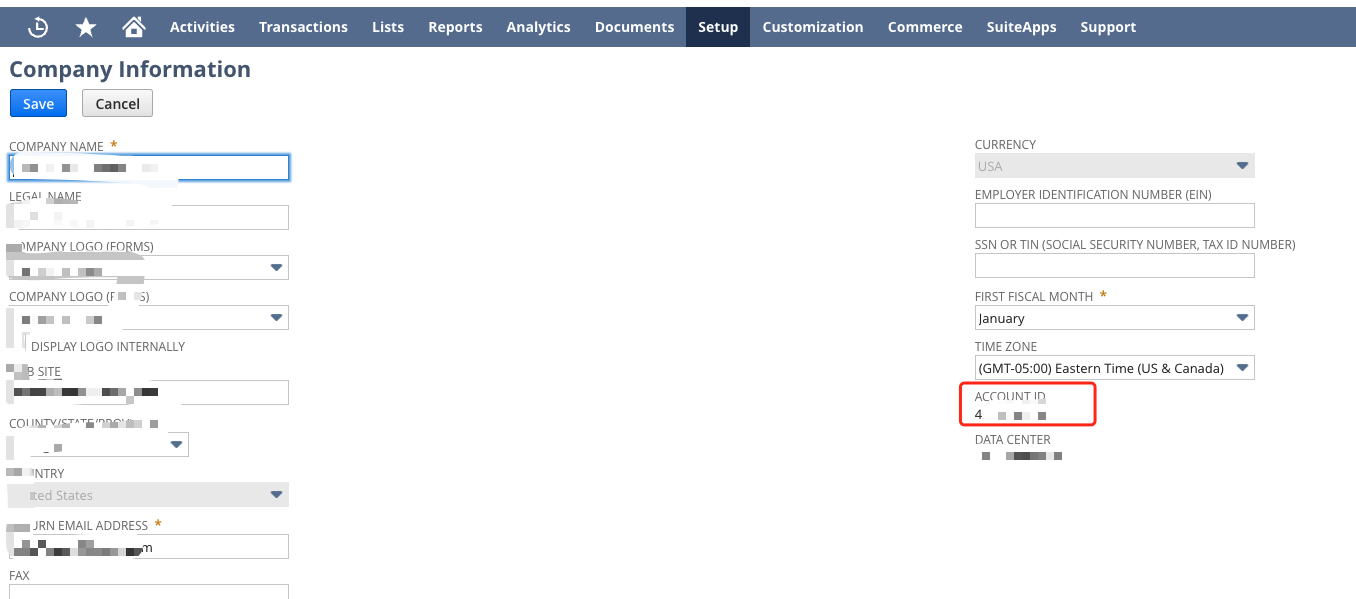
Go to Setup – Company – Company Information page and look for the Account ID.
Enter the Account ID here
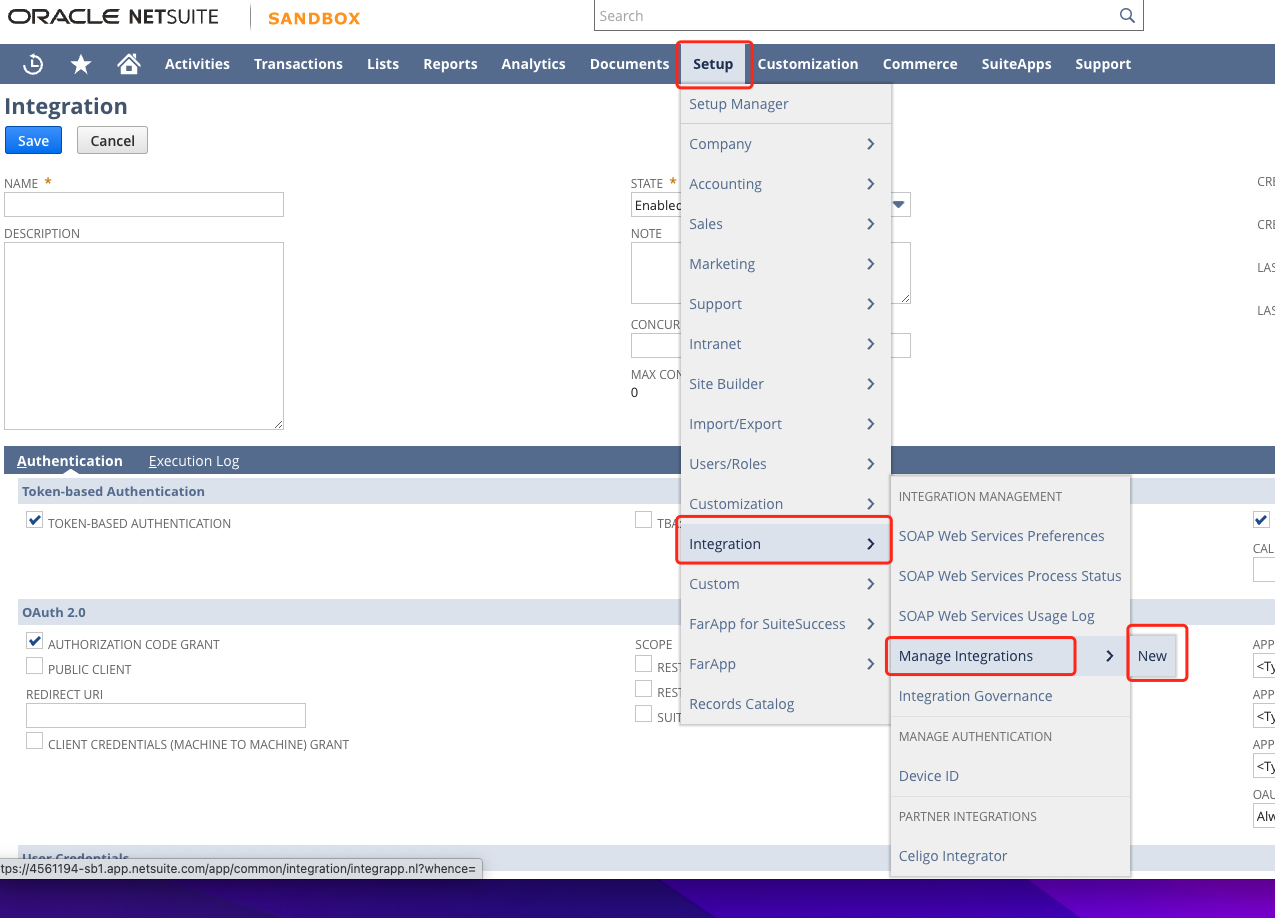
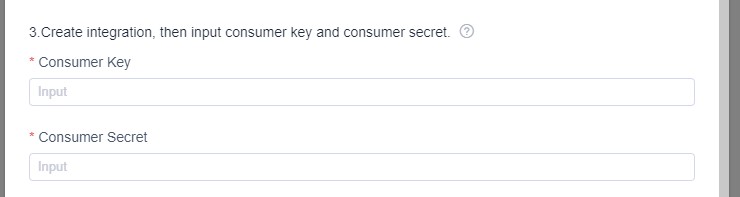
Step 3: Create an Intergration application and fill in the Consumer Key and Consumer Secret
From Set up – Integration – Manage Integrations – New. Create an Integration application: The name is ShipOut, and the status is enabled
After the page is created, the Consumer Key and Consumer Secret will be displayed (only displayed once, please stay on this page when operating), copy and fill in the following
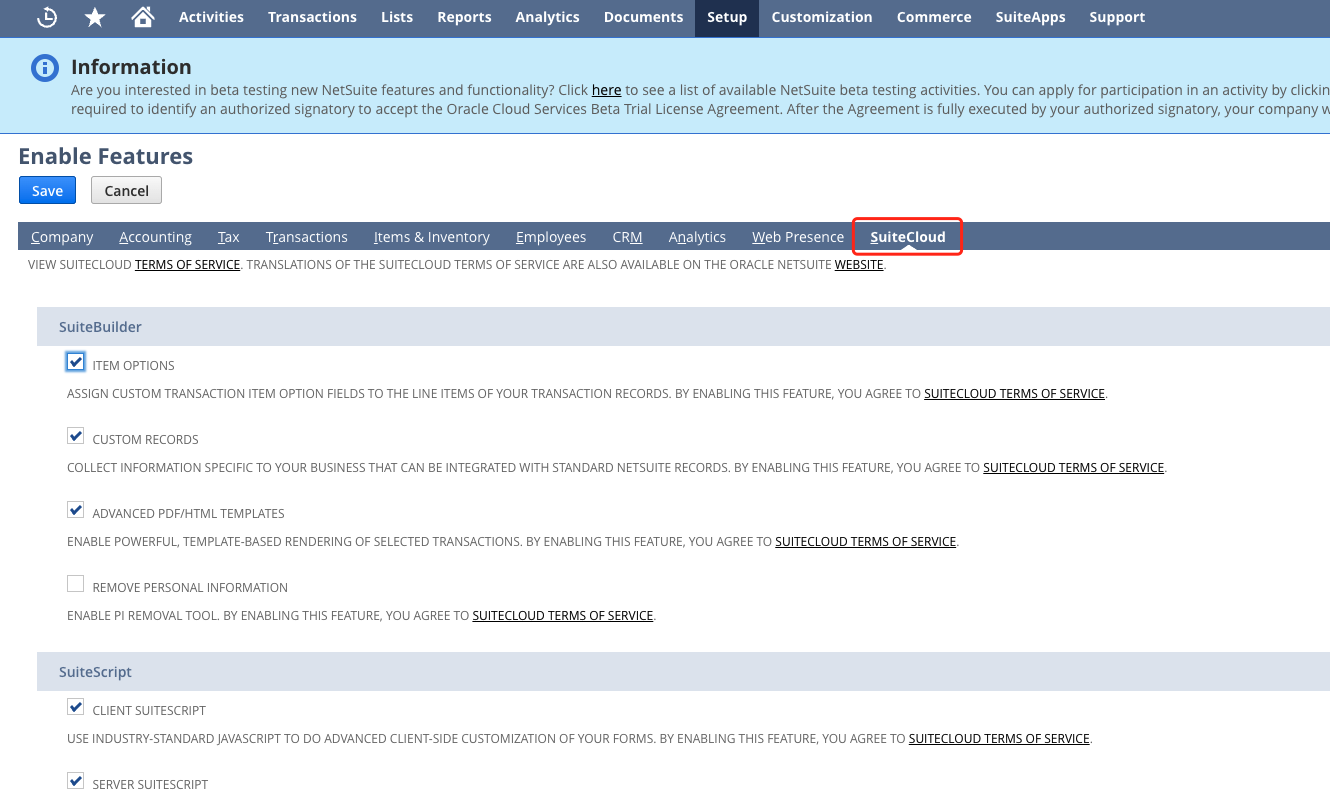
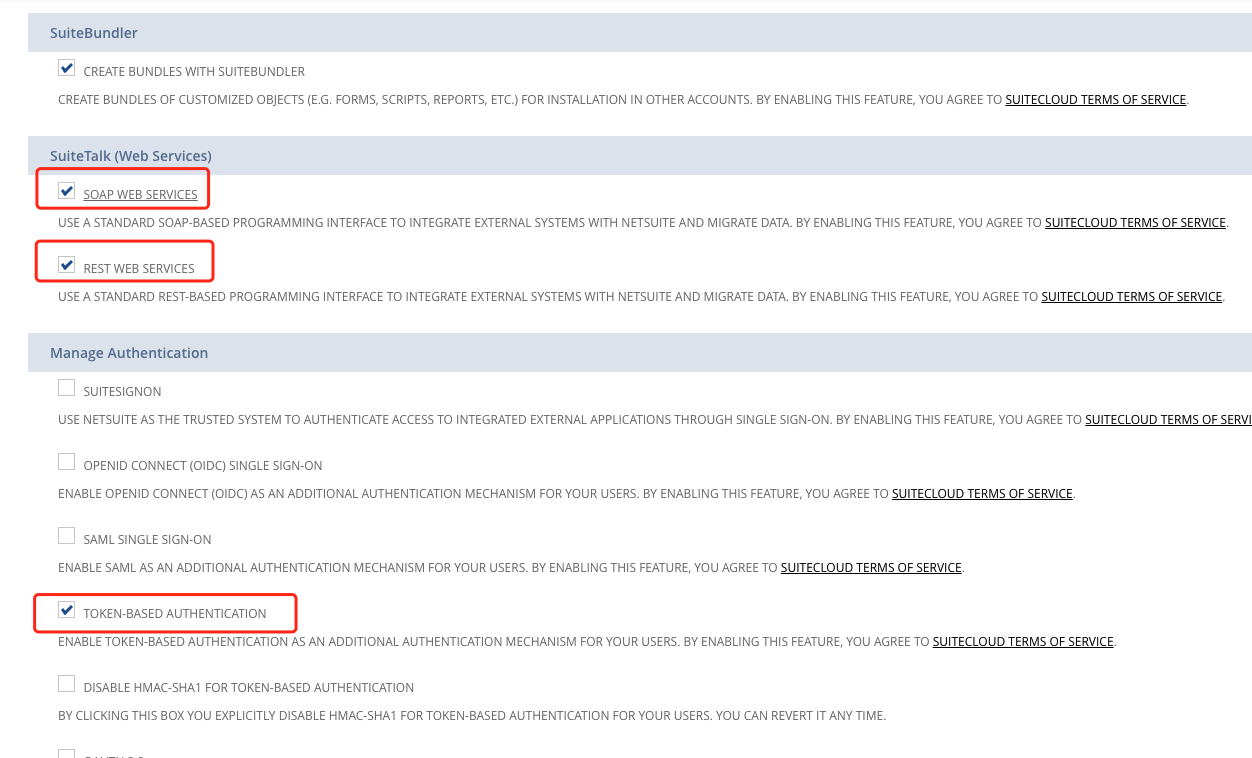
Step 4: Enable Token-Based Authentication
Enable token-based authentication from Setup -Company – Enable Features, as shown in the figure below. Enable three verifications under SuiteCloud
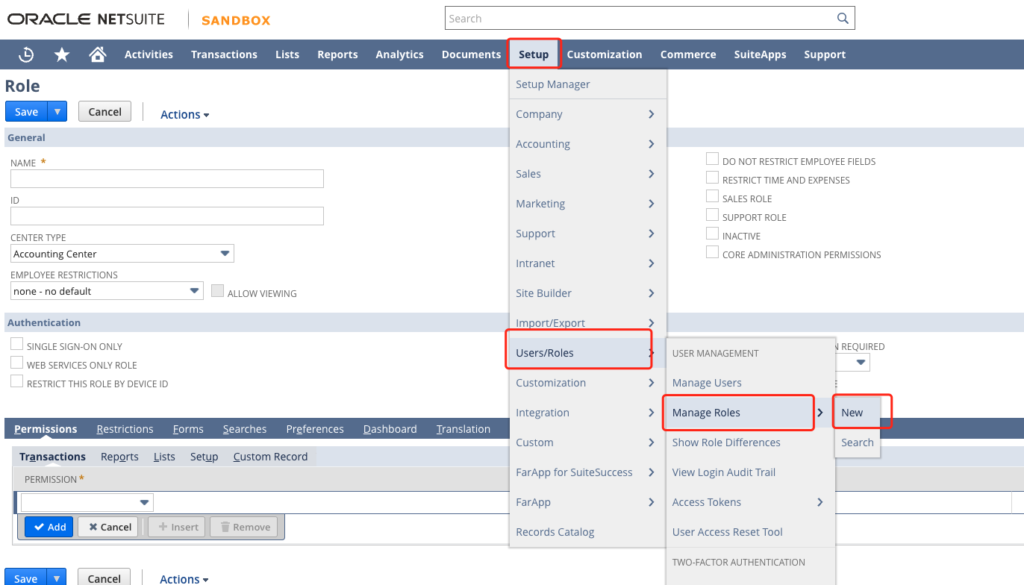
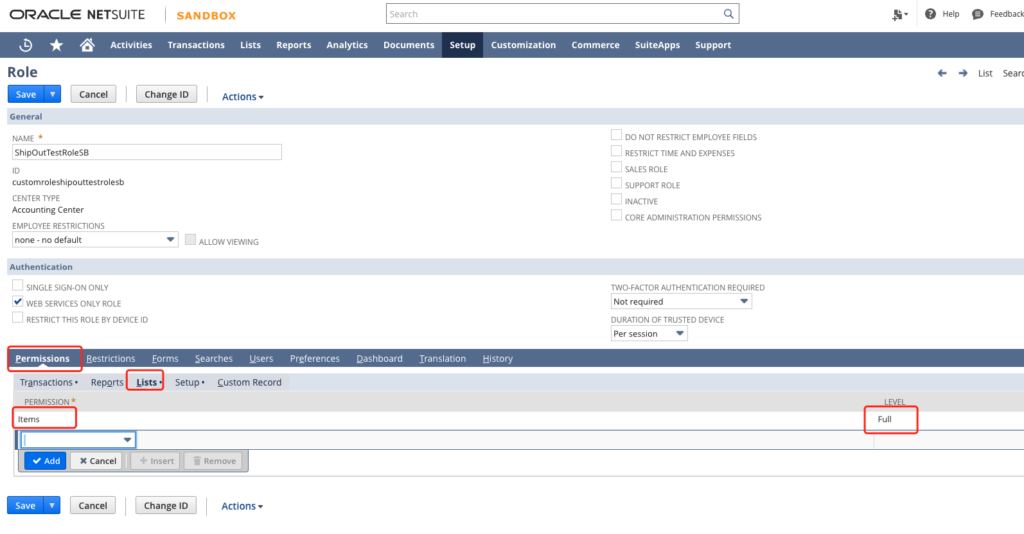
Step 5: After creating token access roles and permissions, Create token administrators
From Set up – Users/Roles – Manage Roles – New, create a token access role and assign permission
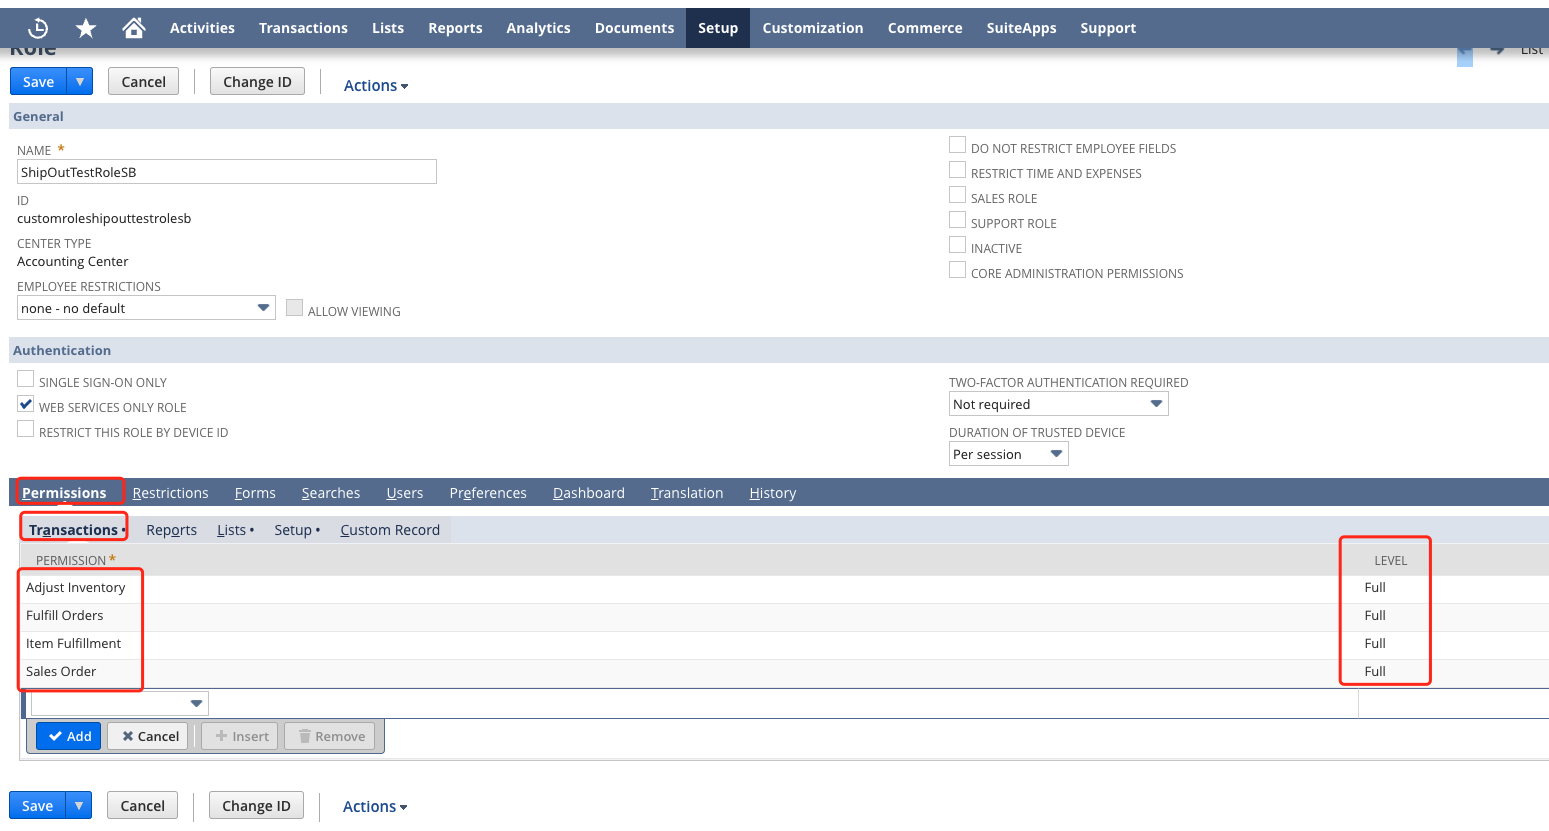
Name and ID customization
The permission settings are depicted in the figure below.
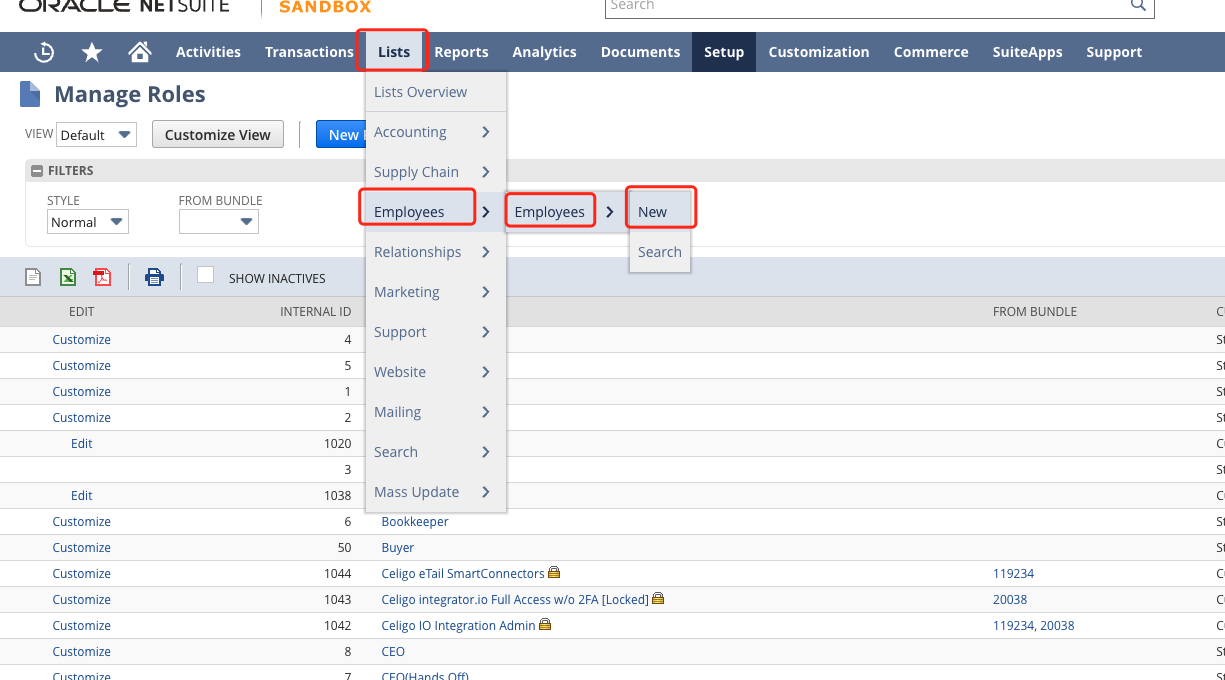
From the List- Employees-Employees -New. Create the role of the token administrator, From Access – Roles, select the newly created role in the previous step.
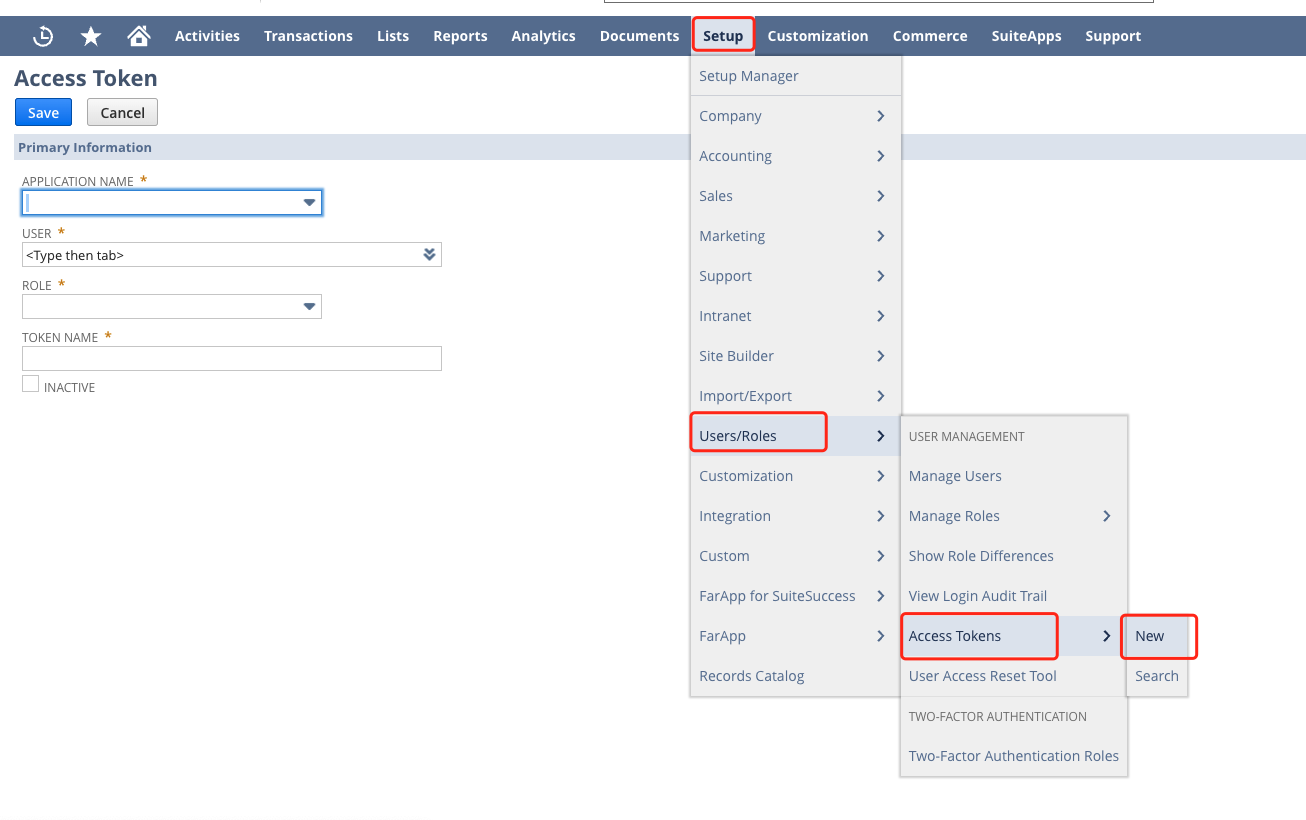
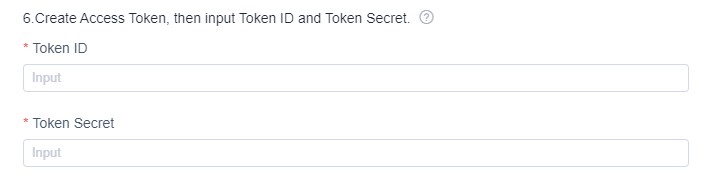
Step 6:创建访问令牌
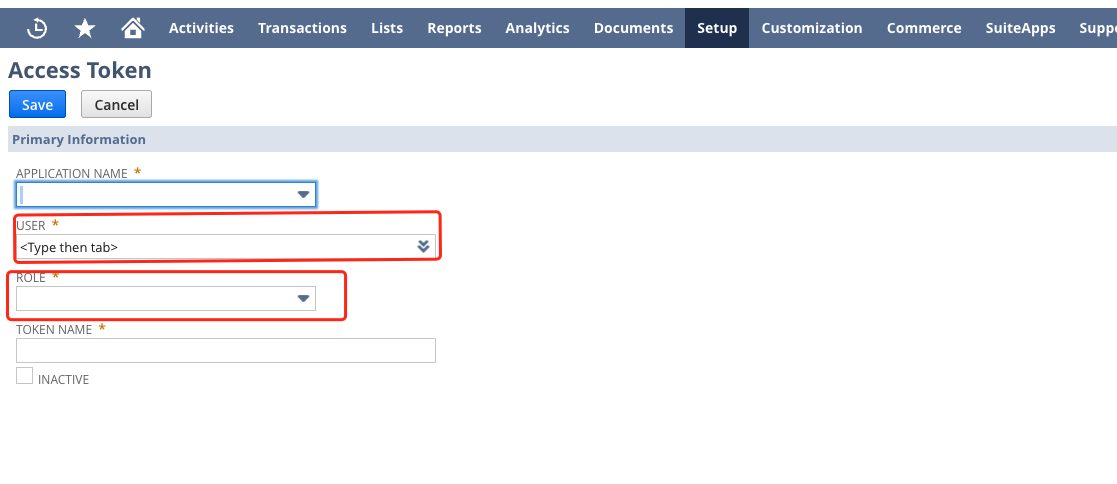
From Setup – Users/Roles – Access Tokens – New, create an access token
Under Users and Roles select the newly created “users” and “roles” from Step 5
Copy the Token ID and Token Secret and paste them into the fields below.
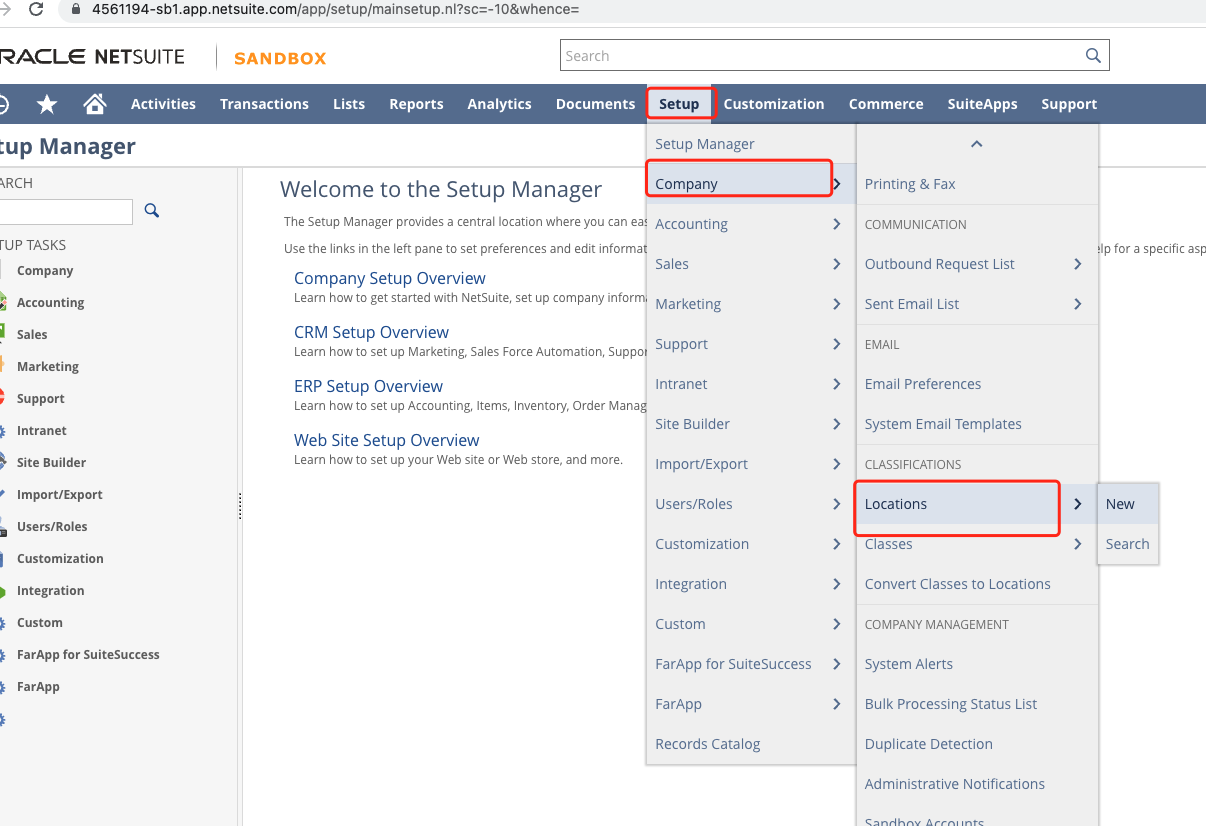
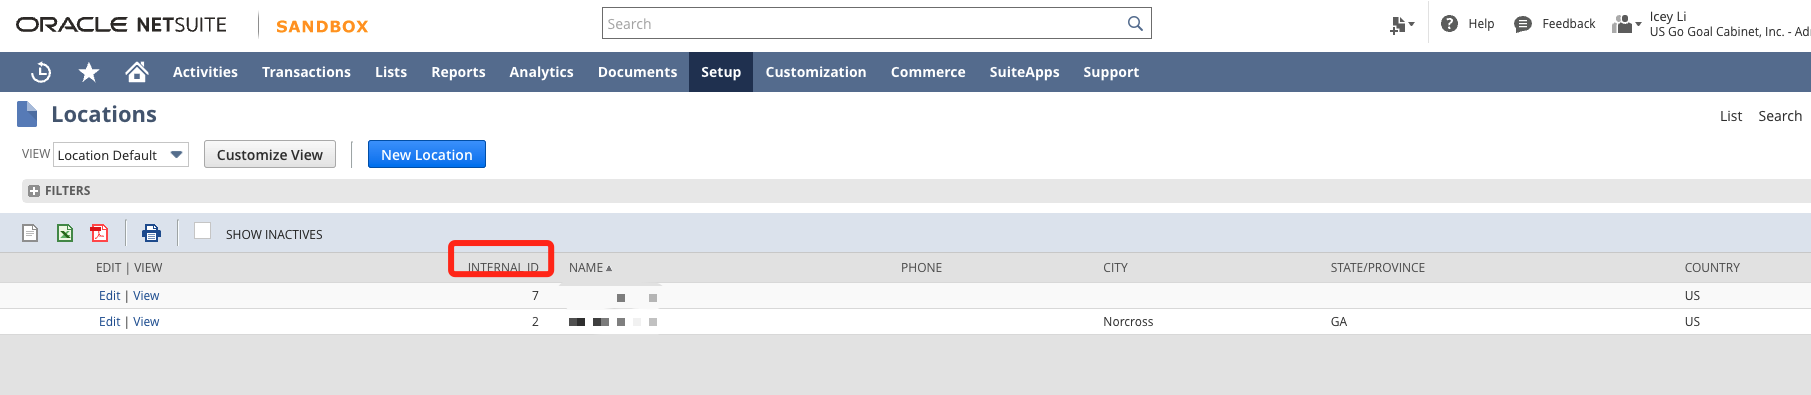
Step 7: Enter the Location Internal ID that will be managed.
Find and copy the Location Internal ID you need to manage. Go to Set Up-Company-Location and fill out the form below.
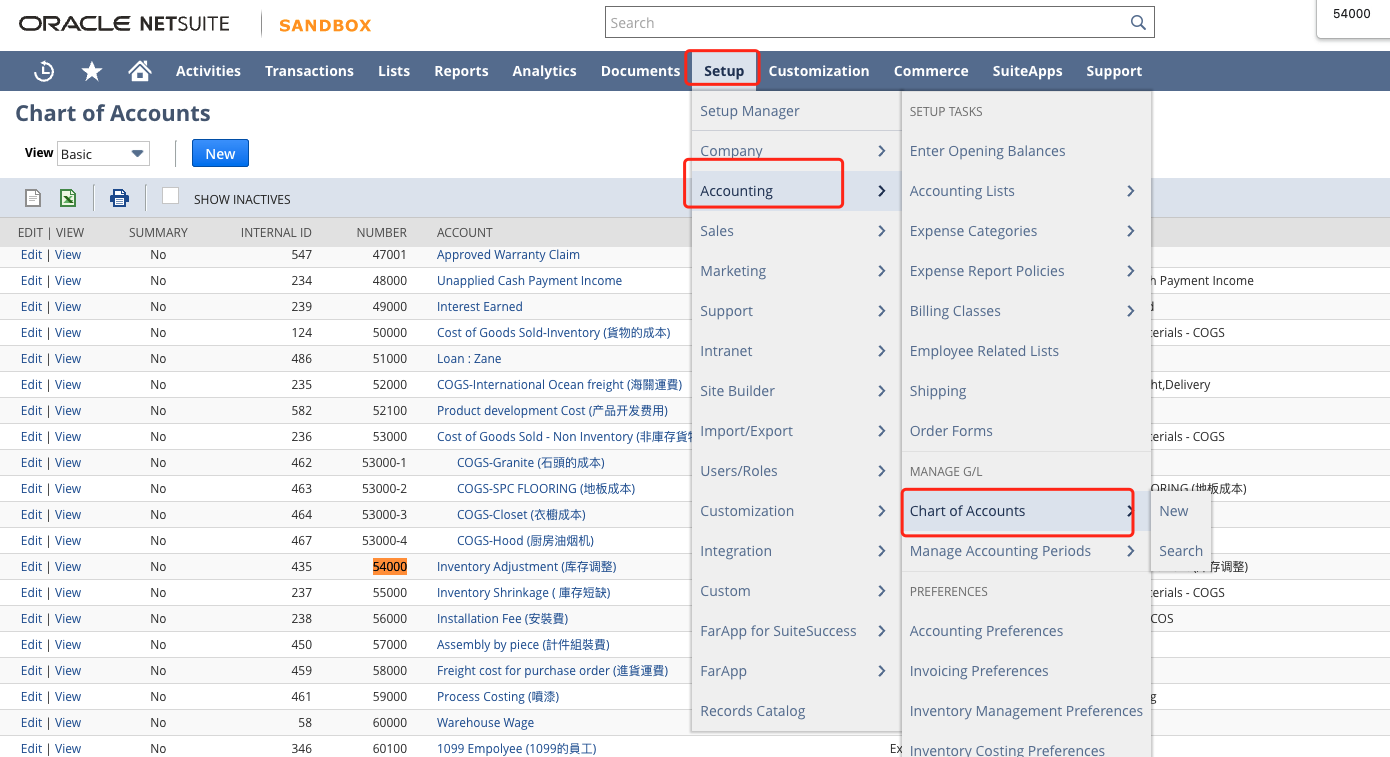
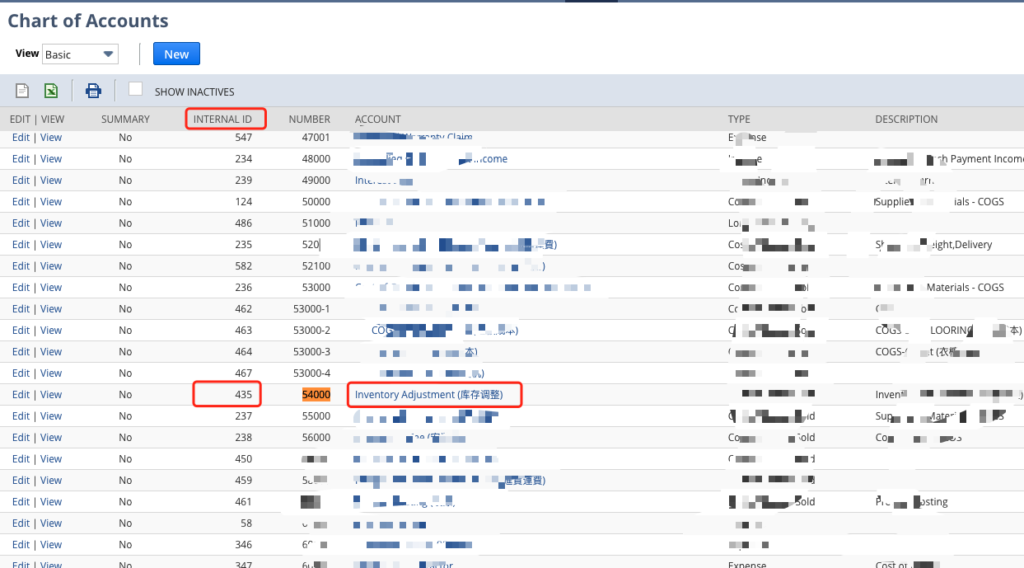
Step 8: Enter the Internal ID for Inventory Adjustment.
Copy the account ID you use for inventory adjustments from Setup- Accounting – Chart of Accounts. Look for the Inventory Adjustment Internal ID. Get the number and paste it into the box below.
Step 9: If you have stock management enabled in NetSuite, please enter the default Bin ID.
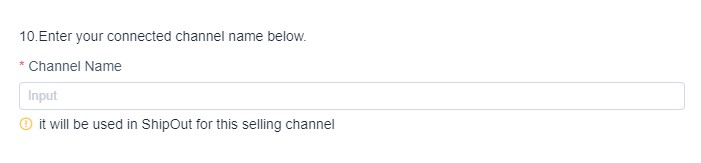
Step 10: Enter the connected Channel name
Please take note: This channel is shown in the ShipOut system.