Have the following ready before you link your store:
The Client ID and Client Secret for your Wayfair Sandbox Application
The Client ID and Client Secret for your Wayfair Production Application
Your Wayfair Supplier ID
The ShipOut warehouse(s) you’ll use and their Warehouse IDs
Your Wayfair product catalog
If ShipOut will create your Wayfair shipping labels: the third-party billing account number provided by Wayfair
1.2 Important notes
Store alias mapping
Your Wayfair store aliases in ShipOut must be mapped to the Wayfair Supplier Part Number, not the Wayfair SKU.
When the ASN is sent
Wayfair requires the Advance Ship Notice (ASN) to be sent after the order has been picked and packed, and before the carrier picks it up. Only confirm shipment or scan the order out in ShipOut once it has actually been packed and is ready to ship. Sending the ASN too early may cause it to fail.
Do not delete your Production Application
If you need a new Client Secret after your Production Application has been authorized, use Rotate to generate a new one. Do not delete the Production Application and create a new one — a new Production Application usually has to go through Wayfair’s approval process again.
2. Create Your Applications in Wayfair
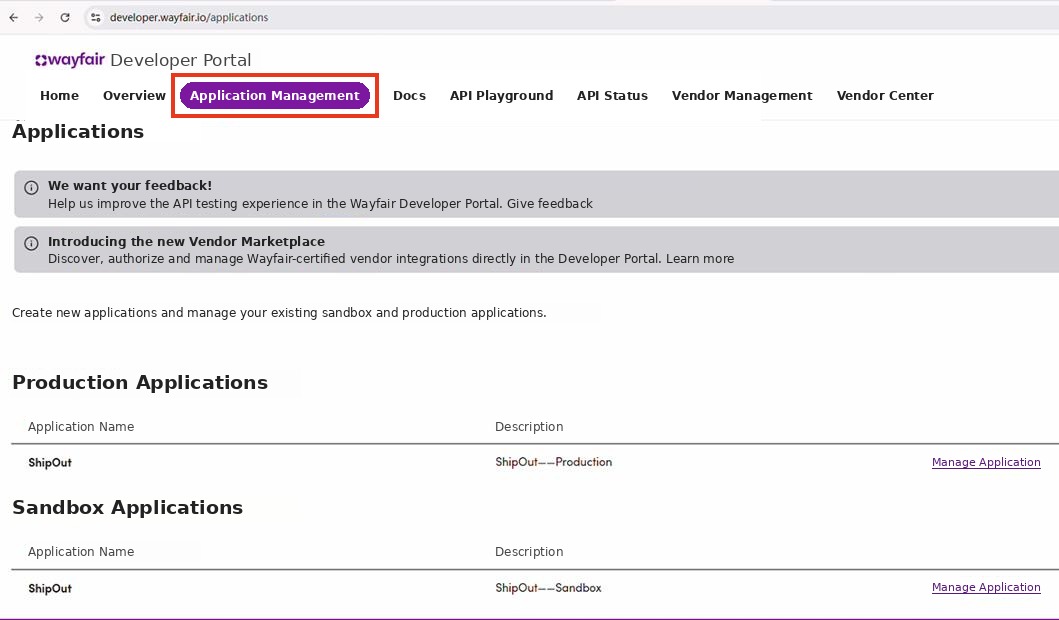
2.1 Open Application Management
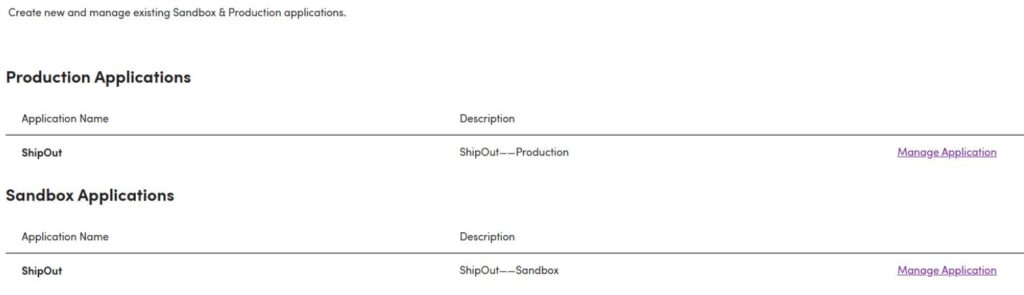
Log in to the Wayfair Developer Portal with your Partner Home credentials, then go to Application Management.
2.2 Create the Sandbox Application
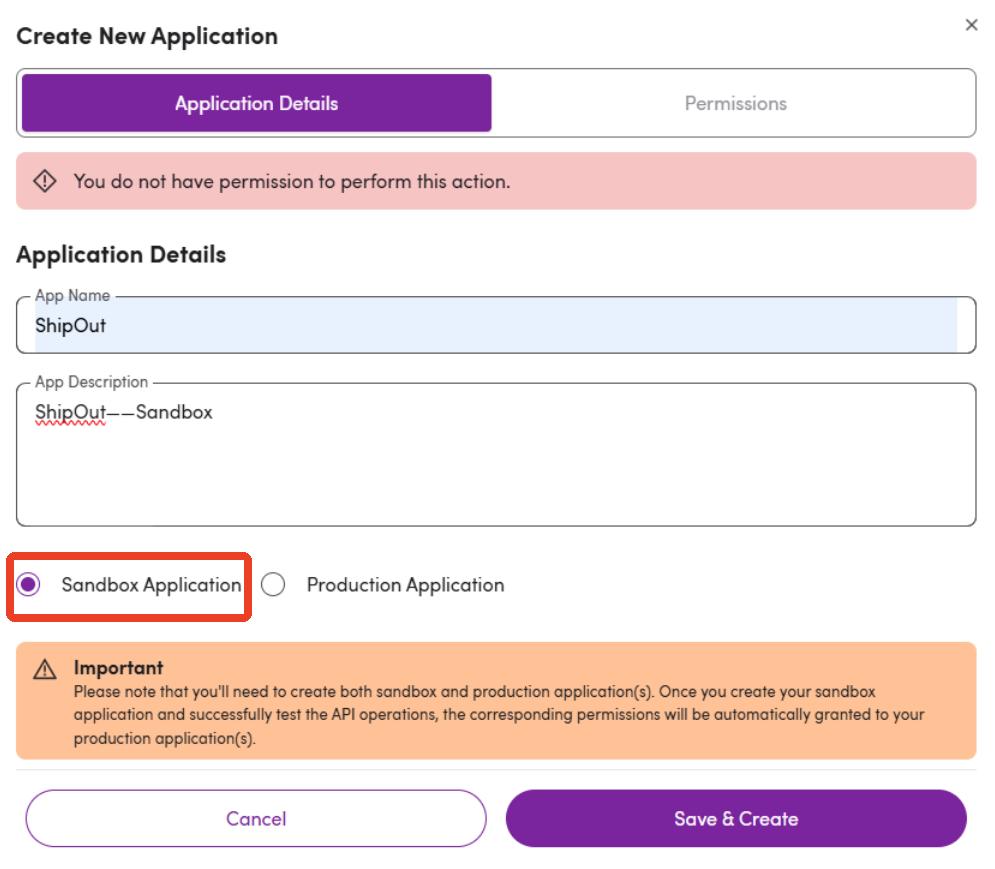
Click Create New Application.
App Name: ShipOut
App Description: ShipOut – Sandbox
App Type: Select Sandbox Application.
Save the Client ID and Client Secret that are generated.
2.3 Create the Production Application
Click Create New Application.
App Name: ShipOut
App Description: ShipOut – Production
App Type: Select Production Application.
Save the Client ID and Client Secret that are generated.
If you lose your Client Secret or need to change it, click Manage Application, then click Rotate Secret on the application details page to generate a new one. Remember to update the new Client Secret in ShipOut.
3. Complete Wayfair Sandbox Testing
Wayfair requires you to pass sandbox testing first. Your Production Application will only be granted the required permissions after the test is complete.
3.1 Find your Supplier ID and Warehouse ID
How you find your Supplier ID depends on your store setup:
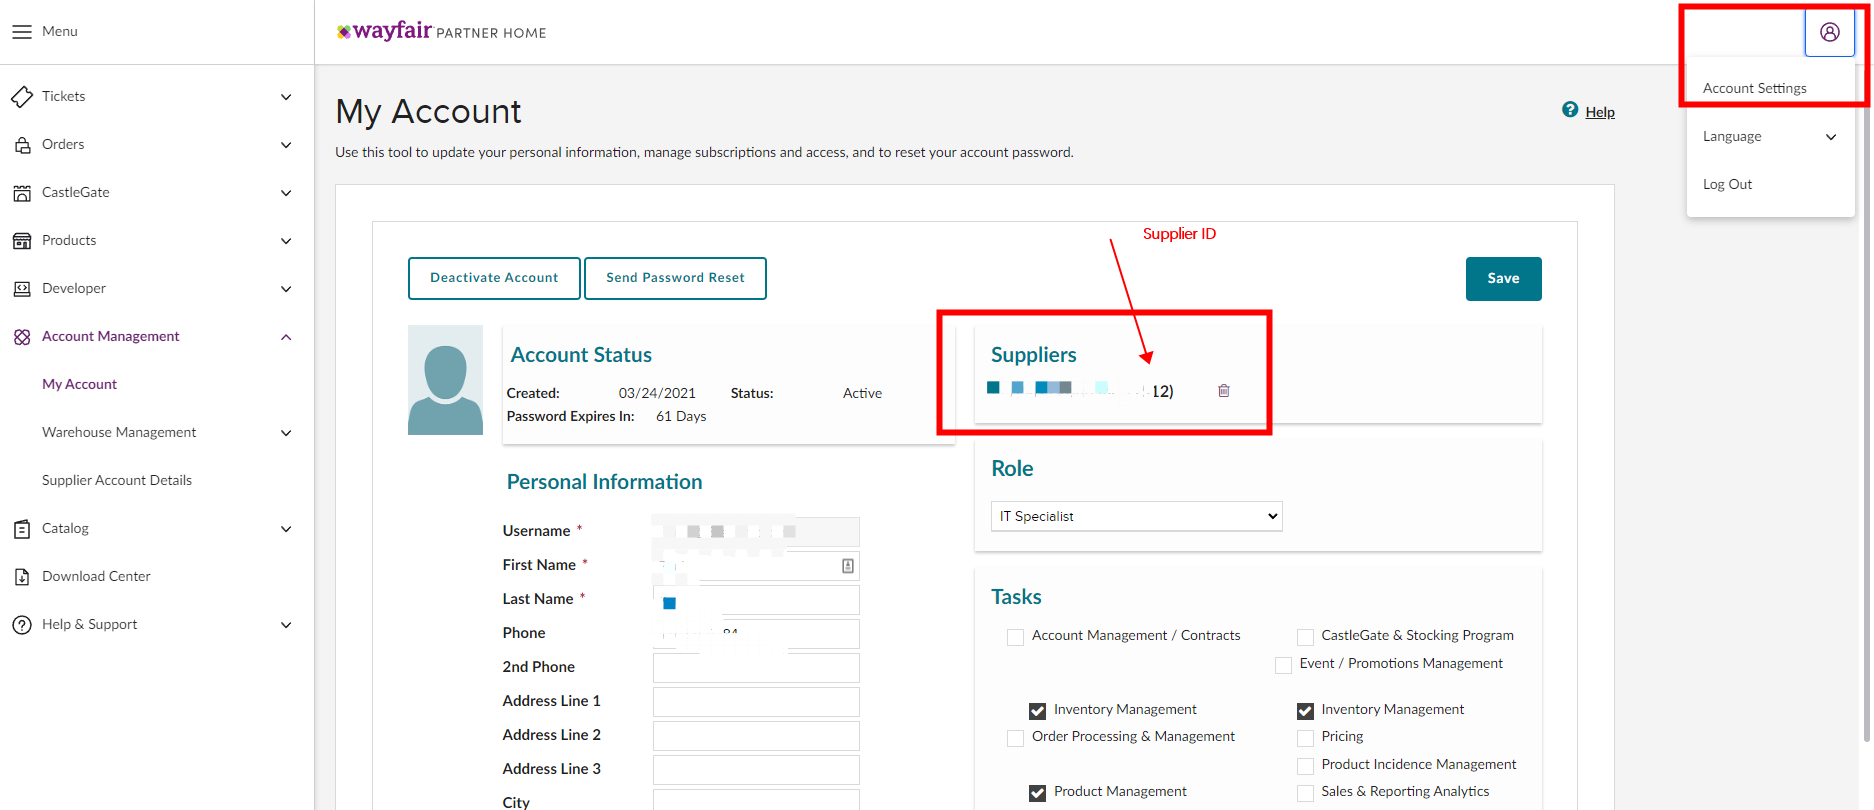
Single-warehouse stores: You don’t need a Warehouse ID. You can find your Supplier ID by clicking your profile icon in the top-right corner of your Wayfair account and opening your account information
•Multi-warehouse stores: You’ll need the Warehouse ID for each warehouse.
•Not sure? Contact Wayfair to confirm your Supplier ID and Warehouse IDs.
One way to find them (for reference only): in the left menu, go to Inventory Management and click Excel/CSV Export to export your inventory. In the exported file, the Supplier ID in the first column is replaced by the sub-warehouse IDs.
3.2 Export your product catalog
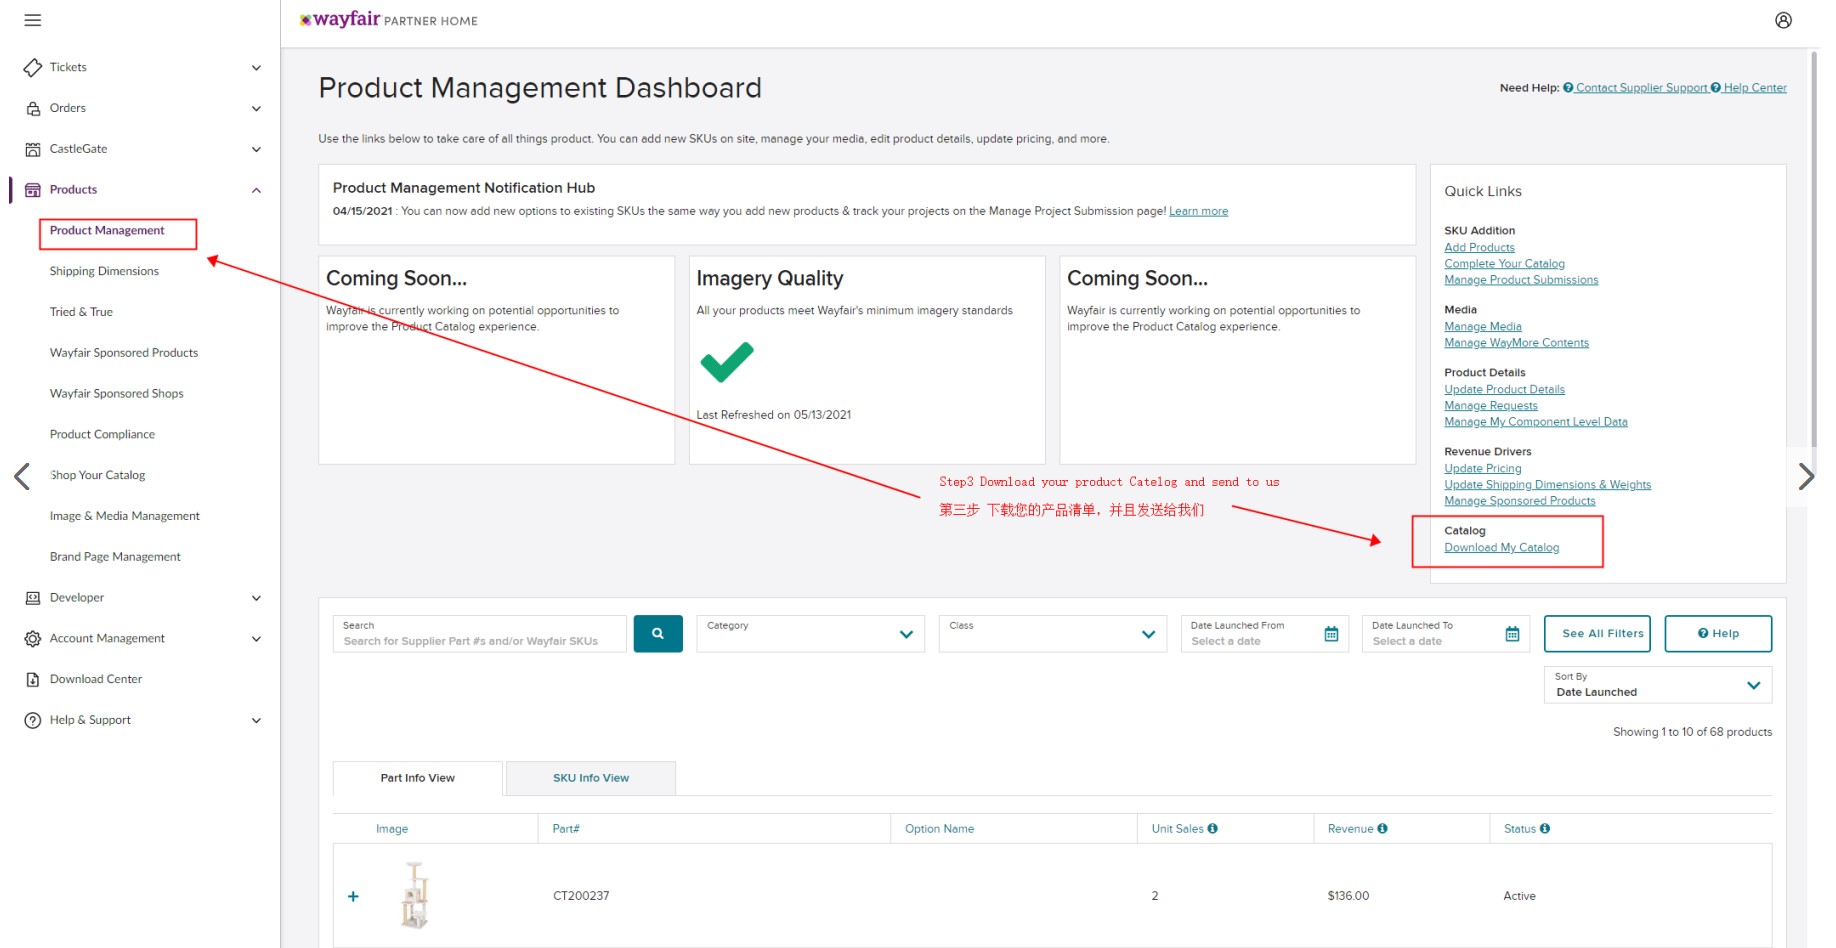
Go to Products → Product Management → Catalog and download your store’s product list.
3.3 Run the sandbox test
Send the following to ShipOut Customer Support so we can run the sandbox test for you:
•Sandbox Client ID
•Sandbox Client Secret
•Supplier ID
•Warehouse ID(s), if applicable
•Your exported product catalog
3.4 Enable permissions after the test
Once the sandbox test is complete:
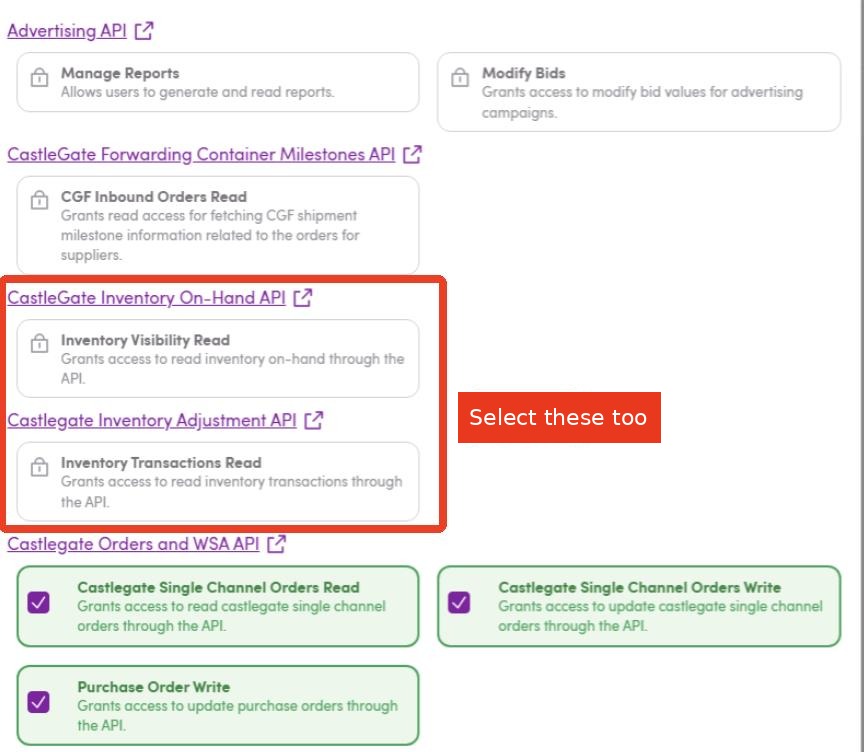
Go back to Application Management.
Click Manage Application.
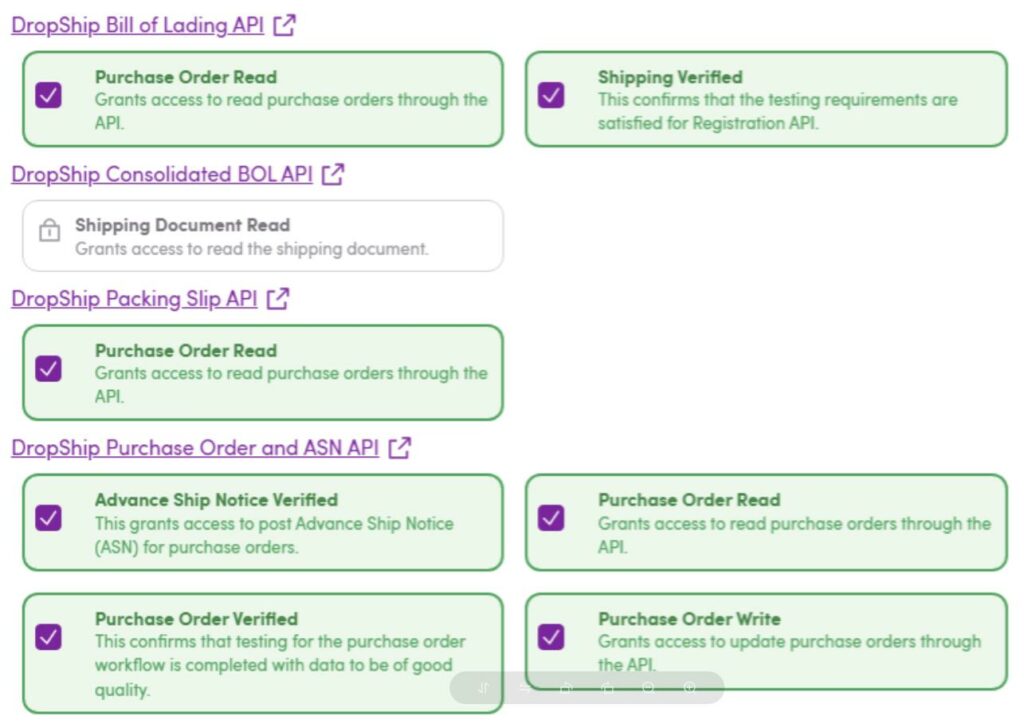
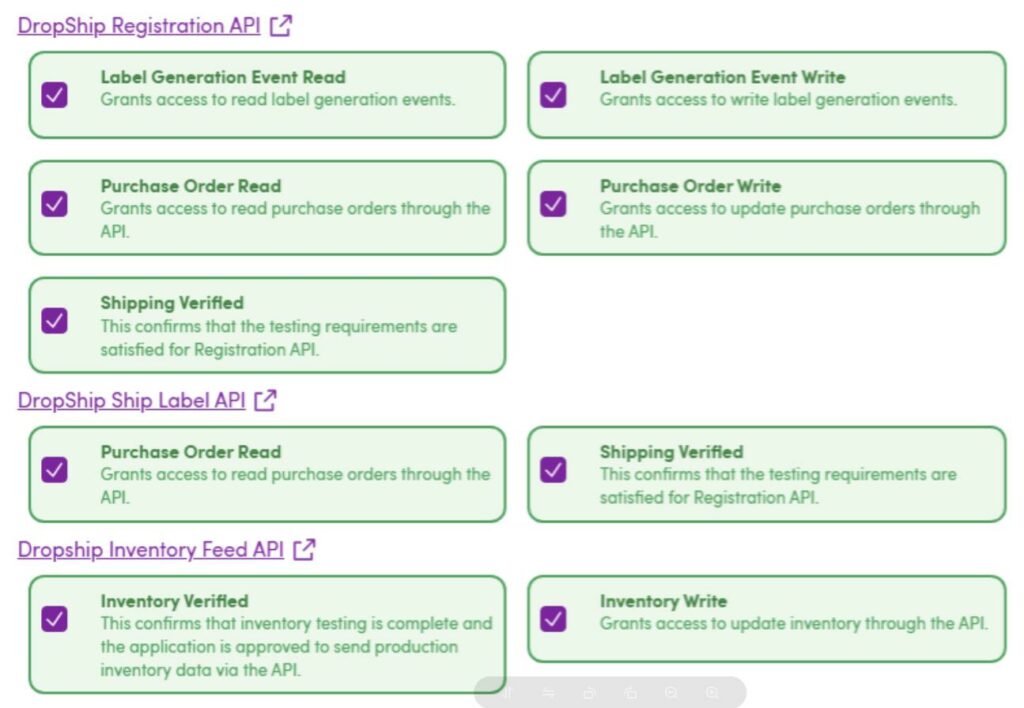
Open the Permissions
Turn on the permissions you need, then save.
4. Link Wayfair in ShipOut
4.1 Open Selling Channels
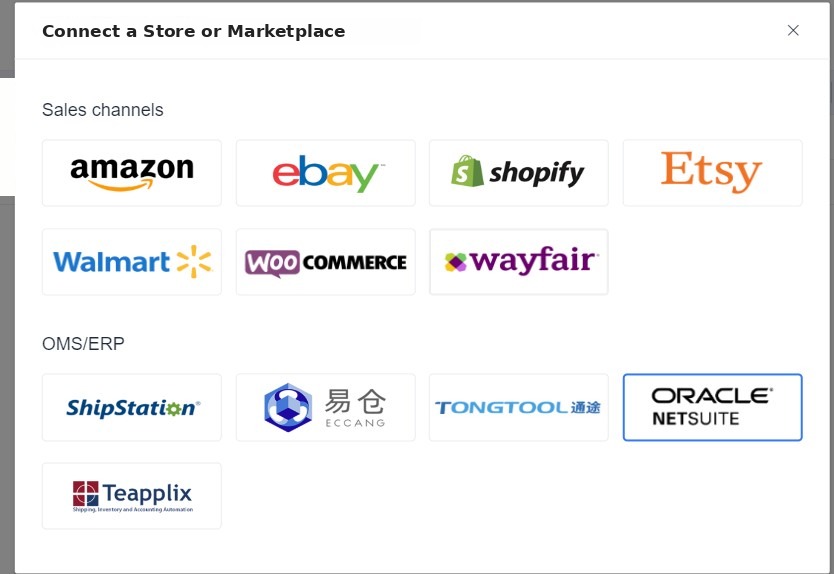
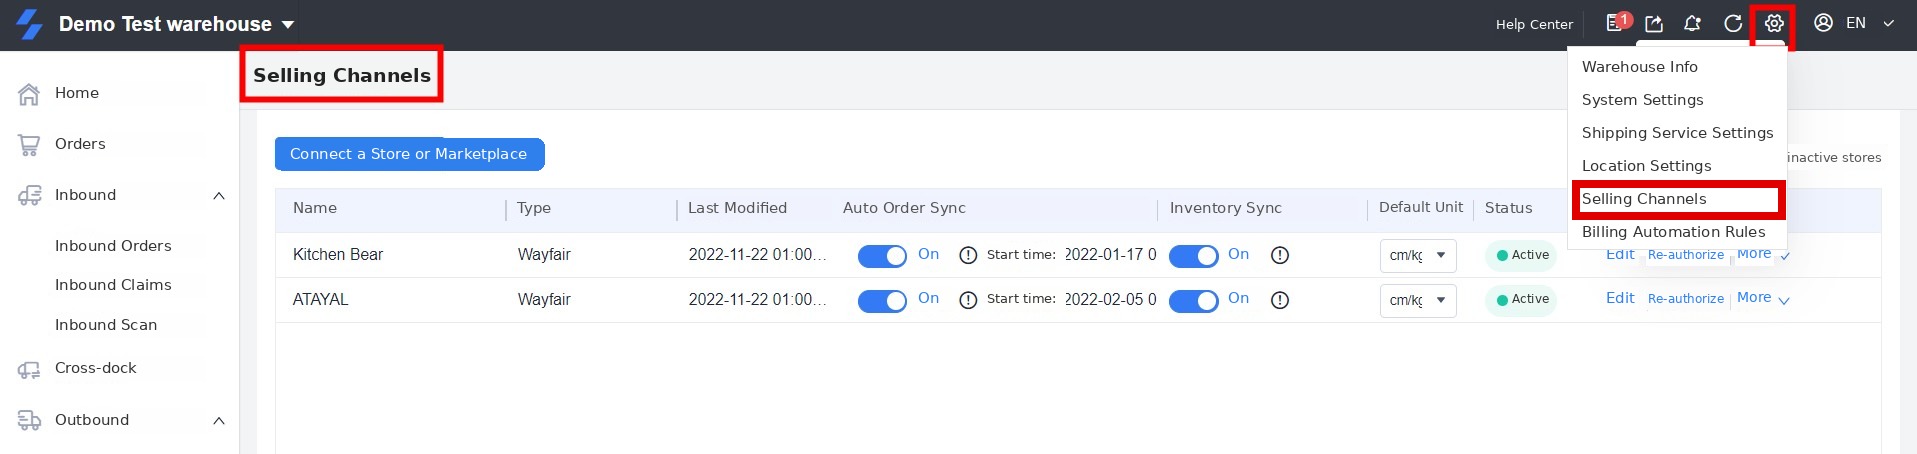
WMS: Click the gear icon in the top-right corner → Selling Channels → Connect a Store or Marketplace → select Wayfair.
OMS: Click your profile icon in the top-right corner → Selling Channels → Connect a Store or Marketplace → select Wayfair.
4.2 Enter your store details
Store Name: A name that makes this store easy to identify in ShipOut
Supplier ID: The Supplier ID provided by Wayfair
Client ID: The Client ID of your Wayfair Production Application
Client Secret: The matching Client Secret
Warehouse ID: The Warehouse ID for the corresponding warehouse (multi-warehouse stores only)
4.3 Connection settings
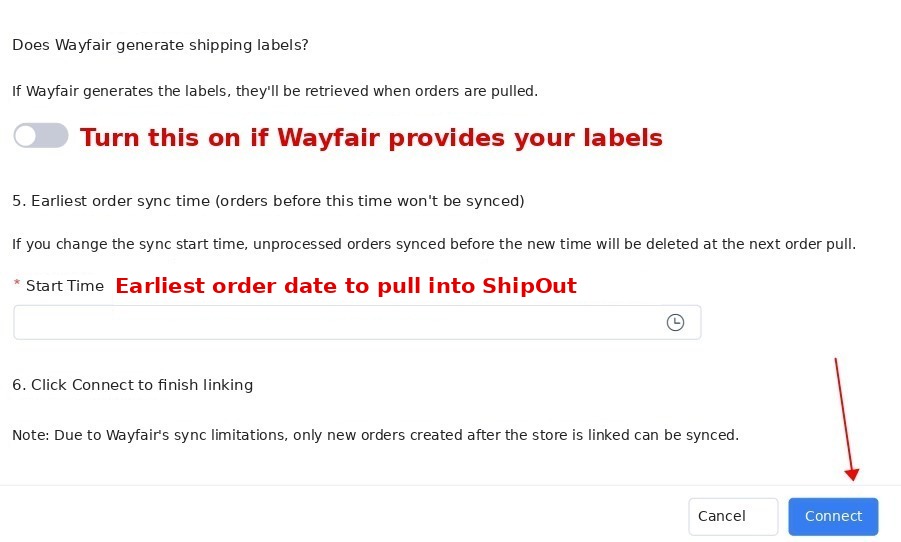
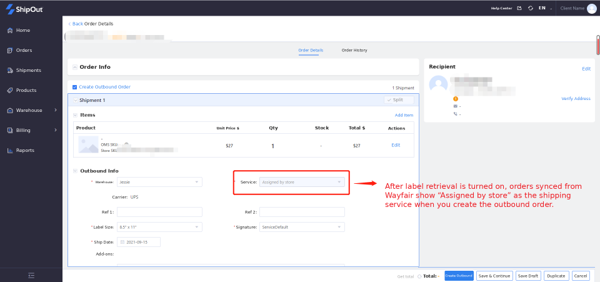
Retrieve Wayfair shipping labels If your shipping labels are created in Wayfair and you want ShipOut to retrieve them, turn on
Does Wayfair generate shipping labels? When this is on, ShipOut retrieves the labels already generated by Wayfair.
Order sync start time We recommend setting the start time to the time you link the store. Avoid choosing an earlier date — orders you’ve already processed may be pulled into ShipOut again.
5. Settings to Complete After Linking
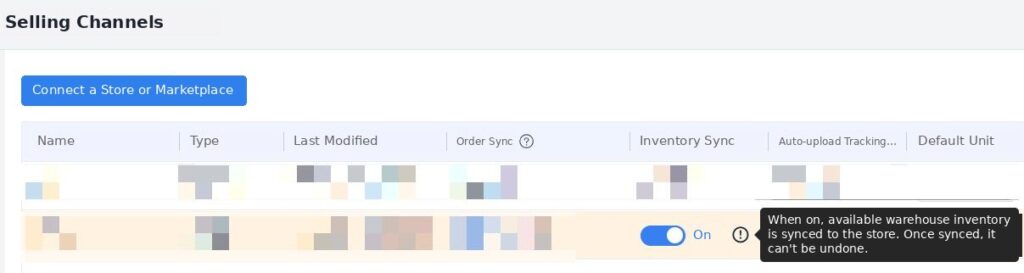
5.1 Turn on automatic inventory sync
After linking Wayfair, you can turn on automatic inventory sync. When it’s on:
Whenever a product’s Available Qty changes, ShipOut sends an inventory update for that product to Wayfair.
Turning it on does not sync all of your inventory automatically.
After linking for the first time, you need to sync all of your inventory manually once (see 5.2).
If automatic inventory sync is off, ShipOut will not send inventory updates to Wayfair when Available Qty changes.
5.2 Sync all inventory for the first time
After you link the store, we recommend manually syncing all product inventory once:
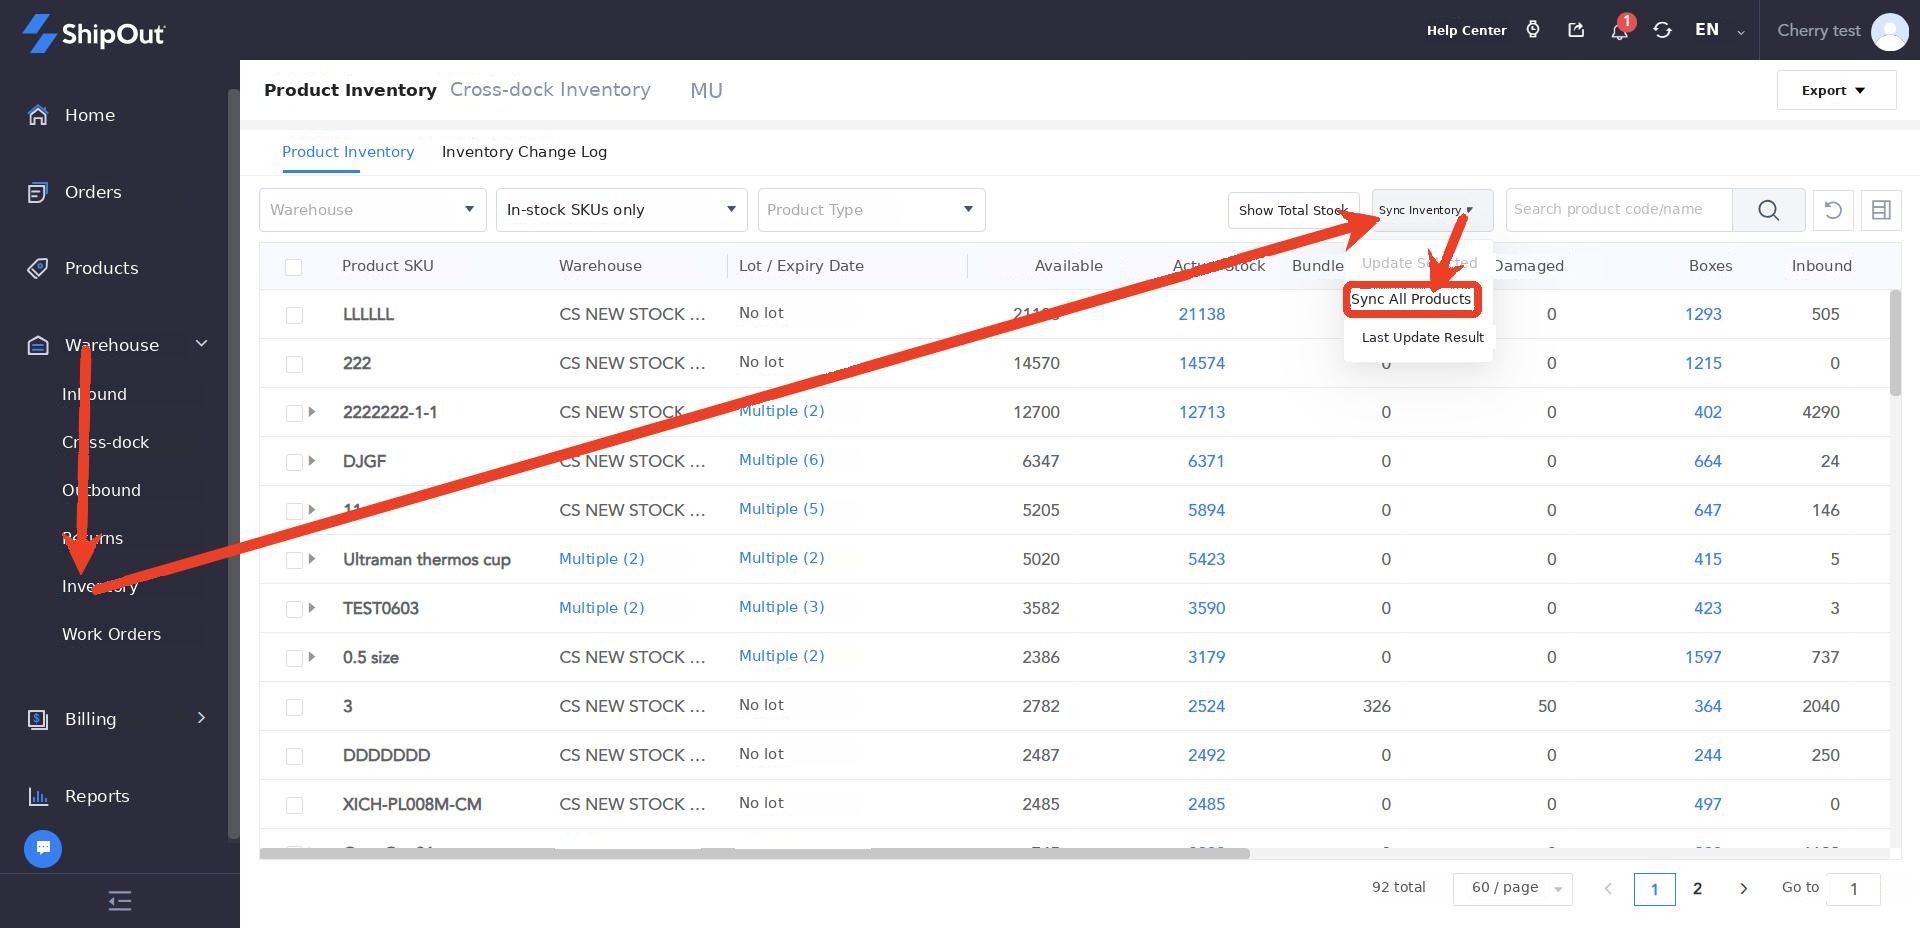
Go to the Inventory
Select the products you want to sync.
Click Sync Inventory, then choose Update Selected to send the products you selected, or Sync All Products to send your full inventory. You can check the outcome under Last Update Result.
ShipOut sends the inventory to Wayfair in one batch. After that, automatic inventory sync handles day-to-day changes.
6. Wayfair Shipping Label Setup
There are two ways to handle Wayfair shipping labels. Decide which one you’ll use before you continue.
Option 1: Retrieve labels already created in Wayfair
If your labels are created in Wayfair:
Link (or re-authorize) your Wayfair store.
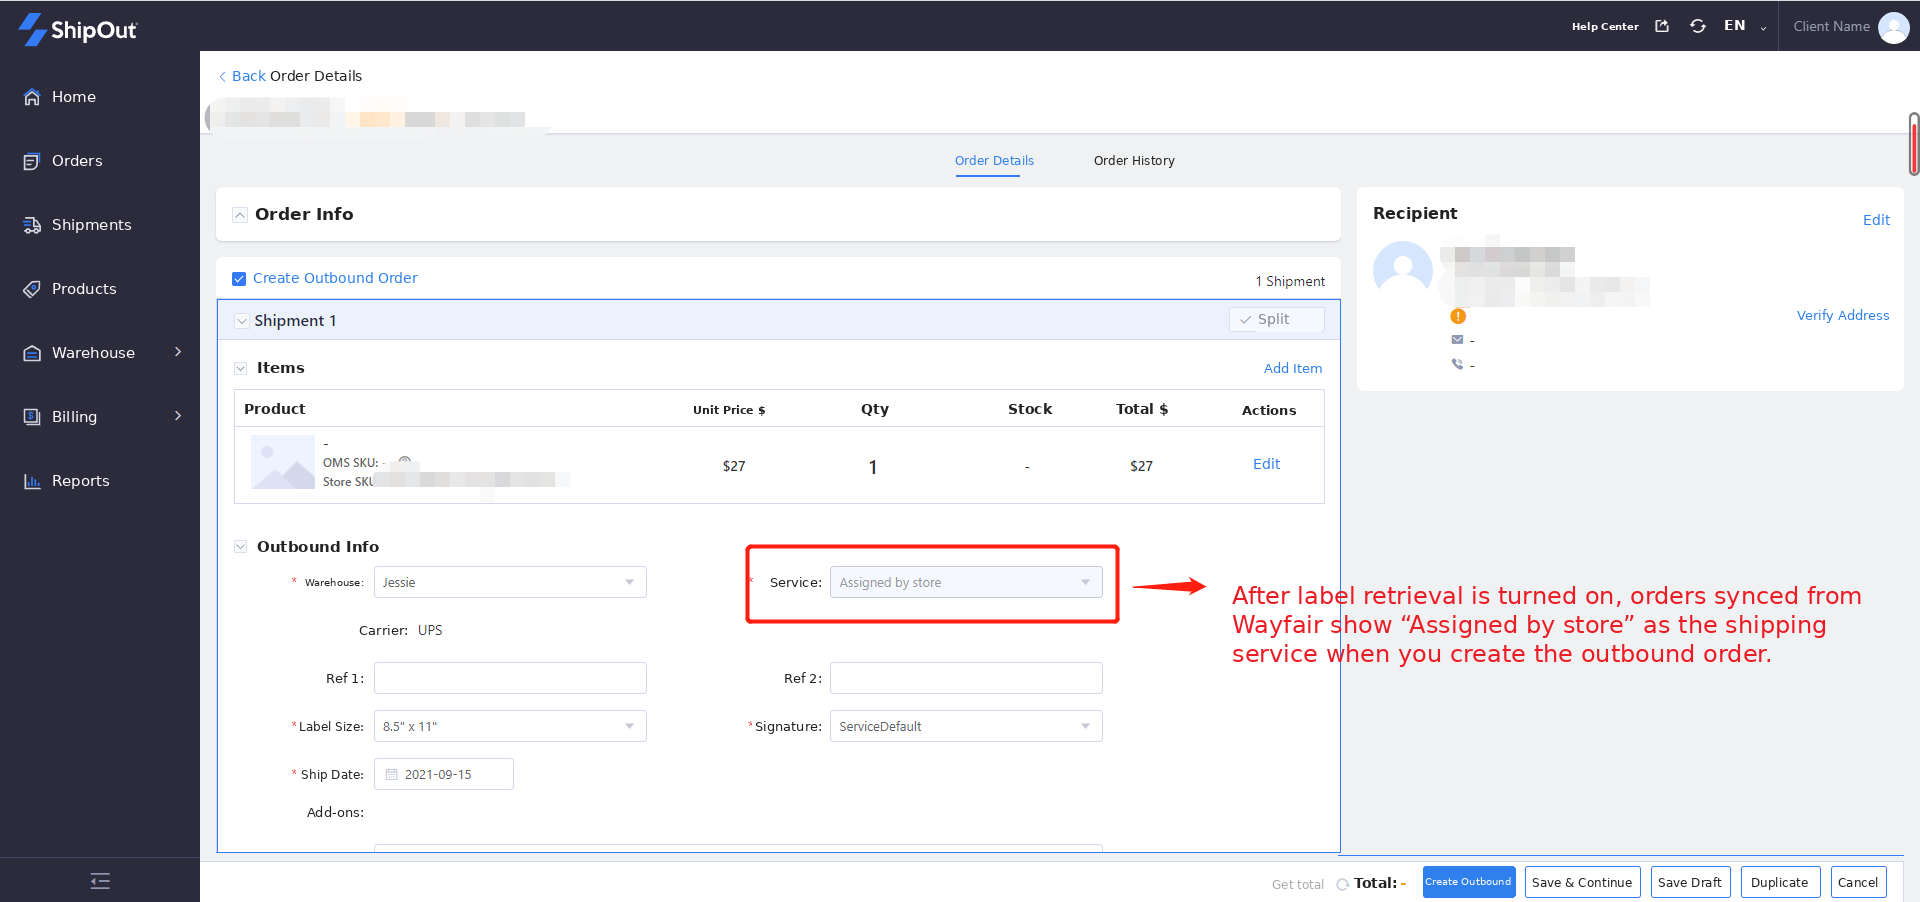
Turn on Does Wayfair generate shipping labels?
ShipOut retrieves the labels Wayfair has already generated.
You don’t need to create shipping labels again in ShipOut.
Option 2: Create labels in ShipOut, billed to Wayfair
If ShipOut should create the labels and bill the shipping cost to Wayfair’s account, complete the following setup.
Step 1: Link your carrier account
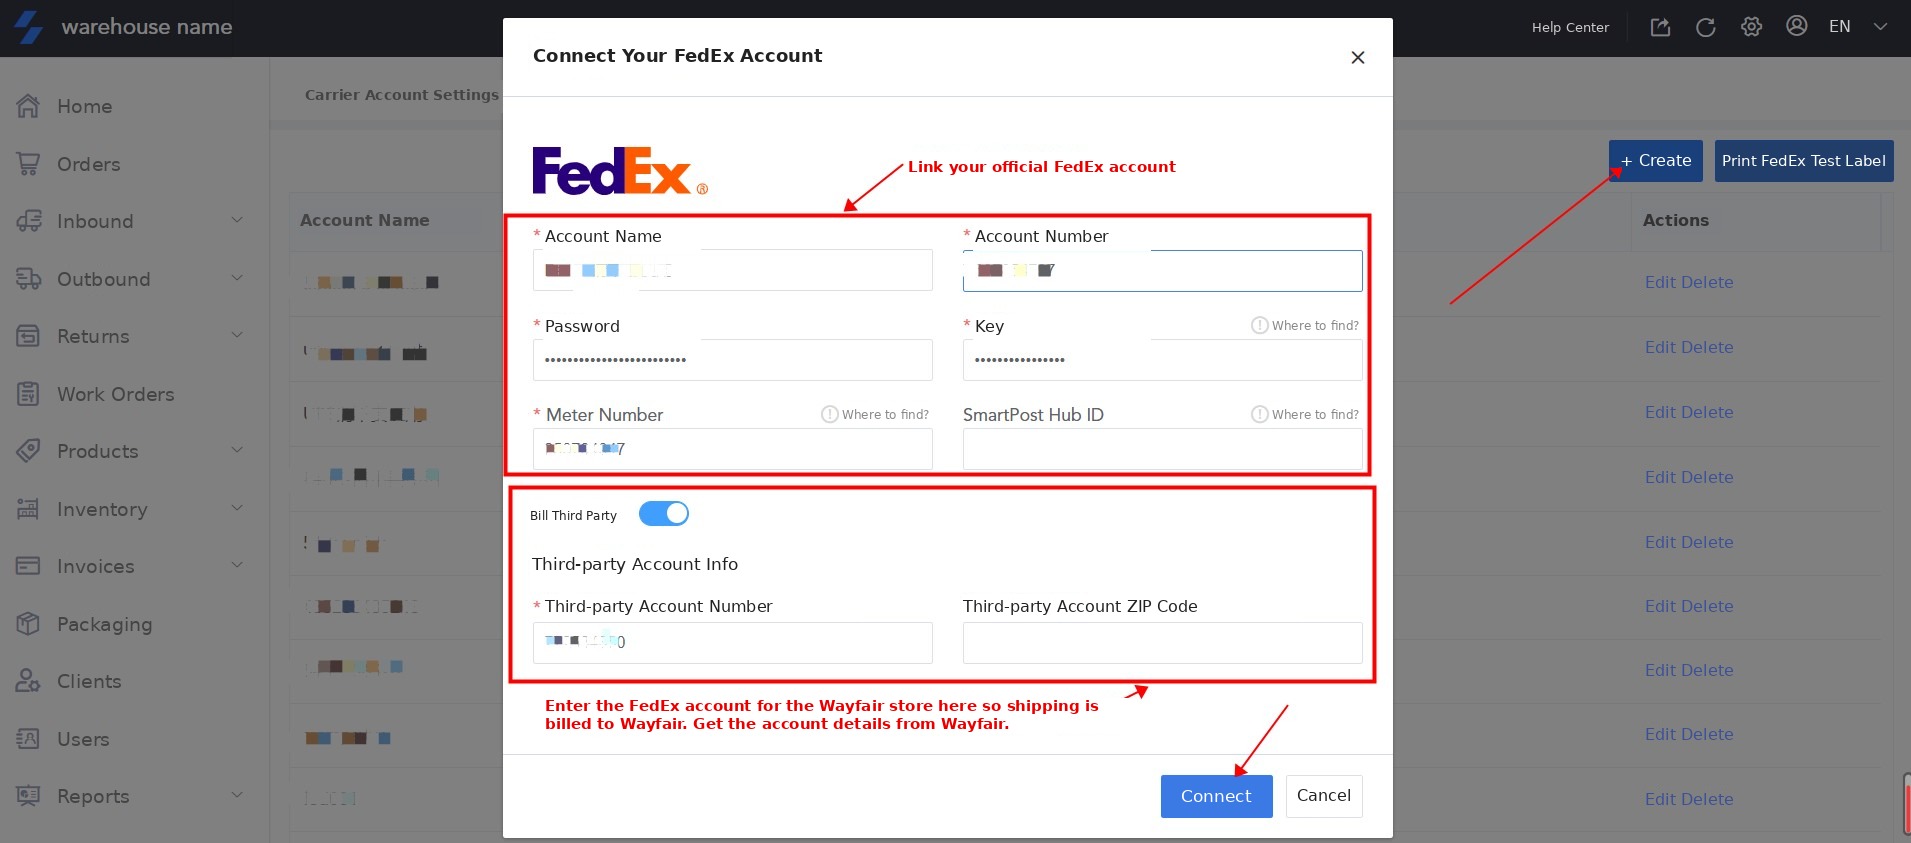
Re-link your FedEx or UPS account in ShipOut and turn on Bill Third Party.
Enter the third-party billing account details provided by Wayfair.
Step 2: Create a dedicated shipping service group
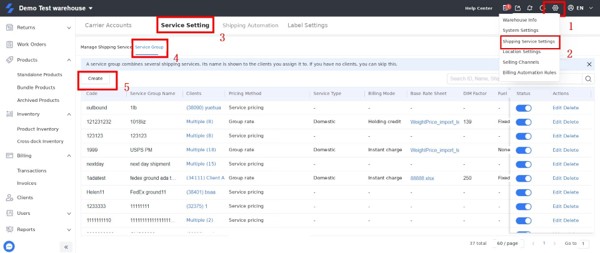
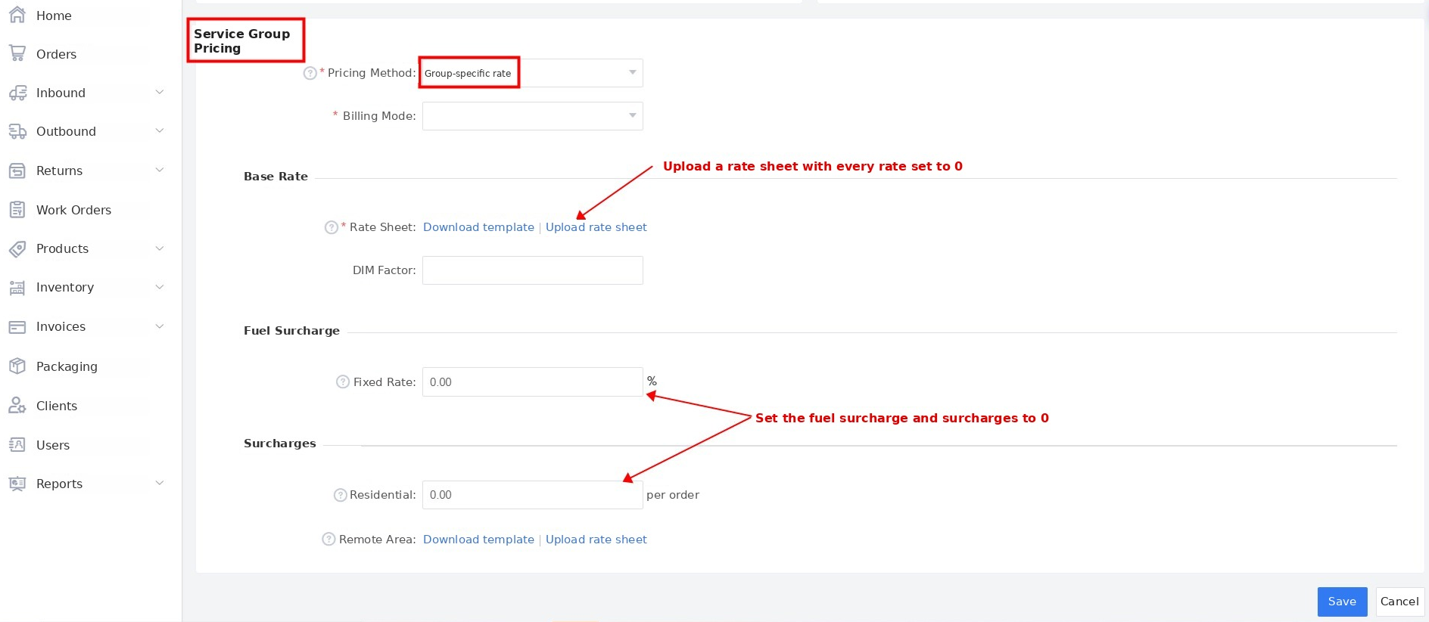
Create a shipping service group used only for this Wayfair store:
Set all rates to 0 (upload a base rate sheet with every rate set to 0).
Do not set a shipping charge for the customer.
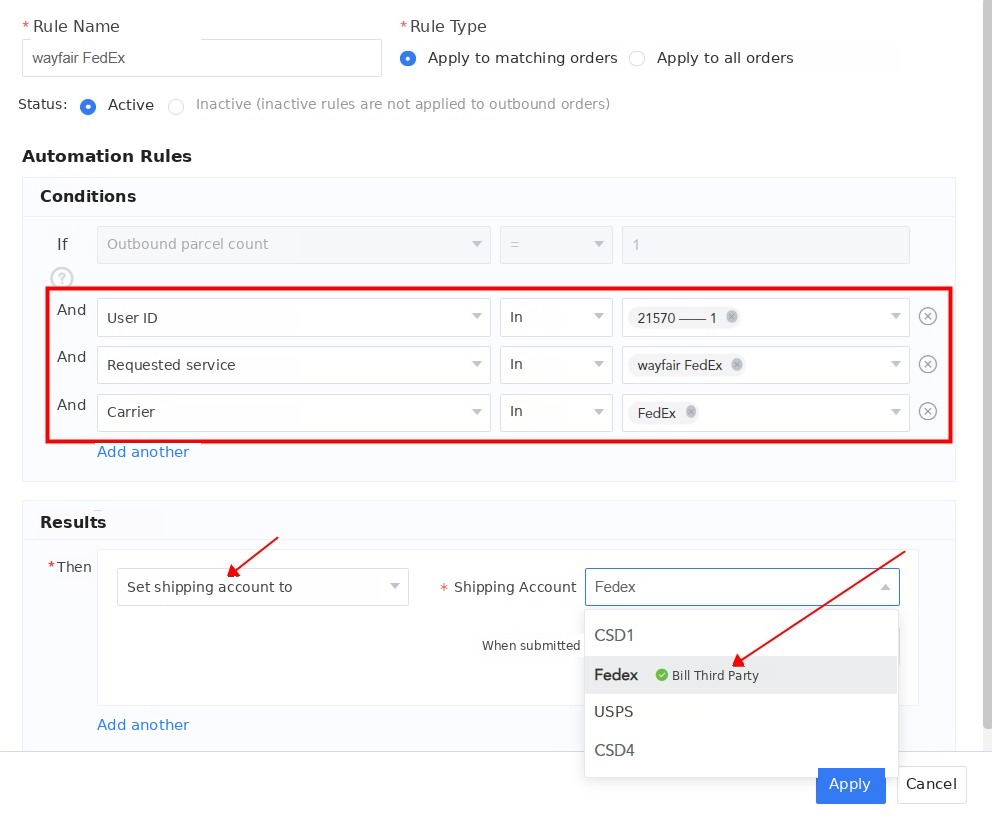
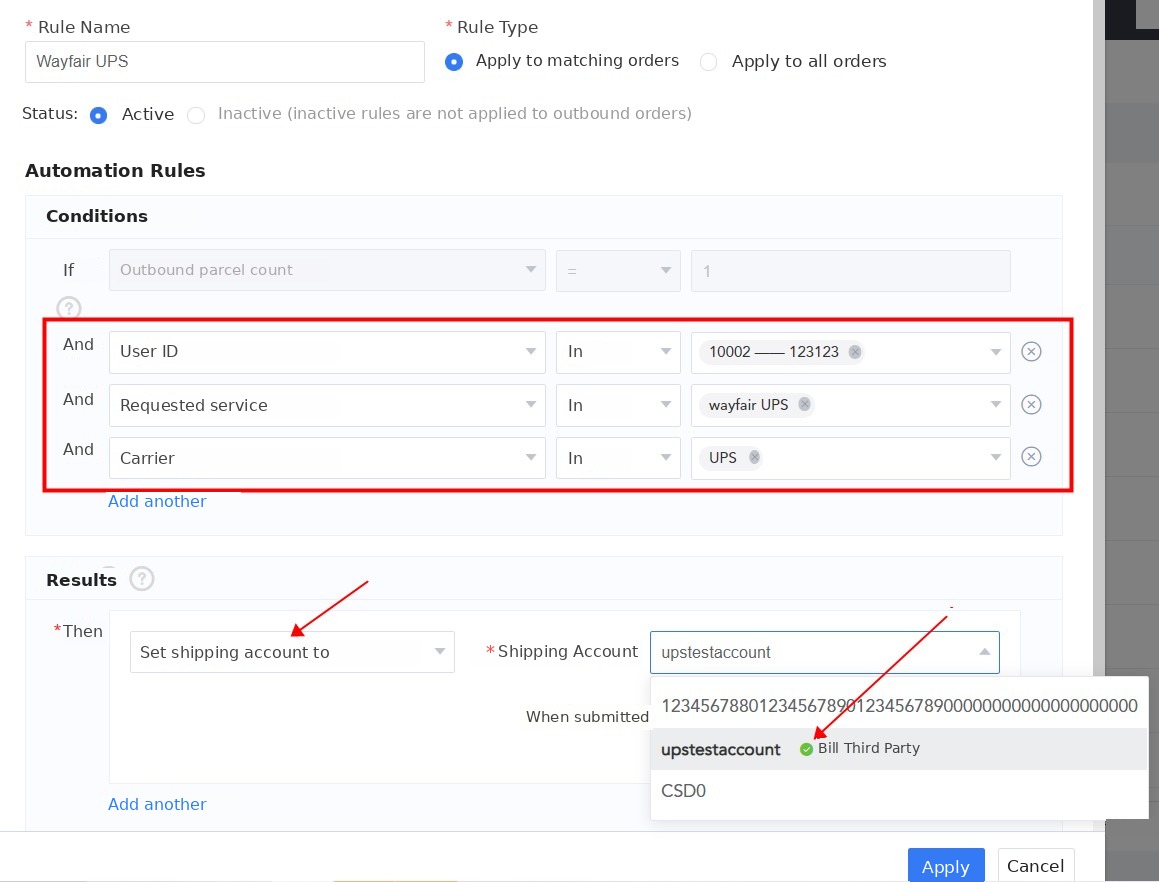
Step 3: Set up shipping automation rules
Create a shipping automation rule for this service group:
Condition: The order uses this dedicated service group.
Action: Bill the shipment to Wayfair’s third-party account.
You don’t need to choose a specific shipping service — Wayfair assigns the service when the label is created.
Example: if Wayfair ships with both FedEx and UPS, set up two service groups and two rules, as shown below.
Step 4: Submit outbound orders When you submit an outbound order for a Wayfair order, you must select this dedicated shipping service group.
We recommend testing with one order first. If the setup is correct, the outbound order will show:
An amount in the estimated shipping cost
A customer-paid shipping cost of 0
The label billed to Wayfair’s third-party account
7. Checklist Before You Start Processing Orders
Before you go live, confirm each of the following:
These permissions are enabled on your Wayfair Production Application:
Inventory
Purchase Order
Advance Ship Notice (ASN)
Registration
Shipping Label
Your Supplier ID is correct.
Your Warehouse IDs match your ShipOut warehouses.
Store aliases are mapped to the Supplier Part Number.
The order sync start time is set to the time you linked the store (or the earliest order date you need).
You’ve chosen your Wayfair shipping label method:
If retrieving Wayfair labels: Does Wayfair generate shipping labels? is turned on.
If ShipOut creates the labels: the third-party billing account is set up, the dedicated Wayfair shipping service group is created, and the matching shipping automation rules are in place.
All product inventory has been synced manually once after linking.
Automatic inventory sync is turned on (if needed).
You’ve tested one order.
Orders are marked as shipped in ShipOut only after they’ve actually been picked and packed, because this is what sends the ASN to Wayfair.