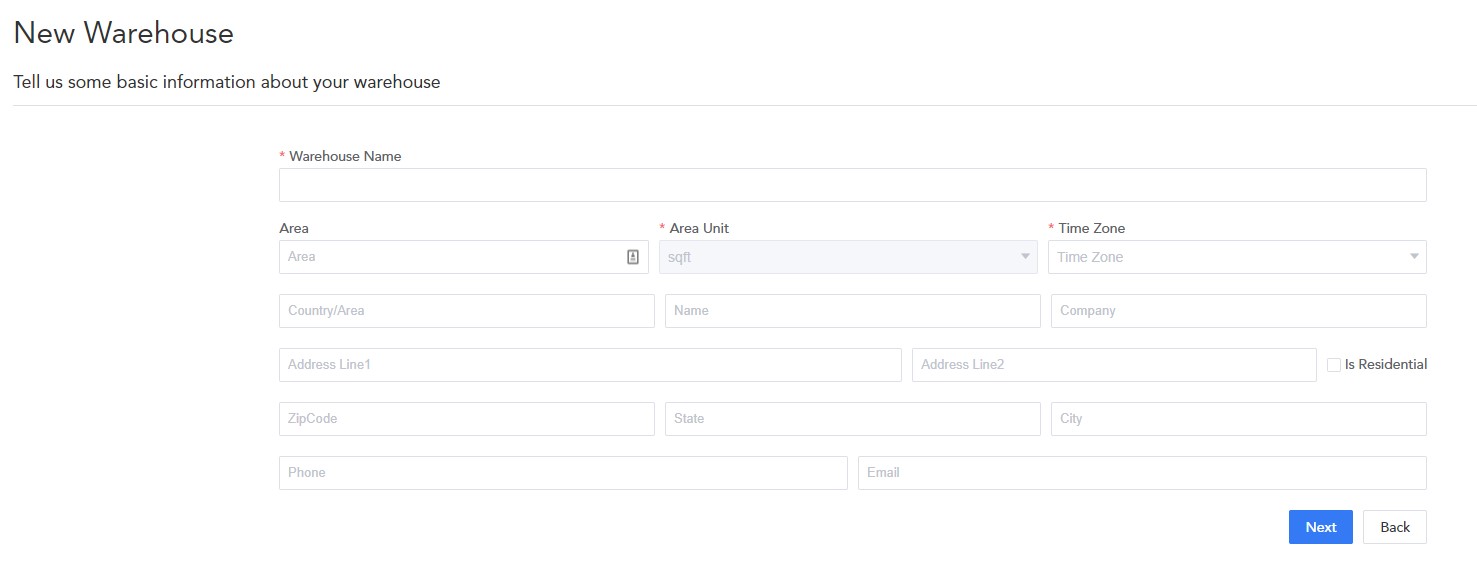
Enter the warehouse name, address, contact number, and time zone.
Click “Next.”
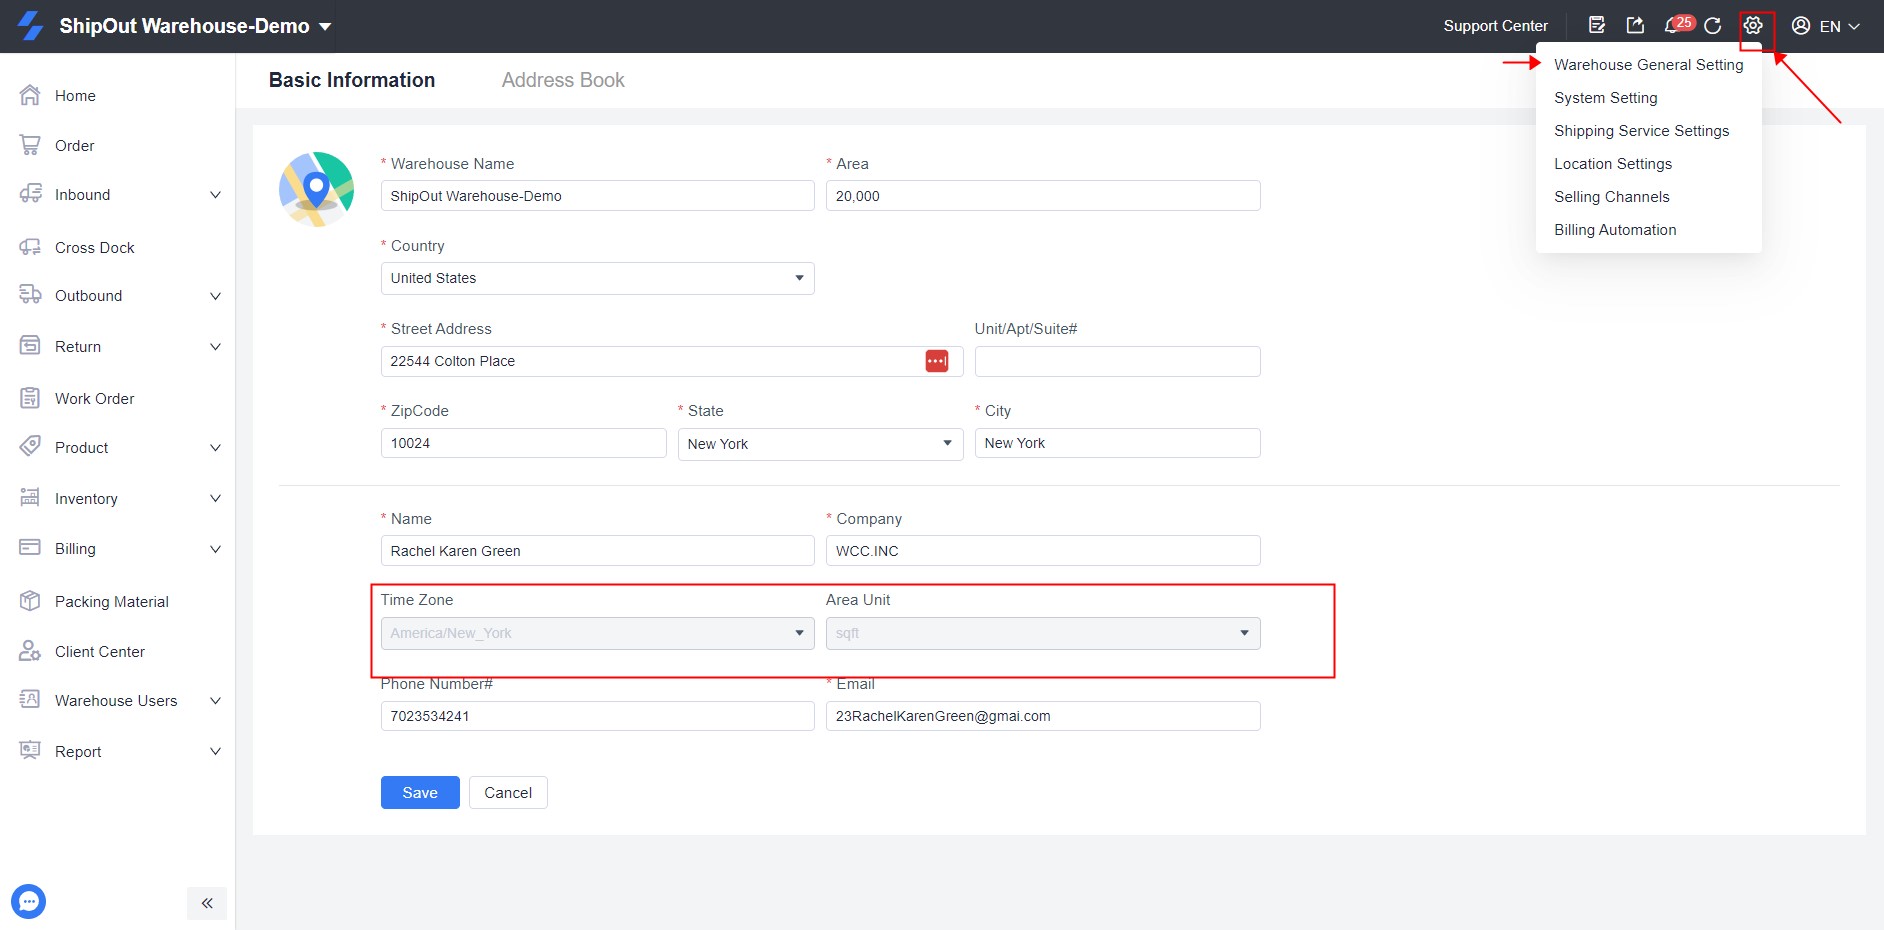
Note: You can modify the warehouse information later by going to “Settings” > “Warehouse Information” > “Edit” > “Save.” If you need to purchase additional warehouses, please contact ShipOut customer service.
2) The time zone chosen when the warehouse was created is no longer changeable.
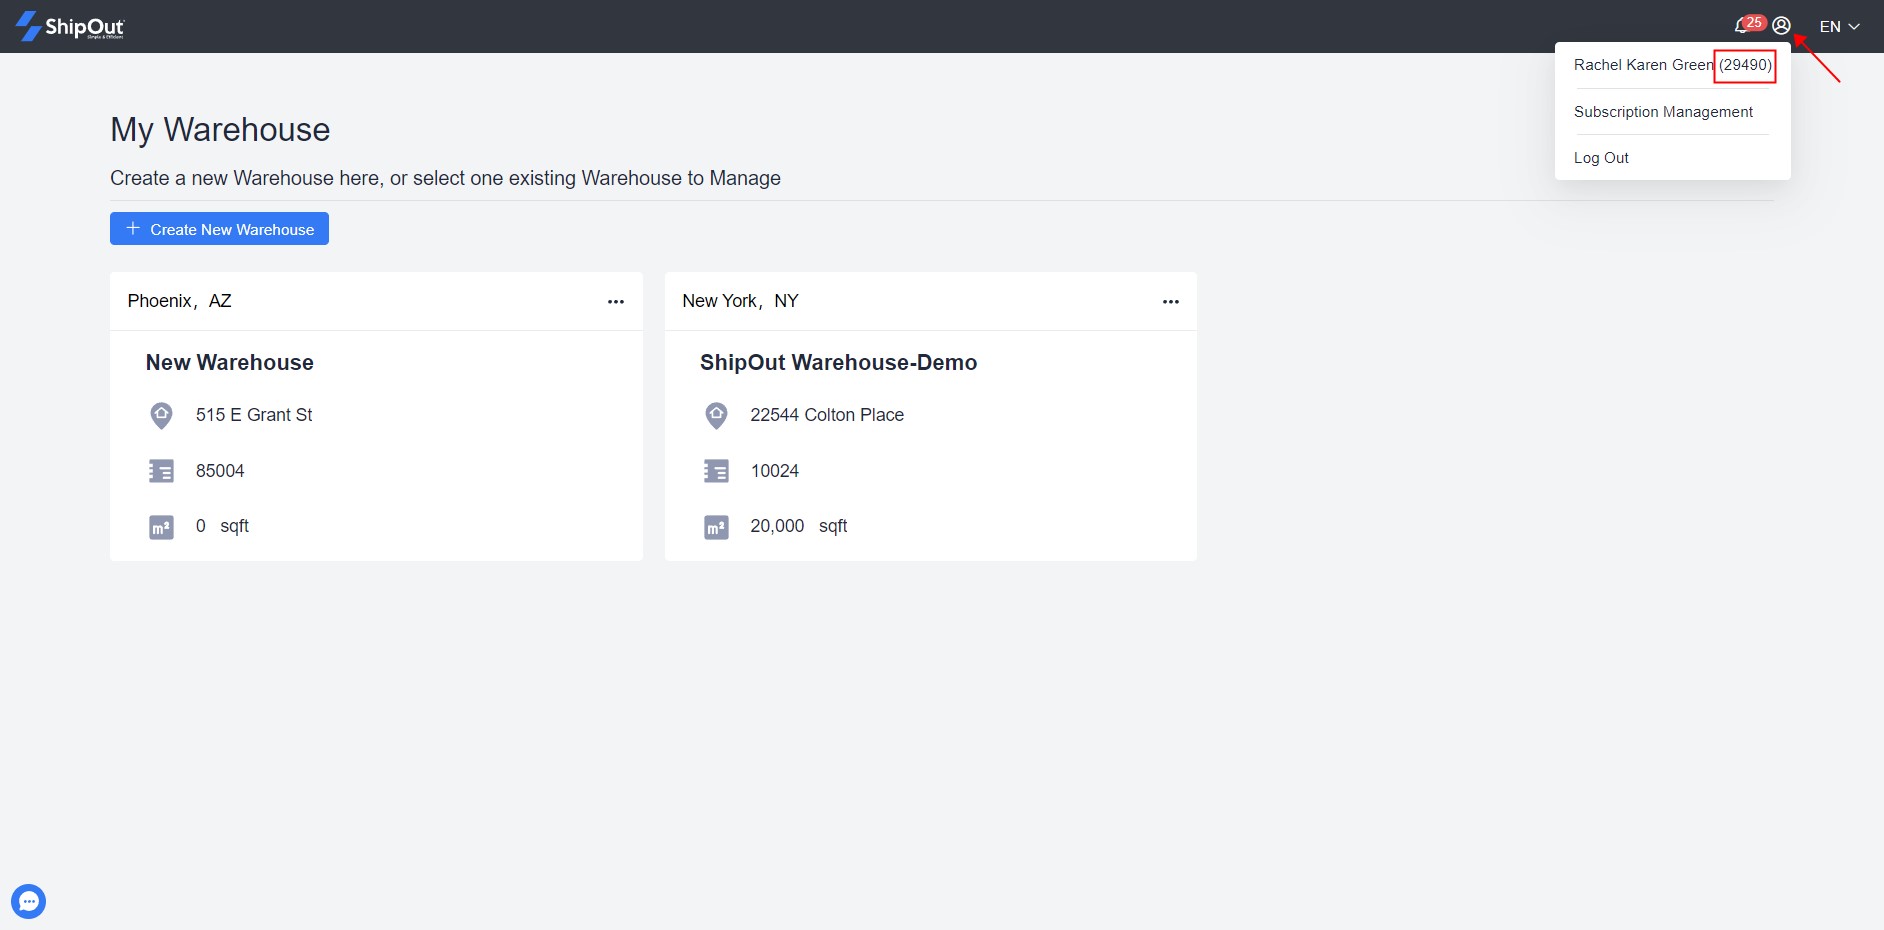
3) Definition of Warehouse ID: In the warehouse management system (WMS), an organization can own multiple warehouses. Each warehouse will have the same organization name and organization ID, even if the warehouse names and addresses are different. The warehouse ID will be the same for all warehouses within the same organization.
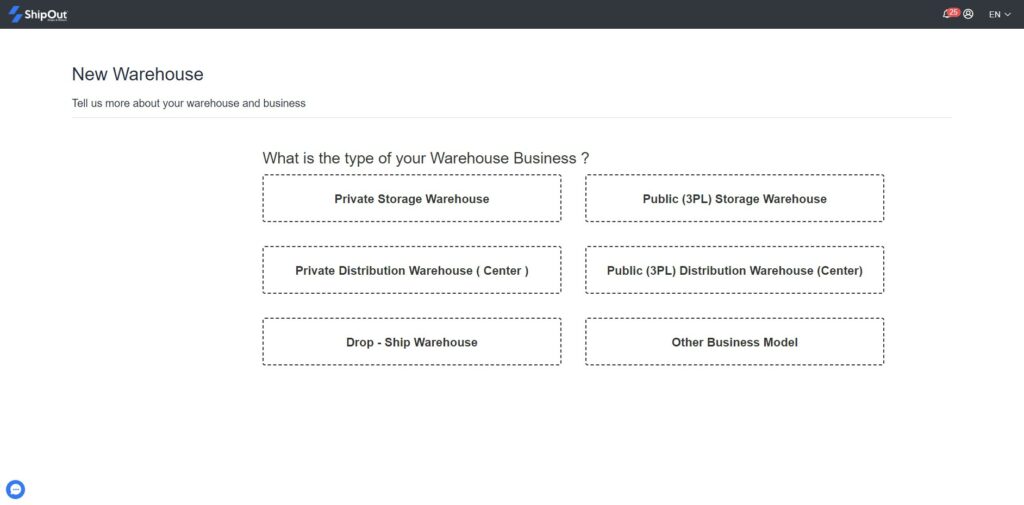
2. Select the warehouse’s type.
Self-operated storage warehouses, also known as private self-operated warehouses or self-delivery warehouses
Third-party storage warehouses are warehouses that are owned and managed by a separate company and are used for business types such as dropshipping, cross docking, and relabeling.
Self-operated overseas warehouses can be used for retail or cross docking
Third-party service overseas warehouses are owned and managed by a separate company and can be used for parcel delivery or cross docking.
Direct delivery warehouses, also known as dropshipping warehouses
Custom warehouses have specialized functions, and there are other business models for warehouses as well.
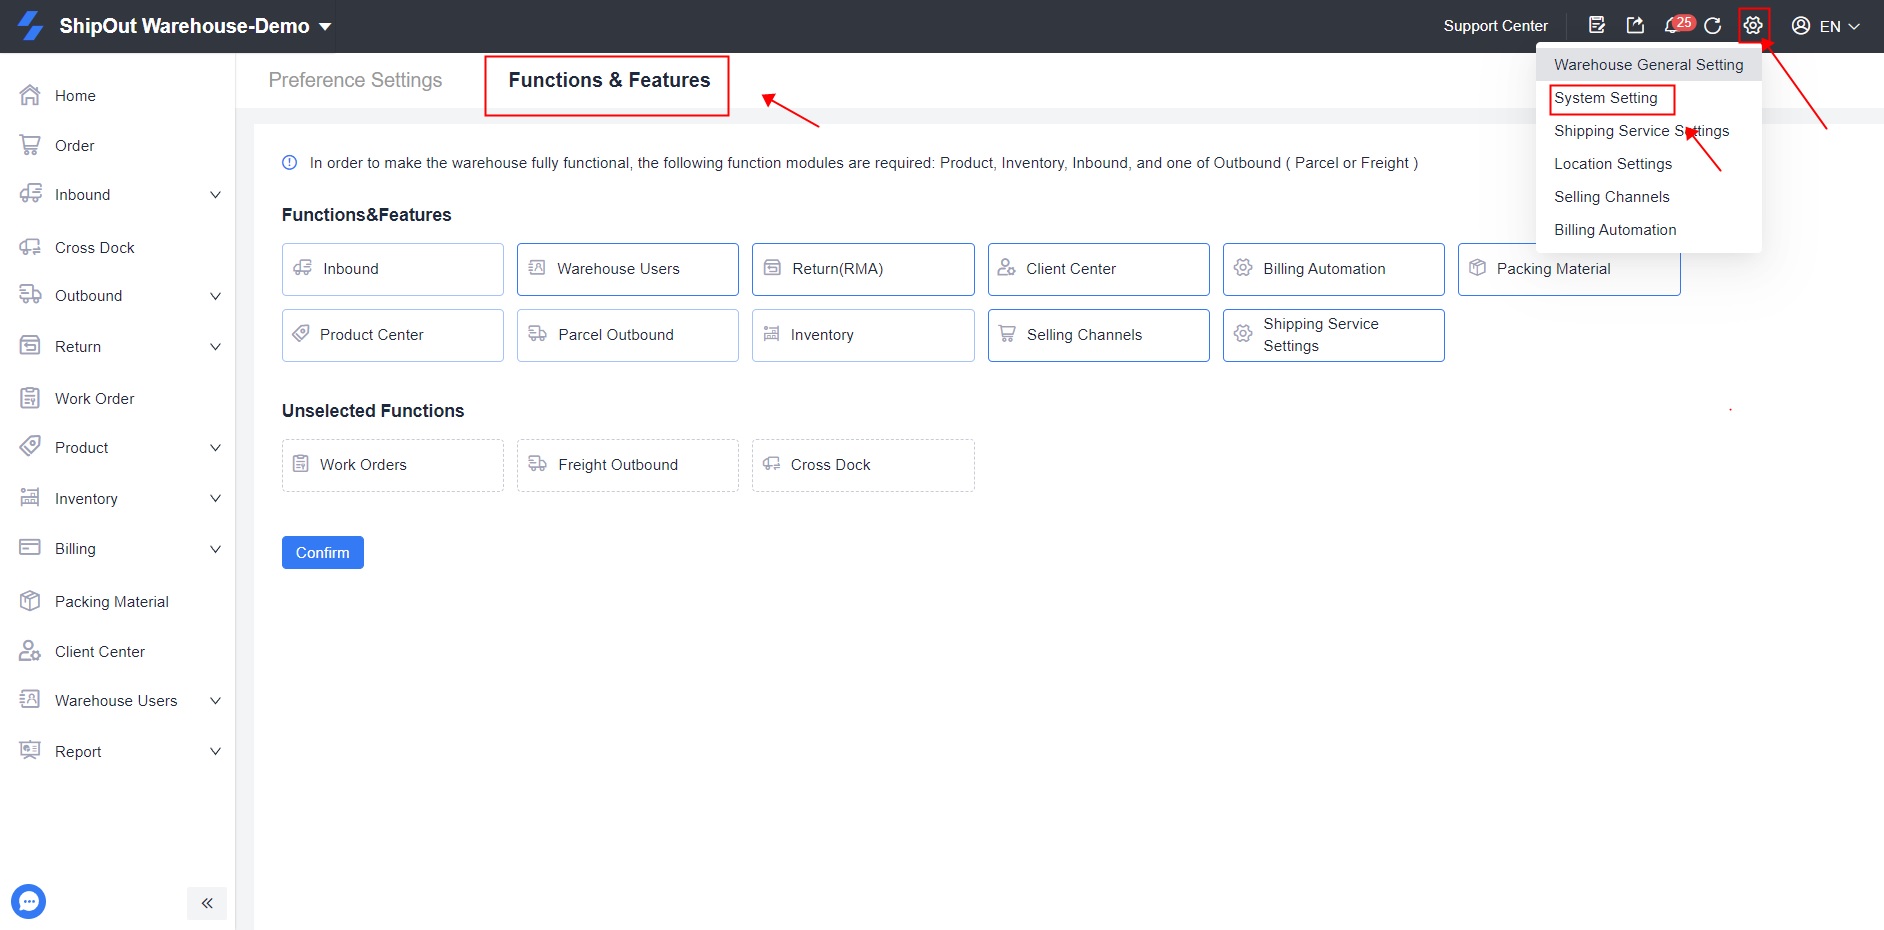
3. Custom warehouse function module
The default modules include:
Freight Outbound: This module is primarily used for transferring large quantities of full-container or full-pallet shipments. The system supports the transfer of incoming and returned goods that need to be transferred out of the warehouse. This is often used in cases where there is a need to transship through Kapai or when using Amazon Express to transship FBA.
Inbound: This module is used to create a warehouse-in plan and allows the warehouse to receive goods and increase inventory before carrying out a warehouse-out.
Product center: This module is suitable for small package outbound and requires corresponding product information.
Inventory: This module is used for inventory management and helps users understand the dynamic changes in inventory.
The custom selection module includes:
Warehouse Users: This module allows users to add employee login accounts, configure employee roles, and assign functional modules.
Client center: This module is suitable for third-party warehouses and allows OMS end users to participate in independent operations such as product storage and delivery.
Billing automation: This module is suitable for third-party warehouses and enables intelligent billing, supporting the setting of billing rules and additional service fees for OMS end users.
Work Orders: This module is suitable for third-party warehouses and allows OMS end users to submit operational requirements for products in the warehouse.
Return (RMA): This module is used for processing returns, including FBA returns and small package returns.
Packing material: This module allows users to preset packaging materials, which will be billed when used for packing.
Parcel Delivery: This module is primarily used for selling goods on e-commerce platforms and sending them to individual users.
Shipping Service Settings: This module connects your UPS, FedEx, Stamps, or EzeeShip account API to print orders.
Selling Channels This module is used for docking with e-commerce stores and supports pulling orders from stores and returning logistics order numbers.
Cross Dock: This module is suitable for fast-in and fast-out bulk goods. Customers can create a transshipment order, and the warehouse can receive the goods and send them directly to the customer based on the information provided in the transshipment order.
Note: The business functions can be modified later as needed by going to “Settings” > “System Settings” > “Readjust Functions” > “Confirm.”