Warehouse inventory will be automatically updated with the operations of inbound and outbound, and support viewing of inbound inventory, transshipment inventory, MU inventory, and historical change records of inventory;
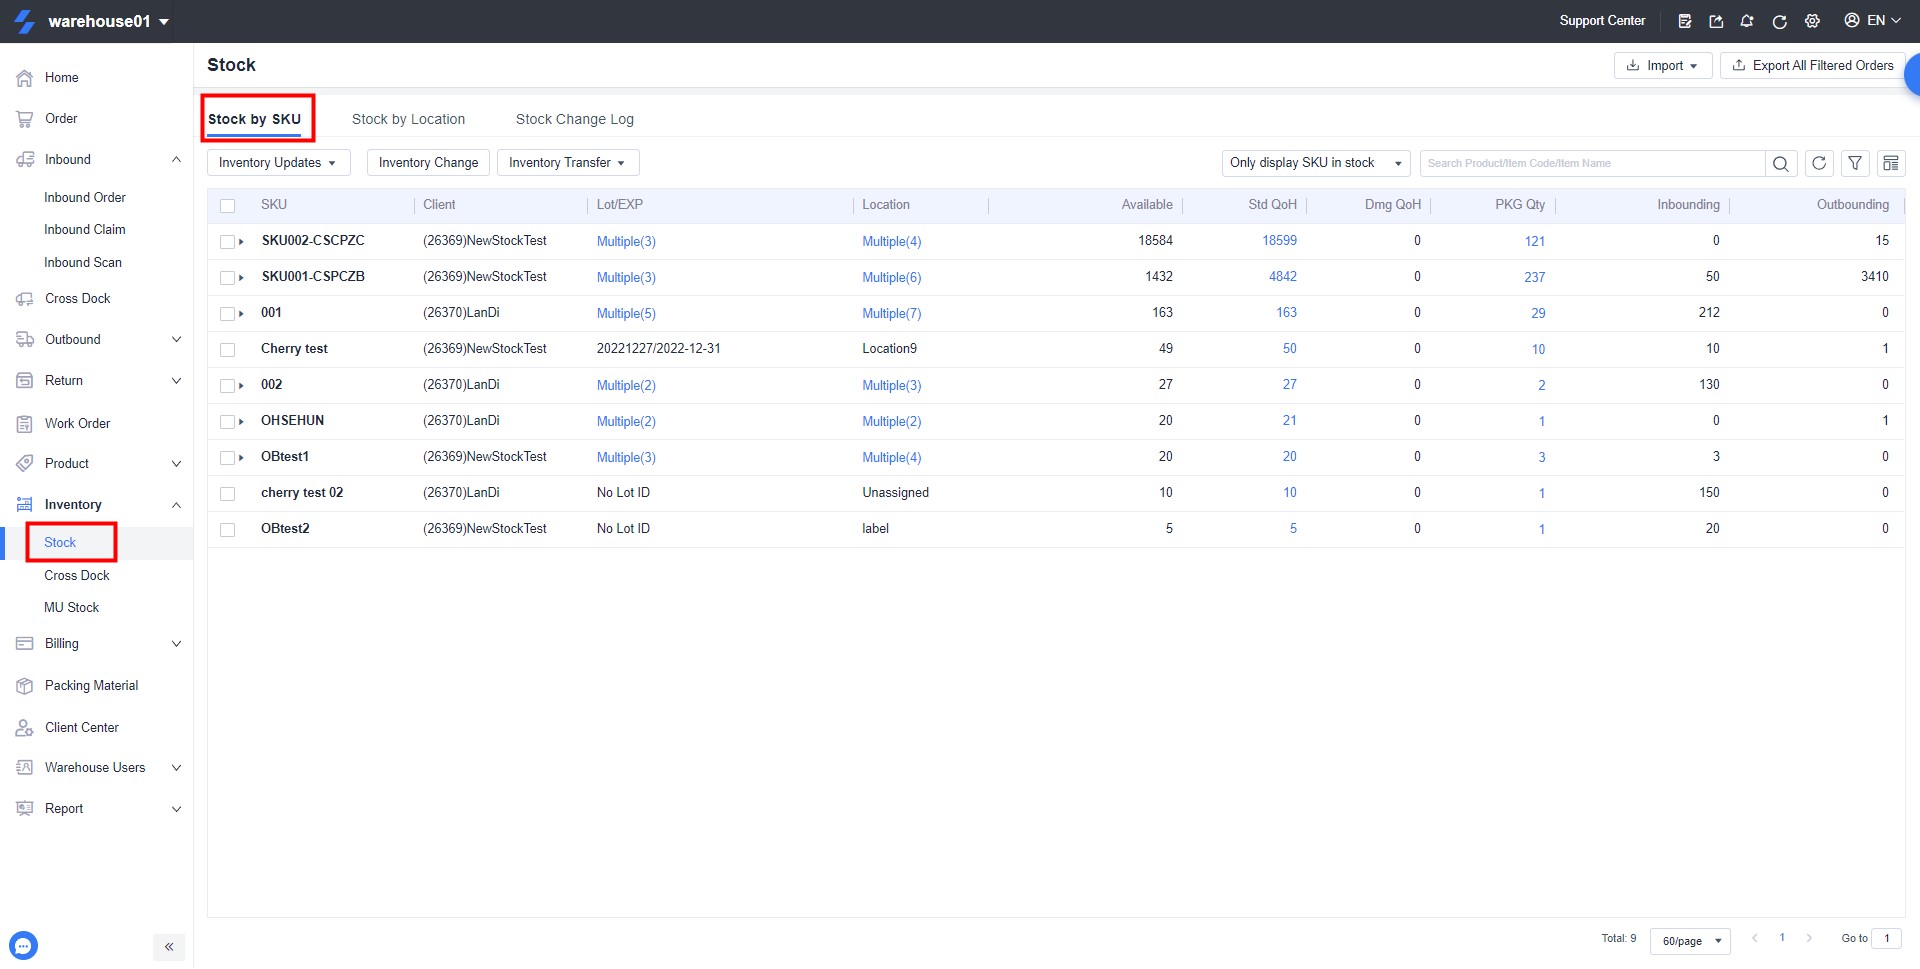
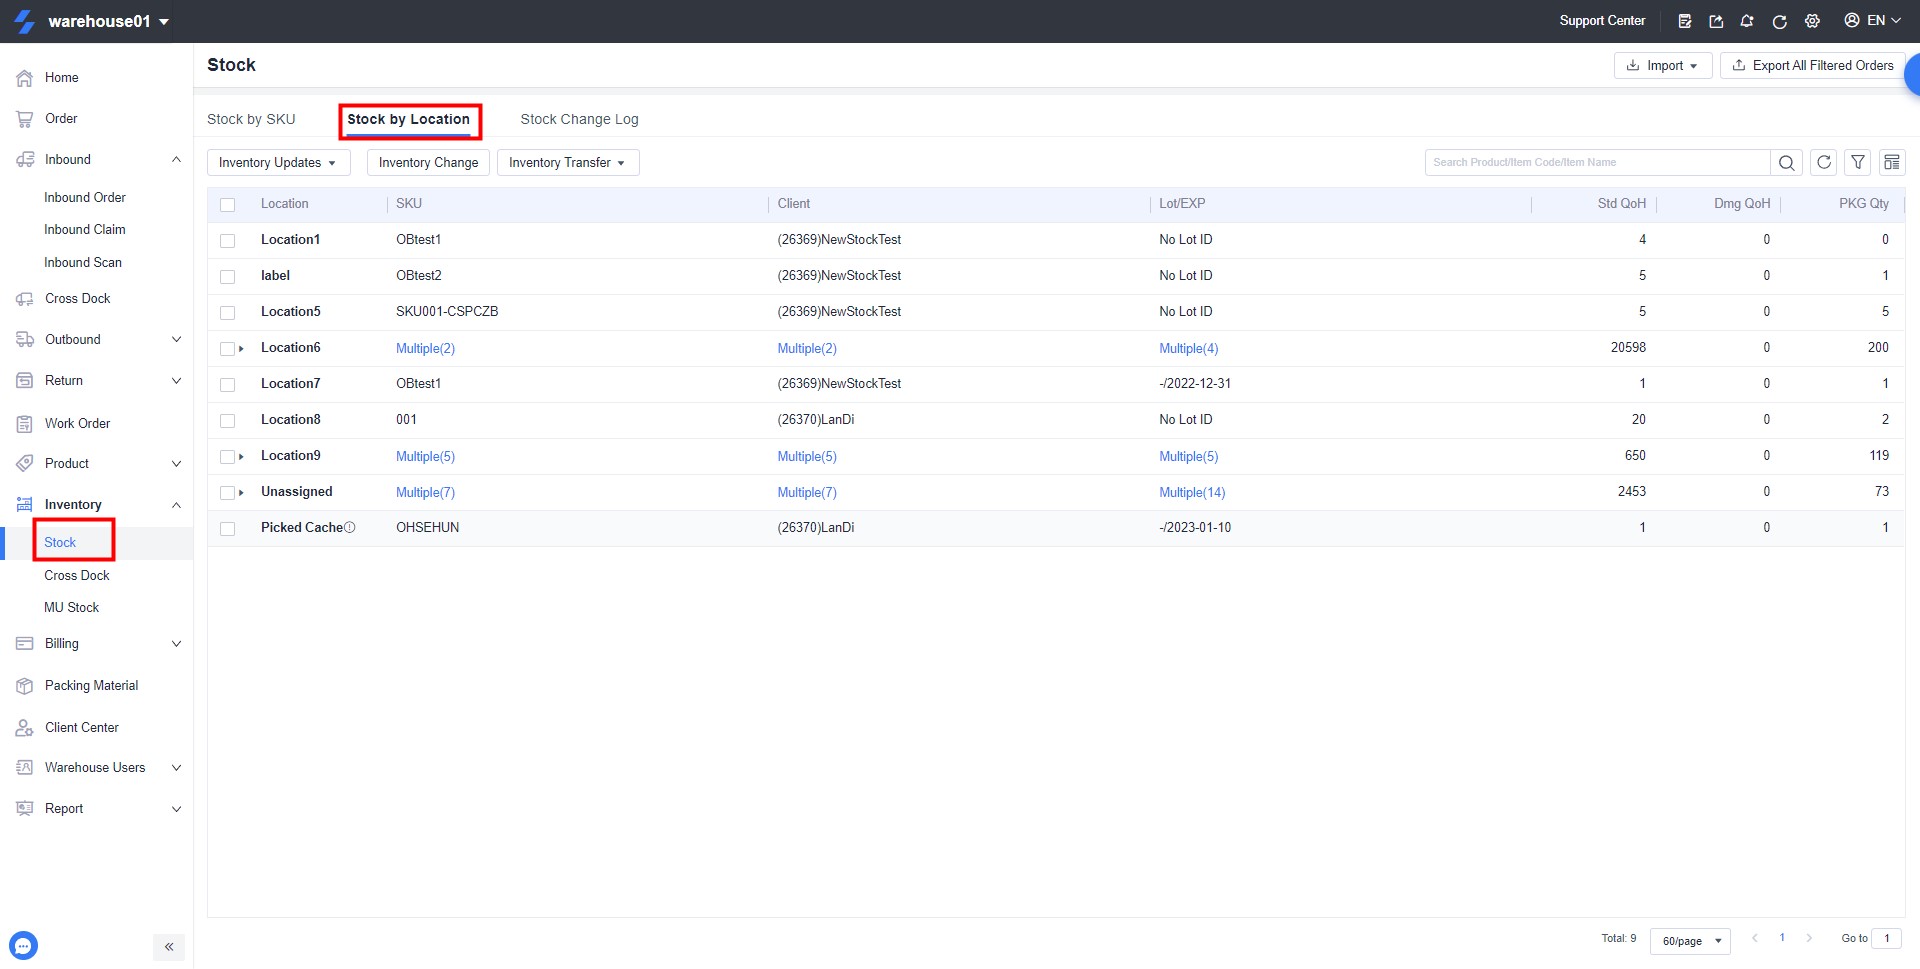
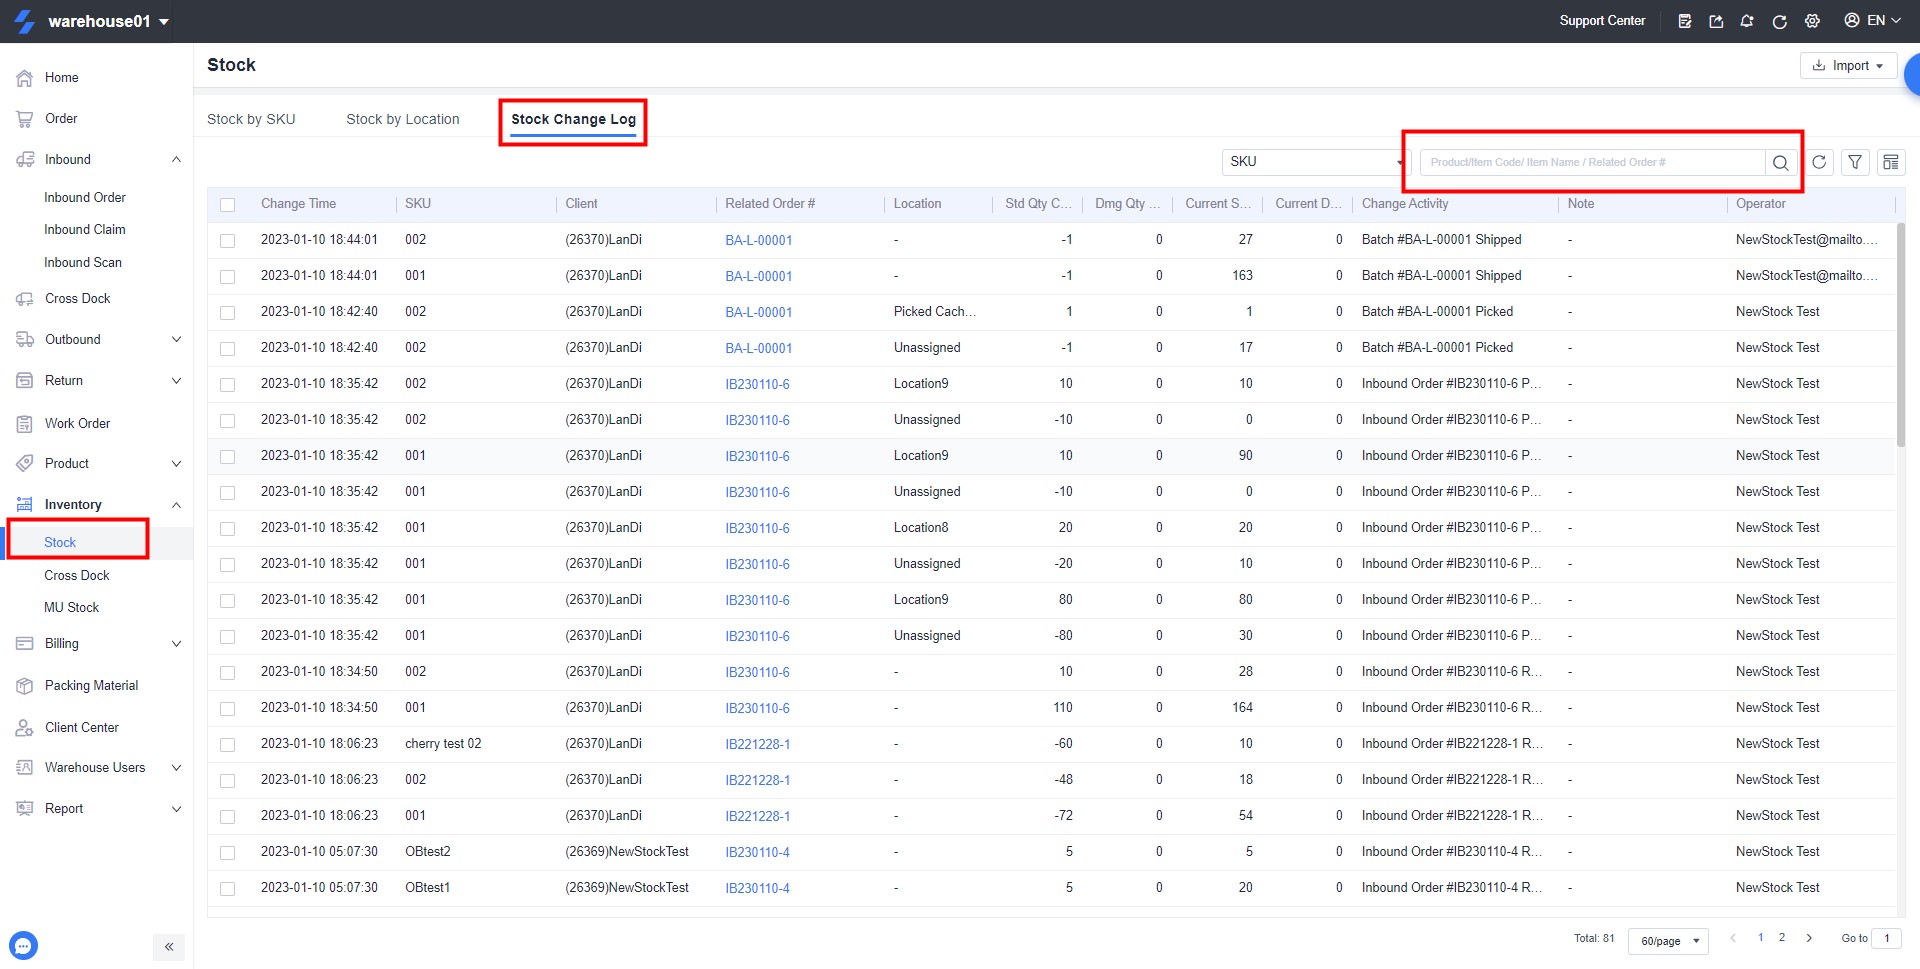
1. View product inventory and inventory change records: you can query through SKU and location
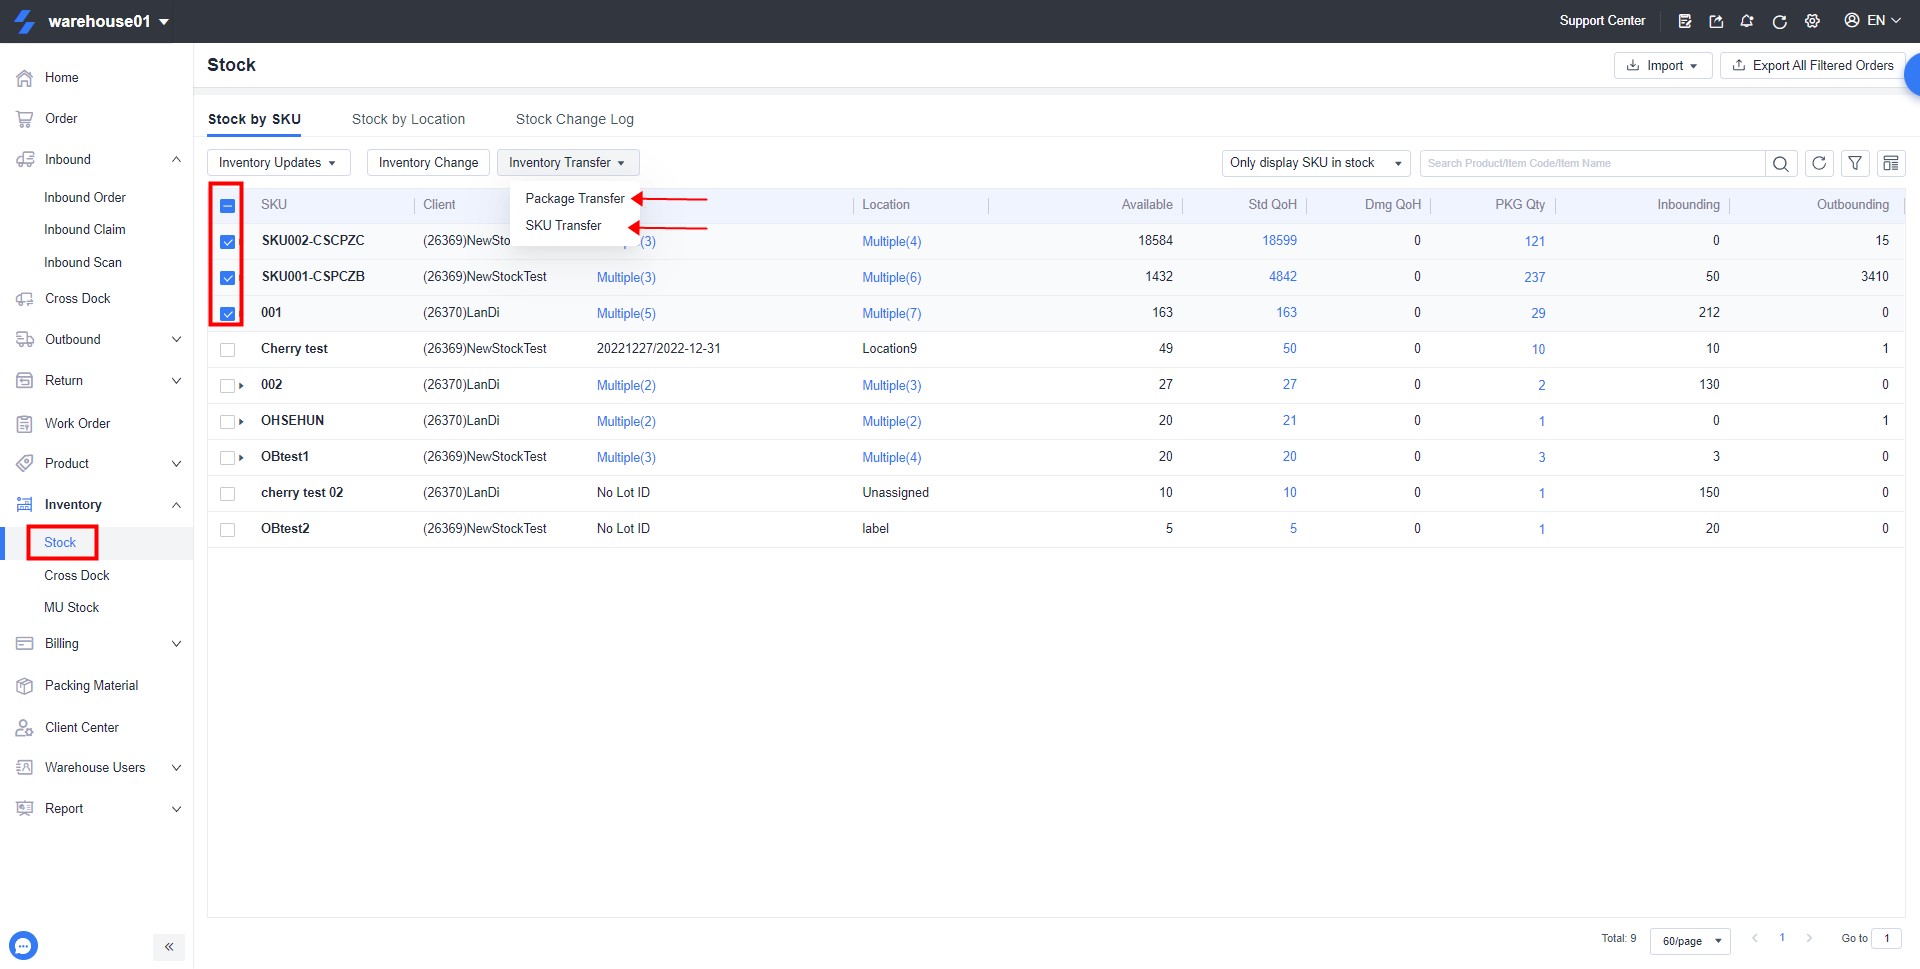
(1) View inventory by SKU: Inventory data is displayed on the basis of SKU, which is convenient for viewing the inventory of each SKU in different locations;
(2) View inventory by location: Inventory data is displayed based on location, making it easy to check the inventory of different SKUs on each location;
(3) Inventory change record: View the inventory change record of each SKU;
Notice:
“Picking area” is the unfinished inventory data of this SKU in the picking process, and the inventory on this location cannot be manually modified and adjusted.
“Cancelled storage area” is the inventory data in the outbound order canceled after picking for this SKU, and the inventory on this location can be picked and moved.
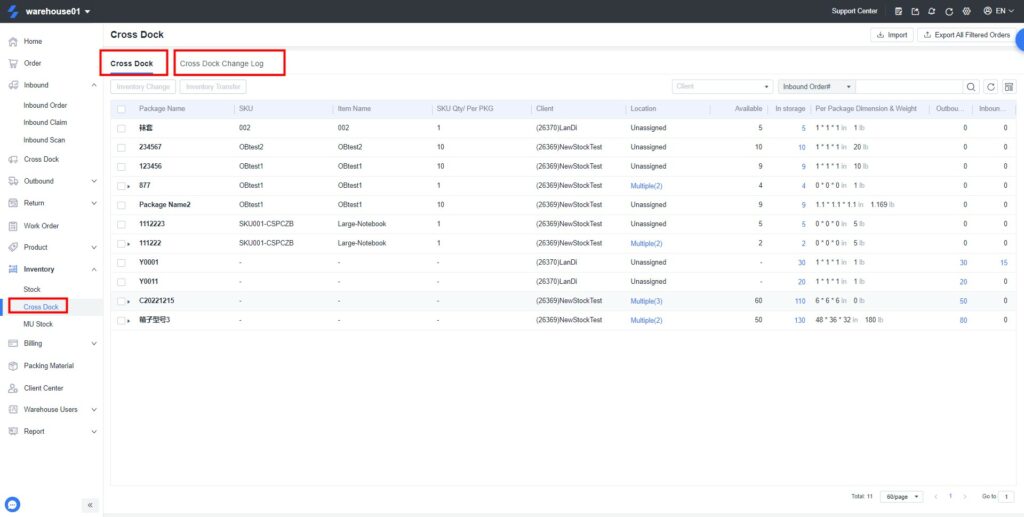
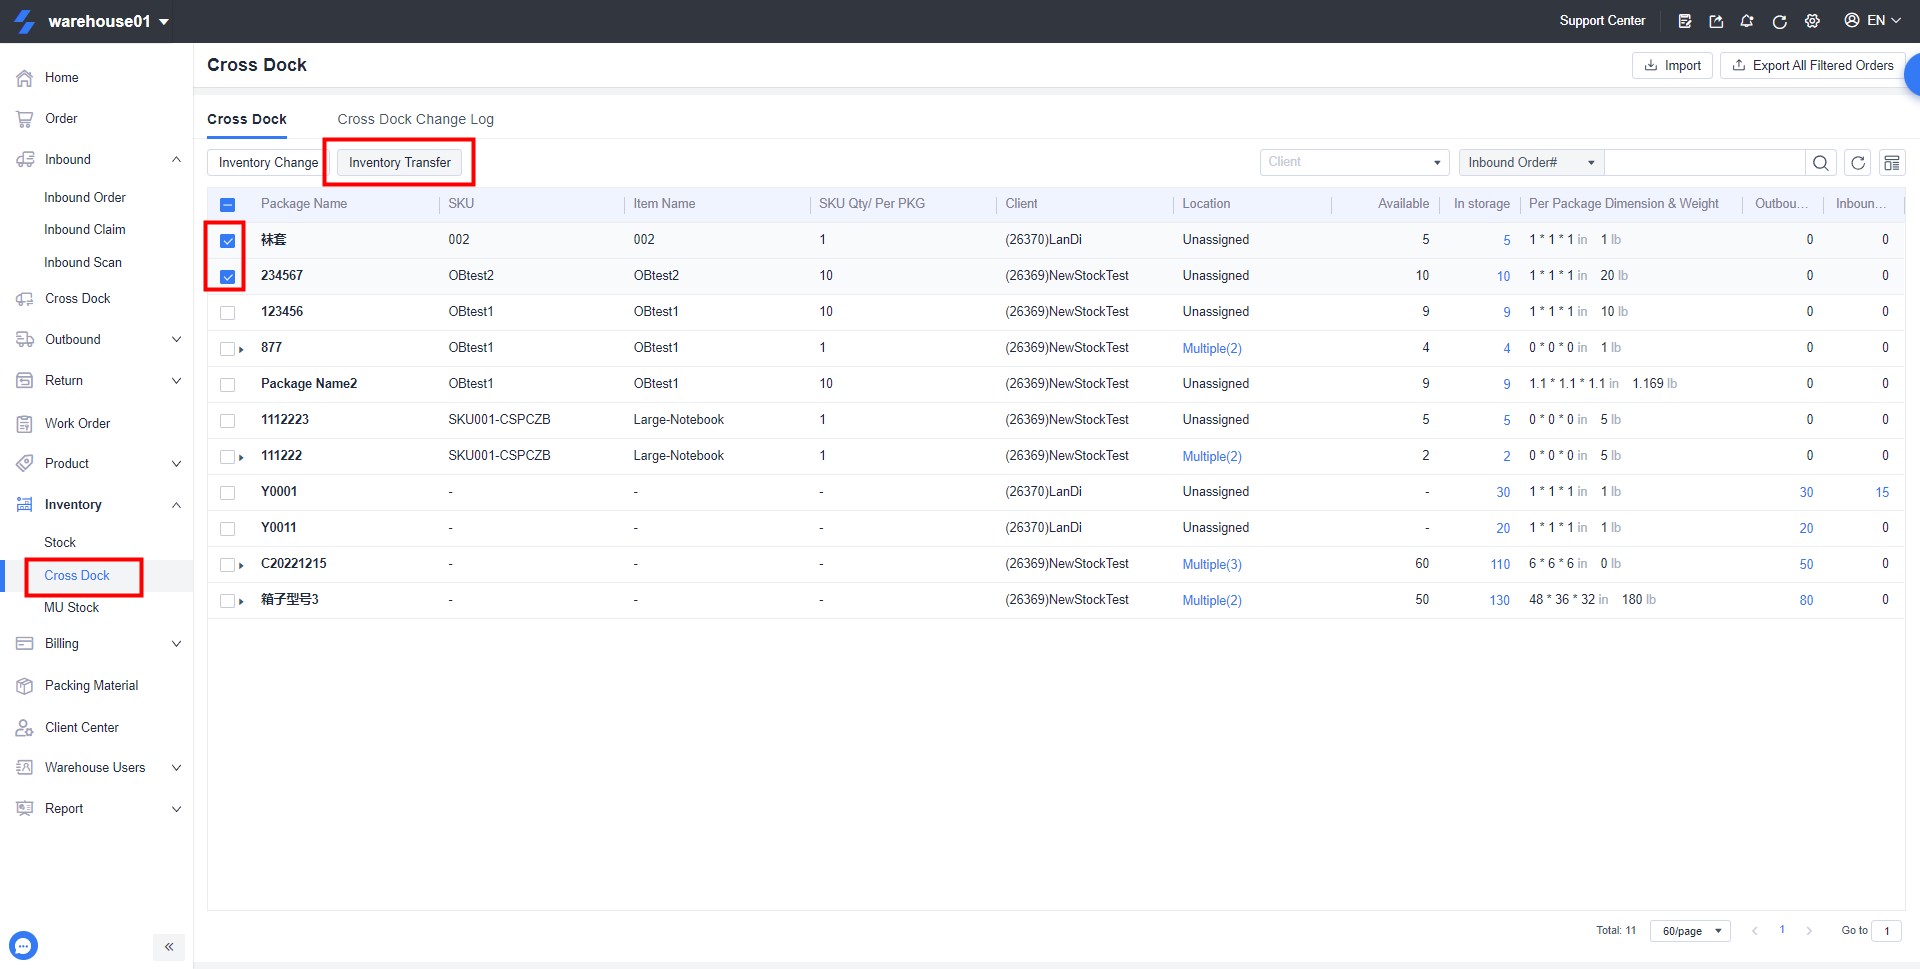
2. View Cross Dock inventory and Cross Dock inventory change log
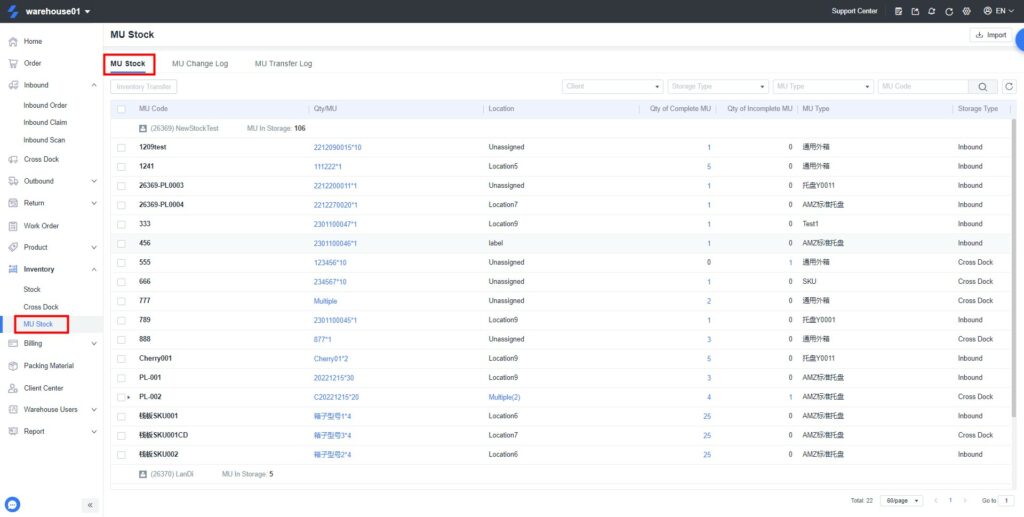
3. View MU inventory and MU change log
II. Inventory management
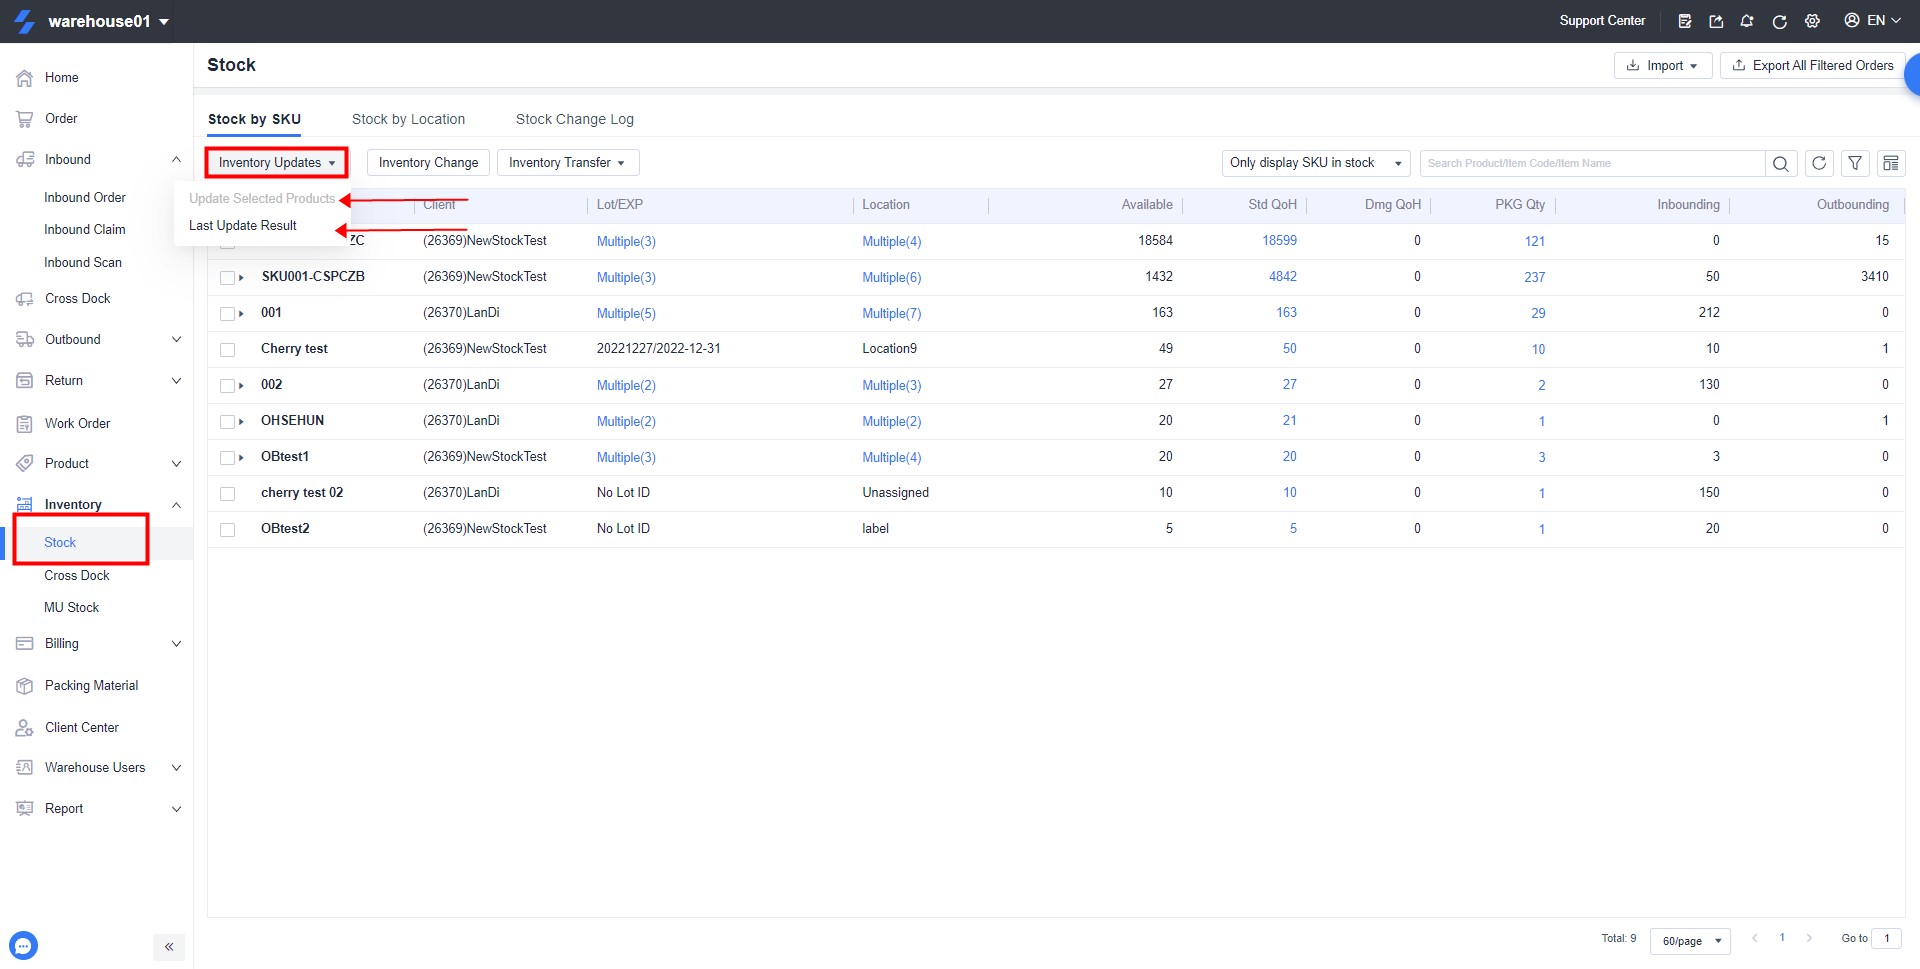
1. Inventory Synchronization
WMS inventory can be synchronized to Amazon, eBay, shopify, wayfair four store platforms
Steps: Select SKU>Inventory Synchronization>Update selected products (the inventory data will be synchronized to the store according to the latest data)
Select SKU>Inventory Synchronization>Last update result (you can download the inventory data table last updated to the store)
2. Inventory adjustment
Inventory adjustments generally apply to:
The actual inventory after inventory is inconsistent with the system inventory;
The inventory data that existed in the warehouse before using the system needs to be added manually;
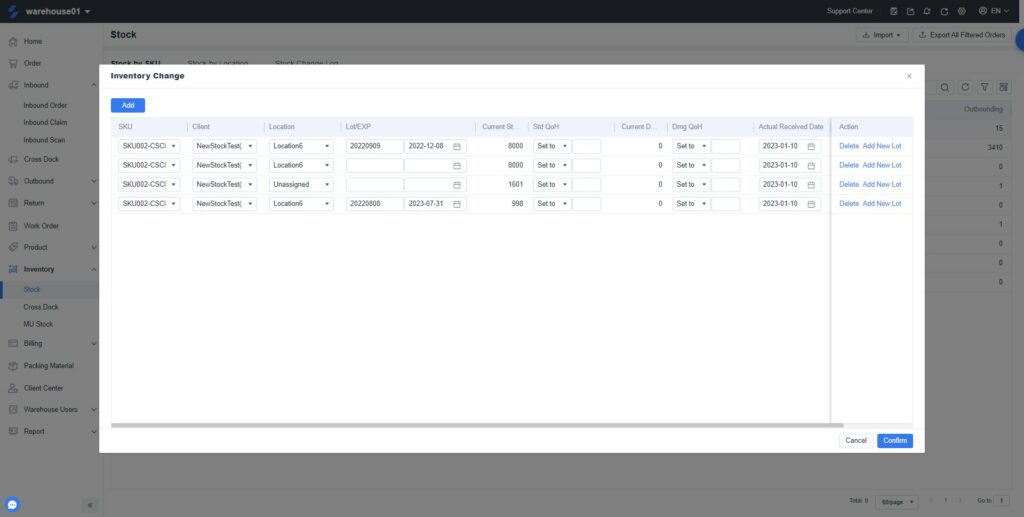
Product Inventory Adjustment Step 1: Inventory > Product Inventory > Check the SKU that needs to adjust inventory > Inventory Adjustment.
Step 2: Add > Select SKU and fill in the warehouse location and inventory quantity to be adjusted > Confirm > OK, I got it.
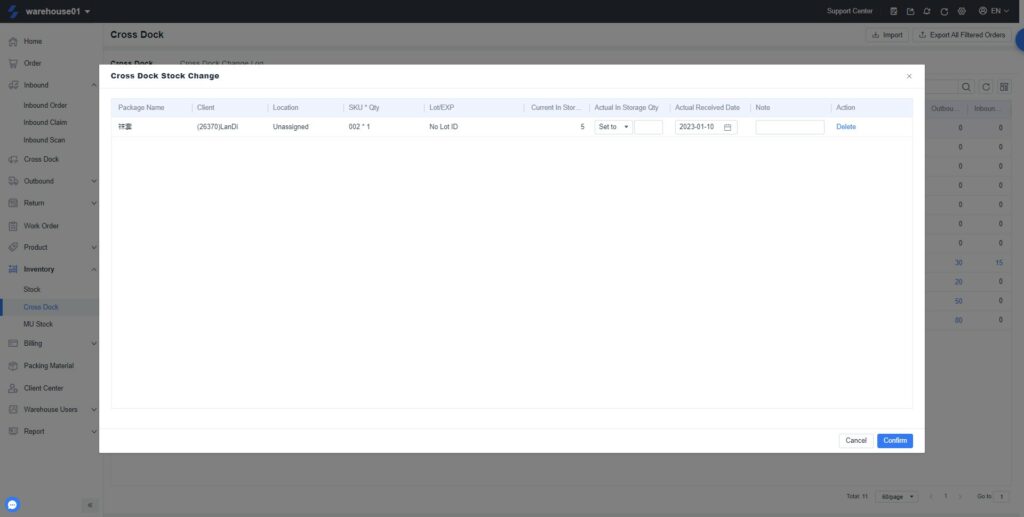
Cross Dock inventory adjustment
Step 1: Inventory > Transshipment inventory > tick the box type number that needs to adjust inventory > inventory adjustment.
Step 2: Select the case type number and fill in the stock quantity to be adjusted > Confirm > OK, I got it.
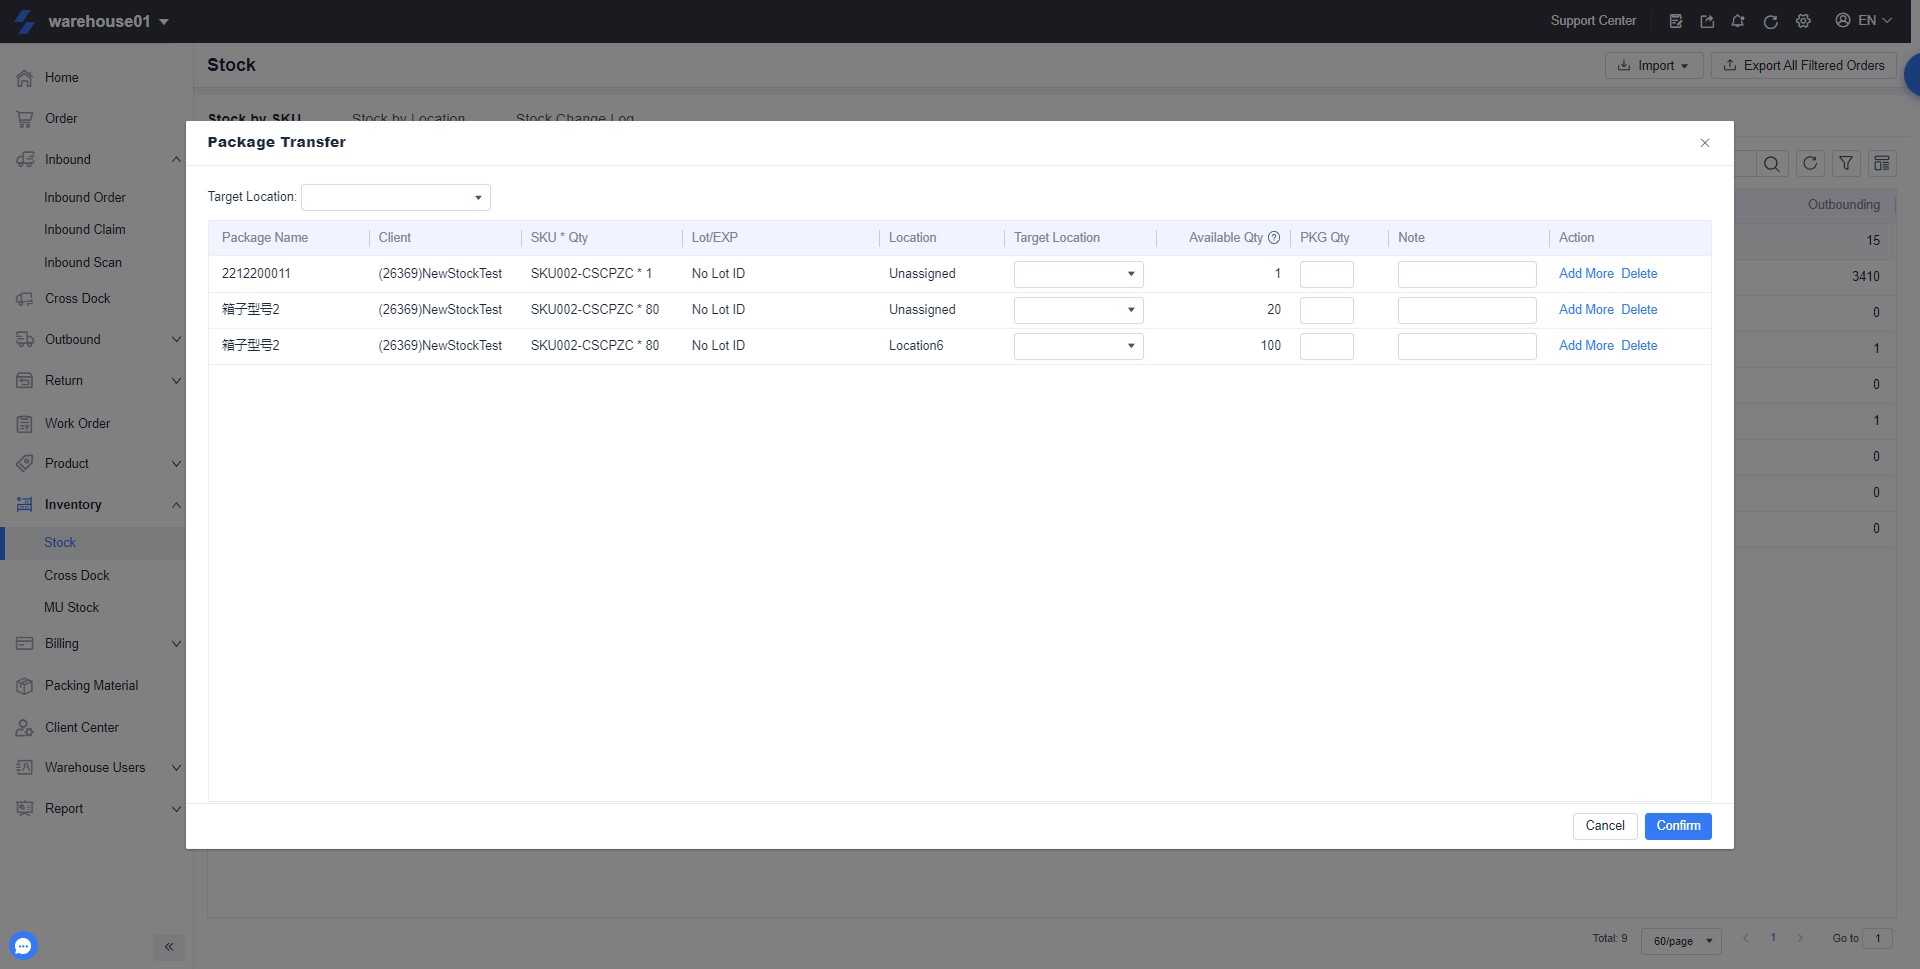
3. Move library
Transfer SKUs from one location to another.
Product Transfer
Steps: Inventory > Product Inventory > Check the SKU/box that needs to be transferred > Transfer > Select the target location to fill in the transfer quantity > Confirm > Confirm the transfer quantity again > OK, I understand.
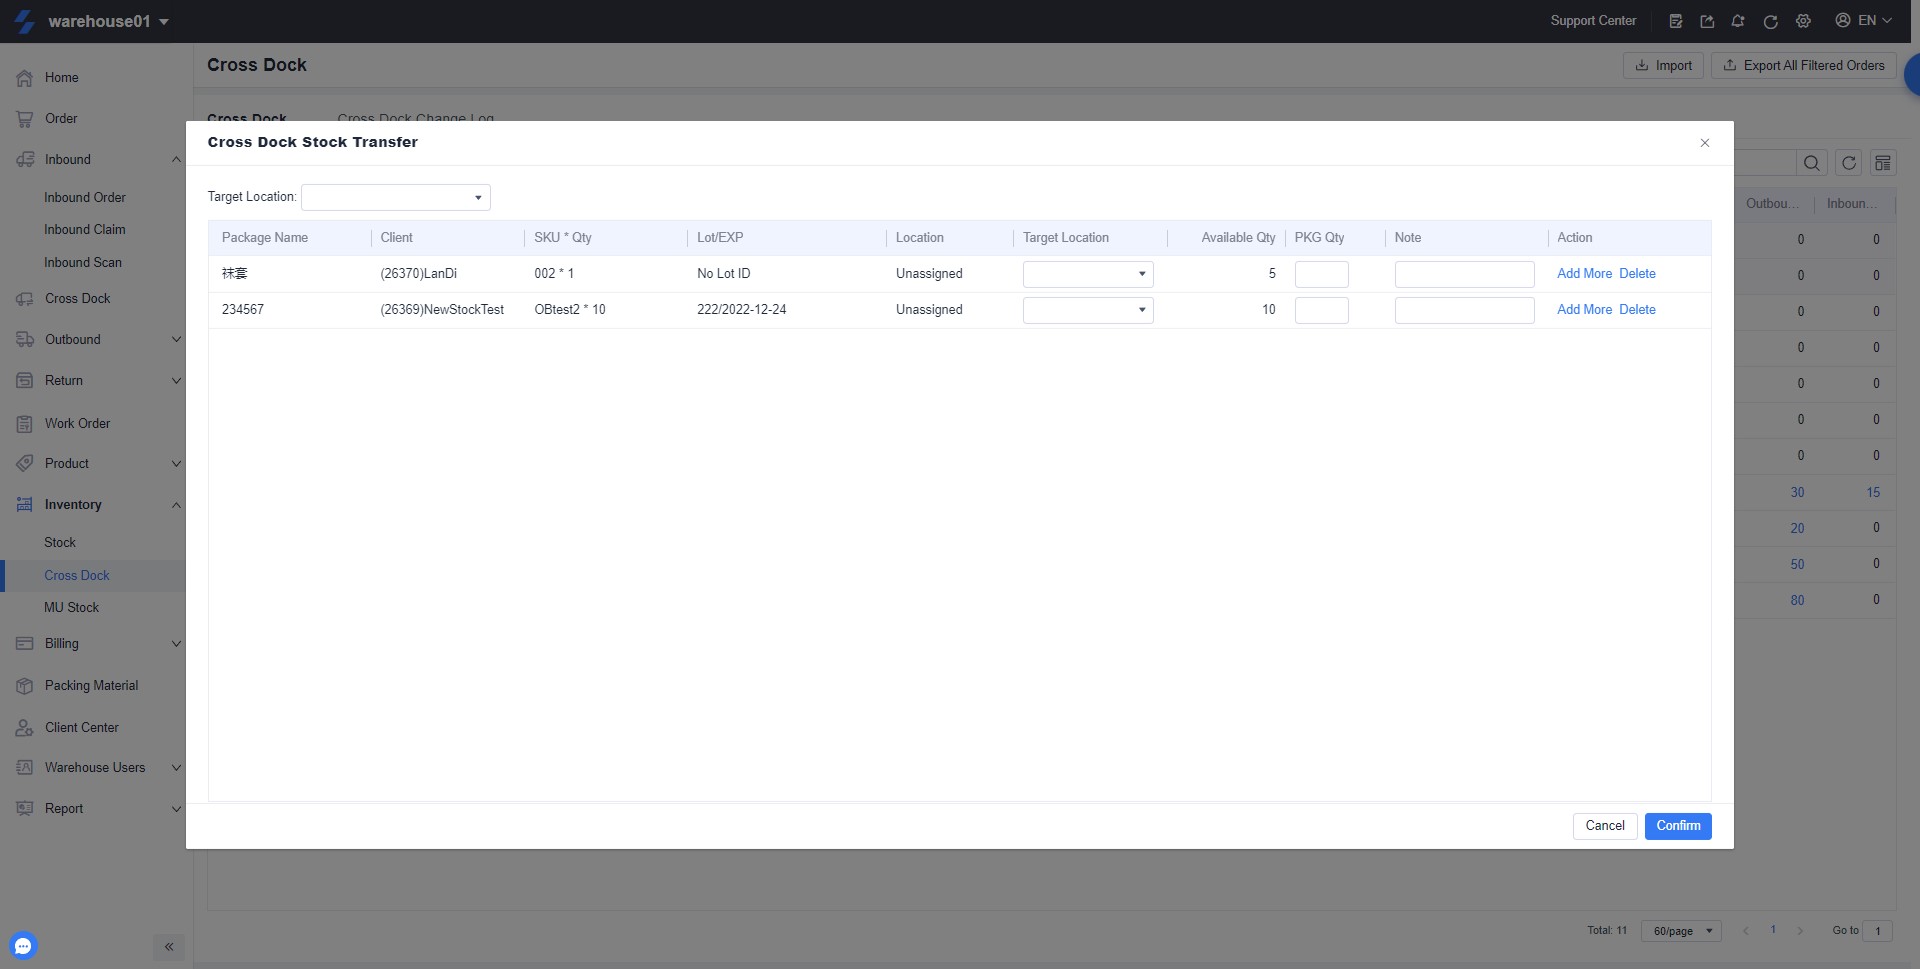
Cross Dock inventory transfer
steps: Inventory > Transshipment Inventory > Check the box type name that needs to be transferred > Transfer > Select the target location and fill in the transfer quantity > Confirm > Confirm the transfe
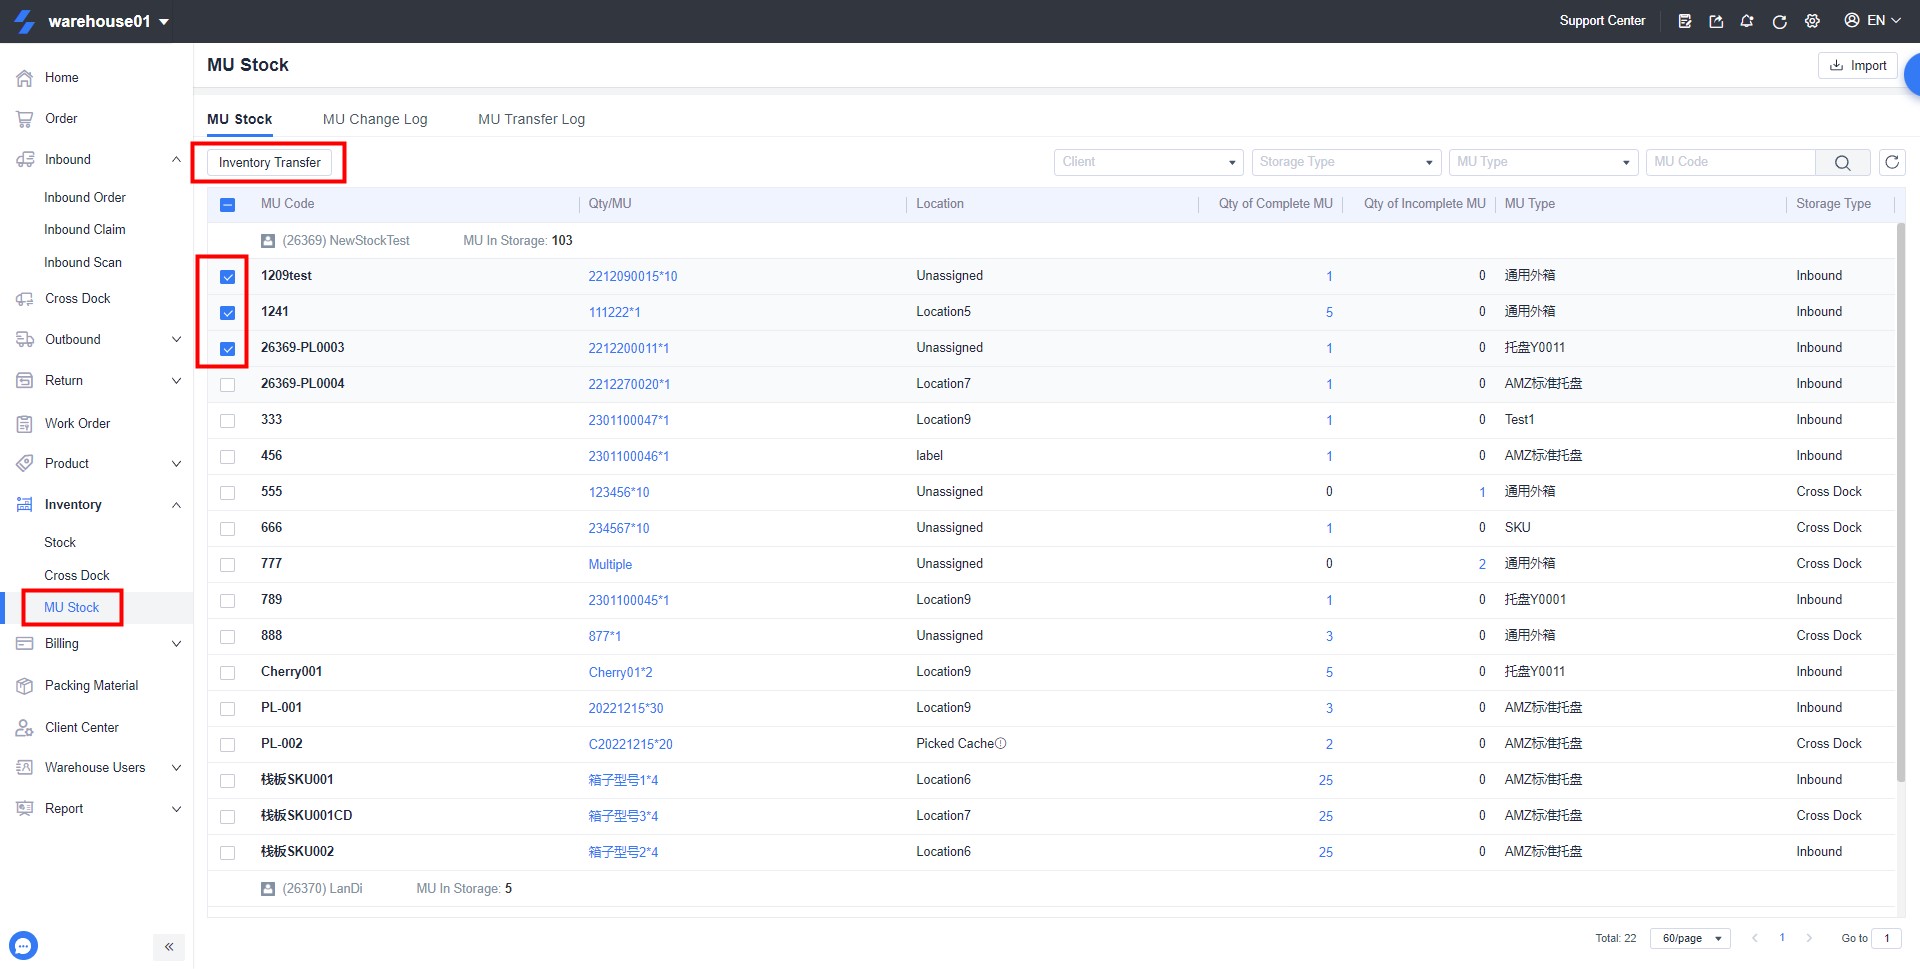
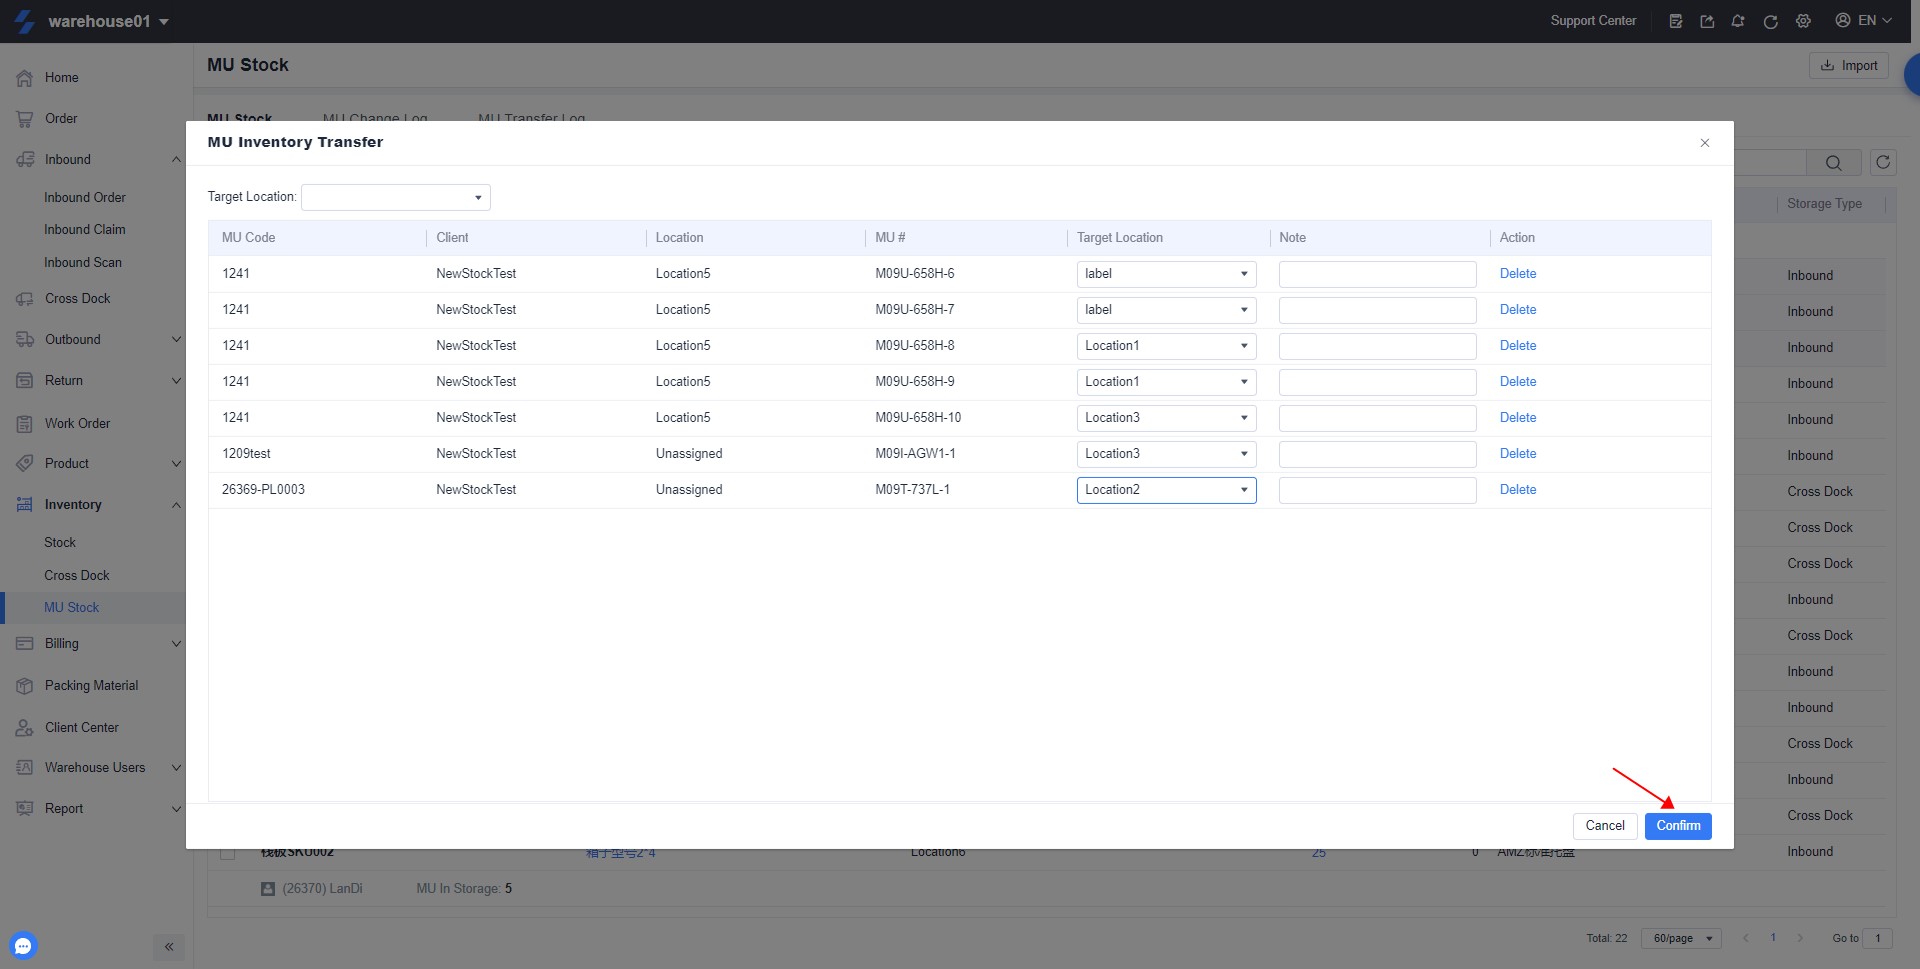
MU Transfer
steps: inventory > MU inventory > check the MU code that needs to be transferred > transfer > select the target location > confirm
4. Import and export inventory
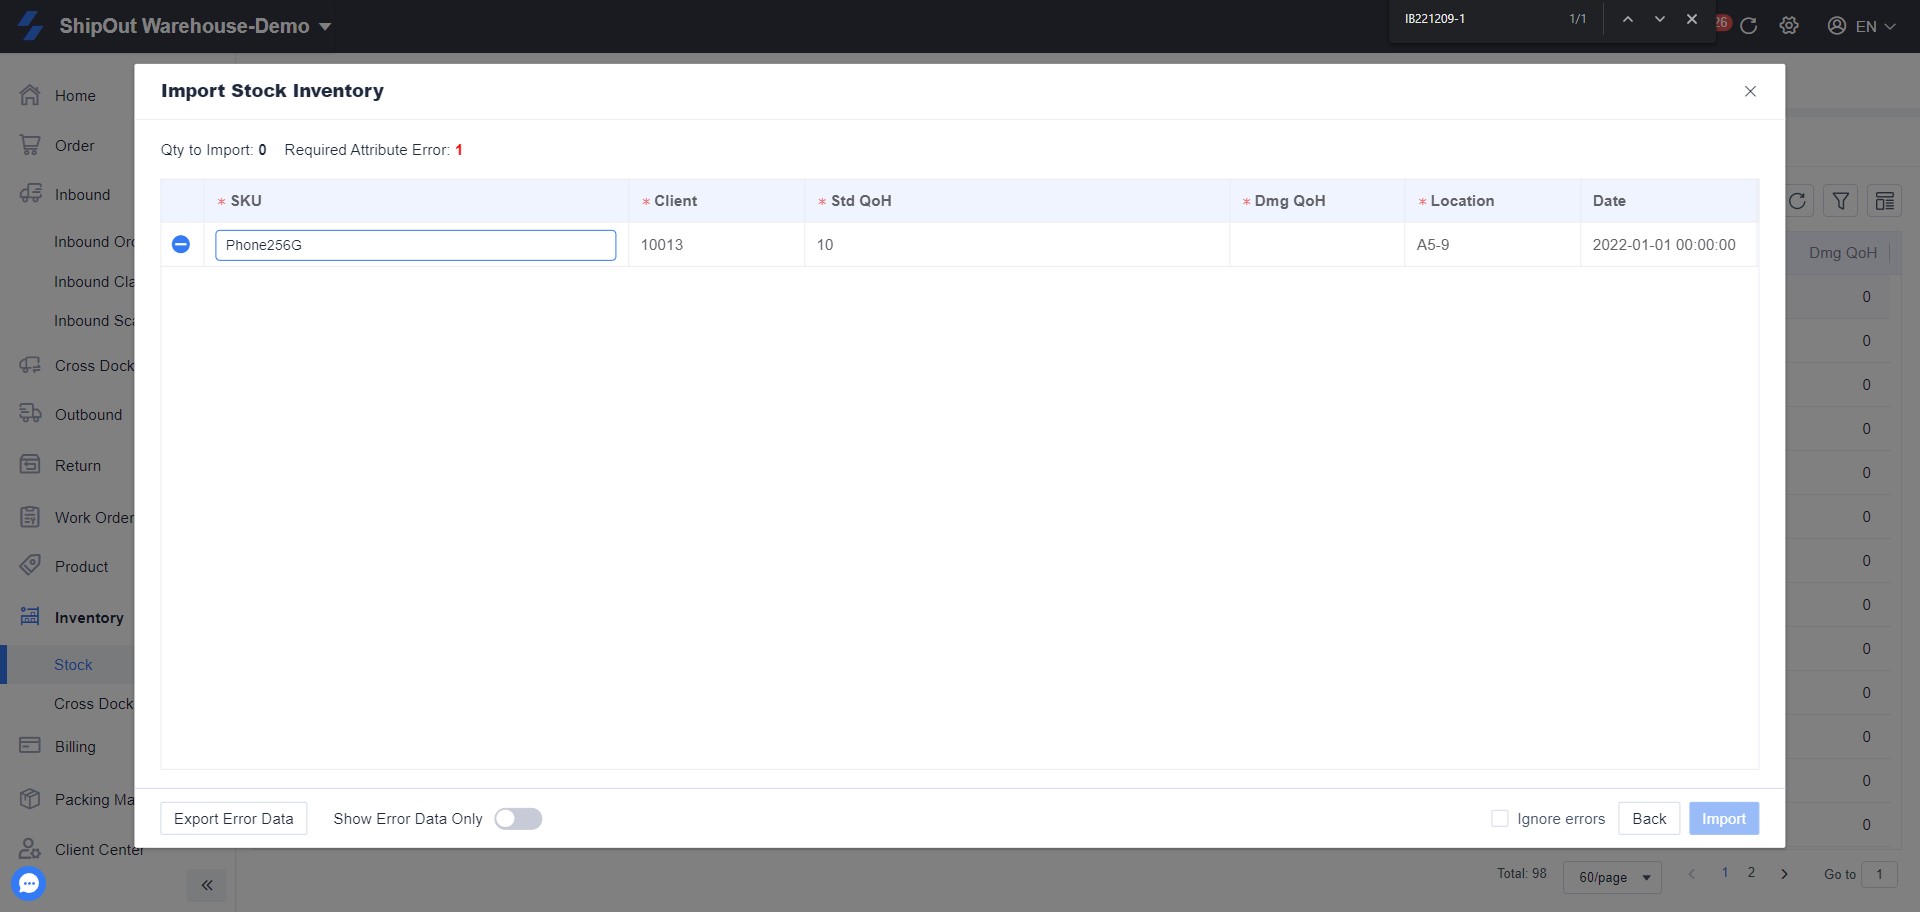
Note:
When importing inventory, if the OMS SKU and the location of the two records are exactly the same, the system will only import the first successful record;
Upload (import): Instead of adding to the existing inventory, it will use the inventory in the table to overwrite the previous inventory of the system;
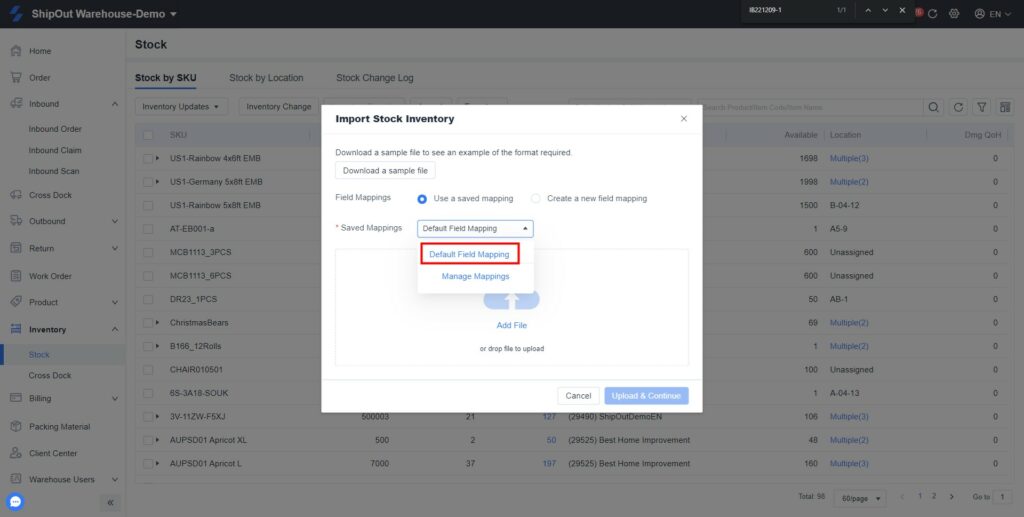
Batch import inventory:
Steps: Inventory > Stock > Import > Download System Template and fill it out > Select Upload
Export inventory in batches: You can search or filter the required inventory or export the inventory of all SKUs;